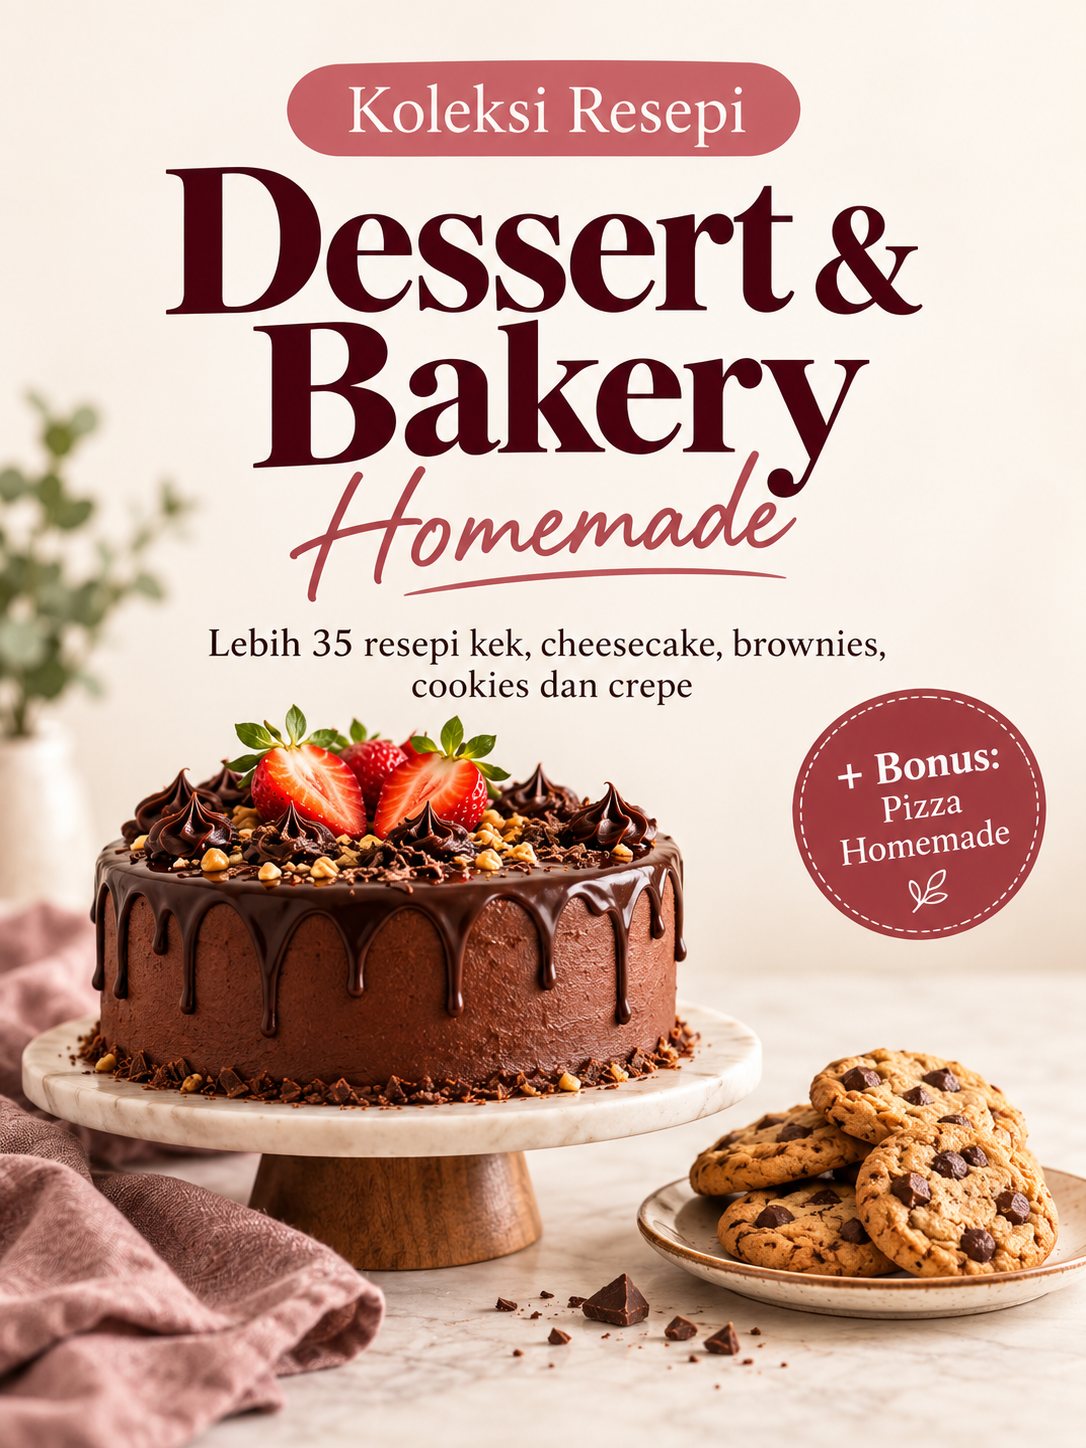
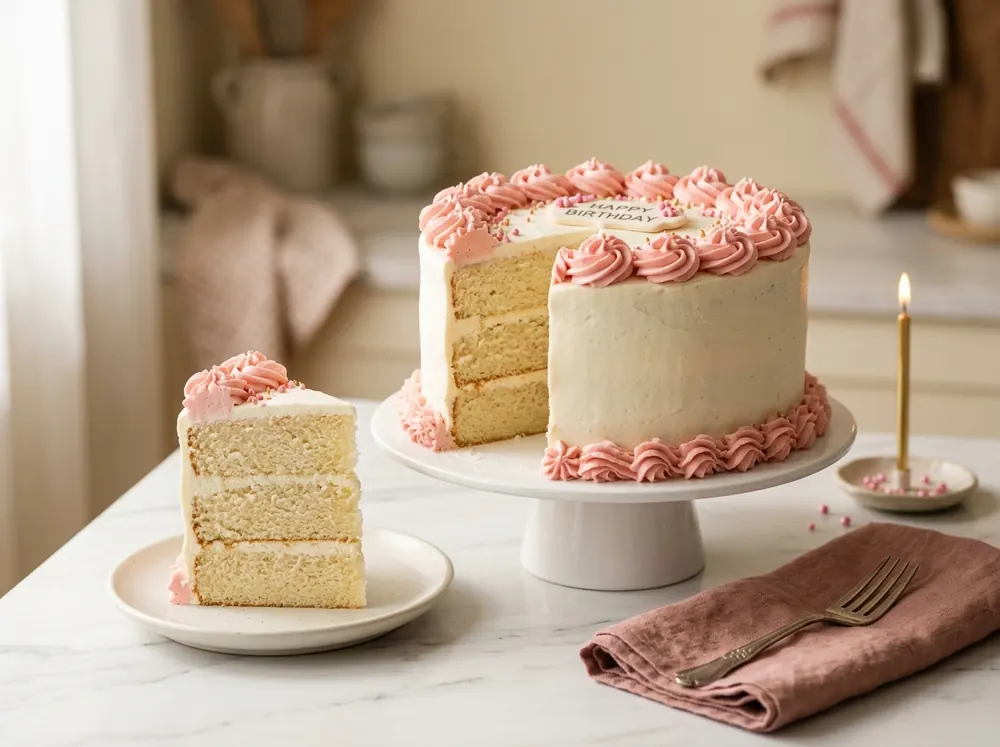
Lebih 35 resepi kek, cheesecake, brownies, cookies dan crepe untuk pemula, lengkap dengan sukatan gram dan cawan, suhu oven dan panduan jika resepi tidak menjadi. Bonus: pizza homemade.
Ebook ini disediakan khas untuk mereka yang baru bermula dalam dunia baking. Jika anda pernah membuat kek yang menjadi keras, mendap atau tidak naik, anda tidak keseorangan. Kebanyakan masalah ini boleh dielakkan dengan sukatan yang betul dan teknik yang tepat.
Di dalam ebook ini terdapat lebih 35 resepi dessert dan bakery, merangkumi kek, cheesecake, brownies, cookies dan crepe, serta bab bonus pizza homemade. Setiap resepi disertakan sukatan dalam gram dan cawan, suhu dan masa bakar, serta panduan untuk mengelakkan kesilapan biasa.
Cara Menggunakan Ebook Ini
Baca Bab 1 terlebih dahulu. Kebanyakan kek tidak menjadi kerana sukatan yang salah, bukan kerana resepinya.
Baca resepi hingga habis sebelum mula, dan sediakan semua bahan di atas meja.
Mulakan dengan resepi bertahap Mudah sebelum mencuba resepi Sederhana dan Mencabar.
Rujuk Bab 8 untuk frosting dan filling yang boleh dipadankan dengan pelbagai jenis kek.
Selamat mencuba.
Arkib Digital
Bab 1
Asas Baking untuk Pemula
Sebelum mula membakar, luangkan sedikit masa untuk membaca bab ini. Maklumat di sini akan digunakan dalam semua resepi seterusnya.
1.1 Kenapa Sukatan Tepat Sangat Penting
Semasa memasak lauk, kita boleh menambah garam atau gula sambil merasa. Baking tidak begitu. Setiap bahan mempunyai fungsi tersendiri: tepung membentuk kek, telur mengikat bahan, gula memberi kelembapan dan baking powder menaikkan kek. Jika satu bahan terlebih atau terkurang, hasilnya hanya dapat dilihat selepas kek dikeluarkan dari oven. Pada ketika itu, nasi sudah menjadi bubur.
Punca utama kek tidak menjadi biasanya bukan resepi yang salah, tetapi sukatan yang tidak tepat.
1.2 Alatan Asas
Alatan wajib:
Alatan
Kegunaan
Penimbang digital
Alat paling penting. Lebih tepat berbanding cawan.
Cawan penyukat bahan kering (set ¼, ⅓, ½, 1)
Tepung, gula, serbuk koko
Jag penyukat bahan cecair (lutsinar)
Susu, air, minyak
Sudu penyukat
Baking powder, garam, esen
Mixer (tangan atau berdiri)
Memukul butter, telur dan krim
Spatula getah
Mengaup adunan dan mengikis mangkuk
Loyang 6, 7 dan 8 inci
Saiz yang paling kerap digunakan dalam ebook ini
Baking paper
Alas loyang supaya kek tidak melekat
Alatan tambahan yang berguna: termometer oven, penapis tepung, piping bag dan nozzle, turntable dan cooling rack (rak dawai).
1.3 Cara Menyukat Dengan Betul
Bahan kering (tepung, gula, serbuk koko)
Gunakan sudu untuk memasukkan bahan ke dalam cawan penyukat. Jangan cedok terus menggunakan cawan.
Ratakan bahagian atas dengan belakang pisau.
Jangan ketuk, goncang atau tekan cawan.
Gula perang perlu dimampatkan ke dalam cawan. Untuk memastikan sukatan betul, terbalikkan cawan di atas pinggan. Jika gula kekal berbentuk cawan, sukatan anda tepat.
Bahan cecair (susu, air, minyak)
Letakkan jag di atas permukaan yang rata. Jangan pegang jag semasa menyukat.
Tuang cecair perlahan-lahan.
Tunduk sehingga paras mata sama dengan paras cecair. Pastikan bahagian bawah permukaan cecair berada tepat pada garisan sukatan.
Bahan melekit (madu, sirap): sapu sedikit minyak di dalam cawan terlebih dahulu supaya semua bahan mudah keluar.
Empat kesilapan menyukat yang paling biasa:
Memampatkan tepung di dalam cawan. Sukatan boleh terlebih sehingga 25%.
Membiarkan bahan menimbun melebihi paras cawan.
Menggoncang cawan untuk menurunkan paras tepung.
Menyukat 1 cawan menggunakan cawan ½ sebanyak dua kali. Gunakan cawan yang betul saiznya.
1.4 Jadual Penukaran Cawan kepada Gram
Bahan
¼ cawan
⅓ cawan
½ cawan
⅔ cawan
¾ cawan
1 cawan
Butter
57 g
76 g
113 g
151 g
170 g
227 g
Tepung gandum
31 g
42 g
63 g
83 g
94 g
125 g
Tepung roti (high protein)
34 g
45 g
68 g
91 g
102 g
136 g
Serbuk koko
21 g
28 g
43 g
57 g
64 g
85 g
Gula aising
30 g
40 g
60 g
80 g
90 g
120 g
Gula pasir / gula kastor
50 g
67 g
100 g
134 g
150 g
200 g
Gula perang (dimampatkan)
55 g
73 g
110 g
147 g
165 g
220 g
Singkatan dan sukatan sudu: sdb = sudu besar, sdk = sudu kecil. 1 sdb = 3 sdk = 15 ml. 1 cawan cecair = lebih kurang 240 ml.
1.5 Saiz Telur Mengikut Gred
Kebanyakan resepi baking menggunakan telur gred A. Jika anda menggunakan gred lain, timbang telur tanpa kulit supaya jumlahnya sama.
Gred
Berat sebiji (bersama kulit)
AA
70 g dan ke atas
A
65 hingga 69.9 g
B
60 hingga 64.9 g
C
55 hingga 59.9 g
1.6 Kenali Bahan dan Fungsinya
Bahan
Fungsi
Tepung gandum
Membentuk kek
Tepung naik sendiri (self-raising)
Tepung yang sudah dicampur bahan penaik
Baking powder dan baking soda
Menaikkan kek. Jangan tertukar, kerana baking soda lebih kuat.
Telur
Mengikat bahan, membantu kek naik dan memberi warna
Butter
Memberi rasa, kelembutan dan aroma
Minyak
Menjadikan kek lebih lembap dan tahan lebih lama
Gula
Memberi rasa manis, kelembapan dan warna perang
Cream cheese
Bahan utama cheesecake dan frosting
Dairy whipping cream
Krim tenusu. Rasa lebih sedap tetapi kurang stabil.
Non-dairy whipping cream
Lebih stabil dan tahan cuaca panas, tetapi rasanya lebih manis
Penting: keluarkan butter, telur dan cream cheese dari peti sejuk 30 hingga 60 minit lebih awal supaya mencapai suhu bilik. Bahan yang sejuk sukar sebati dan boleh menyebabkan adunan berketul.
1.7 Bahan Pengganti
Jika tiada
Gantikan dengan
Buttermilk (½ cawan)
½ cawan susu segar + 1 sdb cuka atau jus lemon. Biarkan 10 minit sebelum digunakan.
Kisar gula pasir bersama 1 sdk tepung jagung sehingga menjadi serbuk
1.8 Kenali Oven Anda
Setiap oven berbeza walaupun daripada jenama yang sama. Berikut ialah panduan asas:
Panaskan oven terlebih dahulu selama 10 hingga 15 minit sebelum memasukkan adunan.
Api atas bawah ialah tetapan yang digunakan untuk kebanyakan resepi dalam ebook ini.
Letakkan loyang di rak tengah supaya haba sekata.
Jangan buka pintu oven dalam tempoh dua pertiga masa bakar yang pertama. Kek boleh mendap.
Ujian lidi: cucuk lidi di tengah kek. Jika lidi keluar bersih, kek sudah masak.
Termometer oven berharga sekitar RM15 hingga RM30 dan sangat membantu jika suhu sebenar oven anda tidak sama dengan tetapannya.
1.9 Istilah Baking
Istilah
Maksud
Sebati
Semua bahan bercampur rata tanpa ketulan
Kembang / berkrim
Butter dan gula dipukul sehingga pucat dan gebu
Kaup balik (fold)
Gaul perlahan-lahan dengan spatula dari bawah ke atas supaya udara dalam adunan tidak hilang
Soft peak
Krim atau putih telur membentuk puncak yang melentur di hujung
Stiff peak
Puncak berdiri tegak. Adunan tidak jatuh walaupun mangkuk diterbalikkan.
Double boil
Mencairkan bahan di dalam mangkuk yang diletakkan di atas periuk berisi air mendidih
Lenser
Menyapu loyang dengan butter atau minyak
Overbeat
Terlebih pukul. Krim boleh pecah dan kek menjadi keras.
Selang-seli
Memasukkan bahan kering dan bahan cecair secara bergilir-gilir
Bab 2
Kek Klasik
Bab ini mengandungi kek-kek asas yang sering dibuat di rumah dan mudah dijual. Kebanyakannya menggunakan kaedah memukul butter dan gula, jadi kuasai resepi pertama sebelum mencuba yang lain.
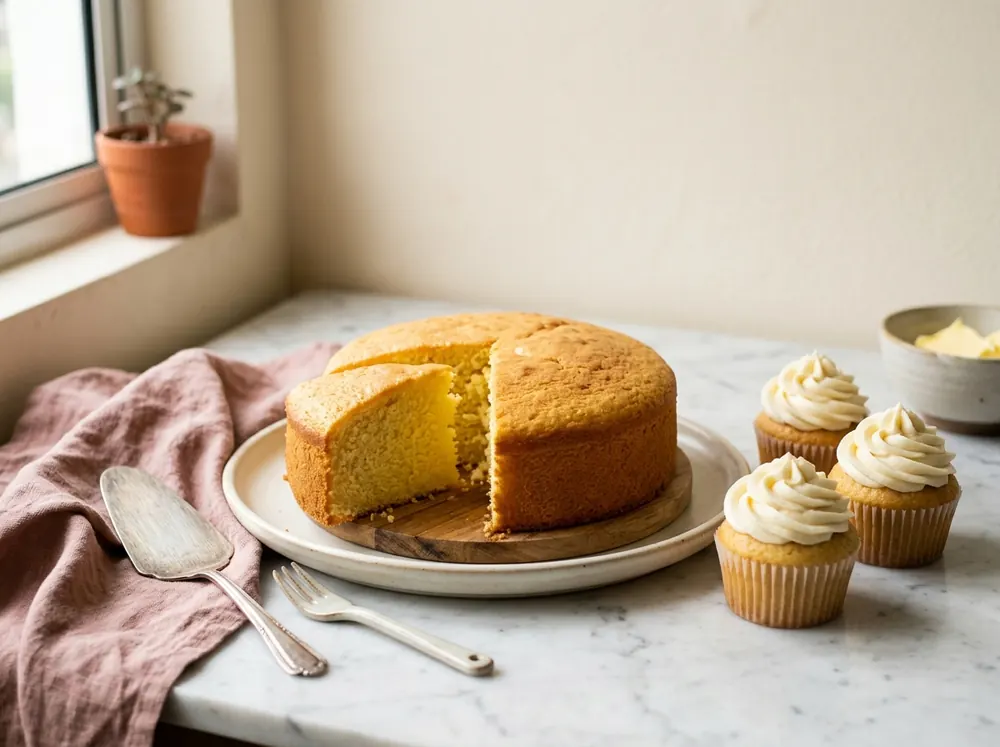
2.1 Butter Cake (+ Variasi Cupcake)
Kek asas yang wajib dikuasai oleh setiap baker. Adunan yang sama juga boleh digunakan untuk membuat cupcake.
Loyang
8 inci bulat
Suhu
160°C, api atas bawah
Masa
50–60 minit
Tahap
Mudah
Bahan
Cara Penyediaan
Panaskan oven pada suhu 160°C. Lenser loyang dan alas dengan baking paper.
Pukul butter dan gula sehingga kembang dan bertukar warna pucat, lebih kurang 5 hingga 7 minit.
Masukkan telur sebiji demi sebiji. Pastikan setiap biji dipukul sebati sebelum memasukkan telur seterusnya. Kemudian, masukkan esen vanilla.
Masukkan tepung dan susu secara selang-seli, bermula dan berakhir dengan tepung. Gunakan kelajuan rendah dan gaul sehingga sebati sahaja.
Tuang adunan ke dalam loyang dan ratakan.
Bakar selama 50 hingga 60 minit. Cucuk lidi di tengah kek. Jika lidi keluar bersih, kek sudah masak.
Biarkan kek di dalam loyang selama 10 minit, kemudian keluarkan dan sejukkan di atas cooling rack.
Variasi cupcake: Isi adunan separuh sahaja di dalam cawan kertas. Bakar pada suhu 170°C selama 18 hingga 22 minit. Resepi ini menghasilkan lebih kurang 24 biji cupcake. Hias dengan buttercream dari Bab 8.
Cara simpan: Di dalam bekas kedap udara pada suhu bilik, tahan 3 hingga 4 hari.
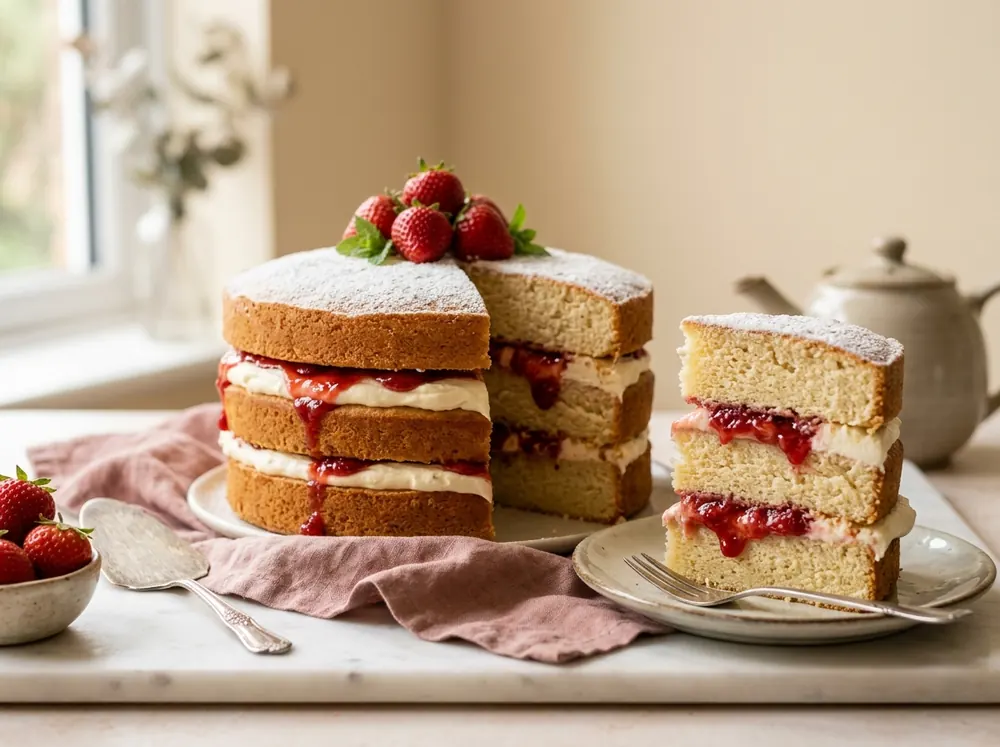
2.2 Victoria Sandwich Cake
Kek lapis gaya Inggeris yang diisi buttercream dan strawberry compote. Rupanya menarik, tetapi cara membuatnya tidak sukar.
Loyang
3 × 8 inci
Suhu
150°C, api atas bawah
Masa
30 minit
Tahap
Sederhana
Bahan
Cara Penyediaan
Panaskan oven pada suhu 150°C. Alas ketiga-tiga loyang dengan baking paper.
Pukul Bahan A sehingga sebati dan gula larut.
Masukkan Bahan B sedikit demi sedikit sambil dipukul supaya adunan tidak pecah.
Masukkan Bahan C dan gaul perlahan-lahan. Jangan overbeat.
Masukkan Bahan D dan gaul sehingga sebati sahaja.
Bahagikan adunan sama rata ke dalam tiga loyang. Timbang adunan supaya setiap lapisan sama tebal.
Bakar selama 30 minit. Sejukkan sepenuhnya.
Susun mengikut turutan ini: kek, buttercream, compote, kek, buttercream, compote, kek. Tabur gula aising di atasnya.
Cara simpan: Di dalam peti sejuk sehingga 3 hari. Keluarkan 20 minit sebelum dihidangkan.
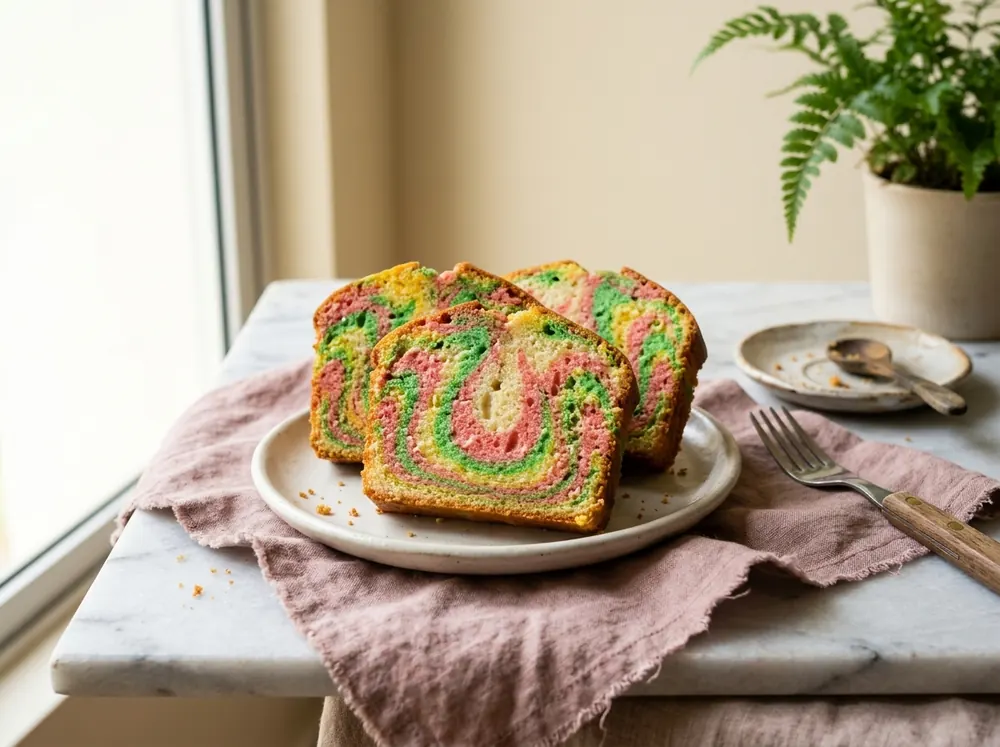
2.3 Marble Seksay Cake
Kek marble berwarna-warni yang menarik apabila dipotong. Sesuai untuk hari jadi dan untuk dijual.
Loyang
8 inci
Suhu
150°C, api atas bawah
Masa
40–45 minit
Tahap
Sederhana
Bahan
Cara Penyediaan
Panaskan oven pada suhu 150°C. Alas loyang dengan baking paper.
Pukul marjerin dan gula kastor sehingga kembang.
Masukkan telur satu per satu sehingga sebati.
Masukkan susu tepung, susu cair dan susu pekat perlahan-lahan.
Ayak tepung bersama baking powder. Masukkan ke dalam adunan dan gaul sehingga sebati sahaja.
Bahagikan adunan kepada tiga atau empat mangkuk. Biarkan satu mangkuk tanpa warna, dan warnakan yang lain.
Masukkan adunan secara berselang ke dalam loyang menggunakan sudu. Lorek sekali atau dua kali dengan lidi untuk corak marble. Jangan terlebih lorek kerana warna akan bercampur dan menjadi keruh.
Bakar selama 40 hingga 45 minit.
Cara simpan: Di dalam bekas kedap udara di tempat sejuk, tahan sehingga 5 hari.
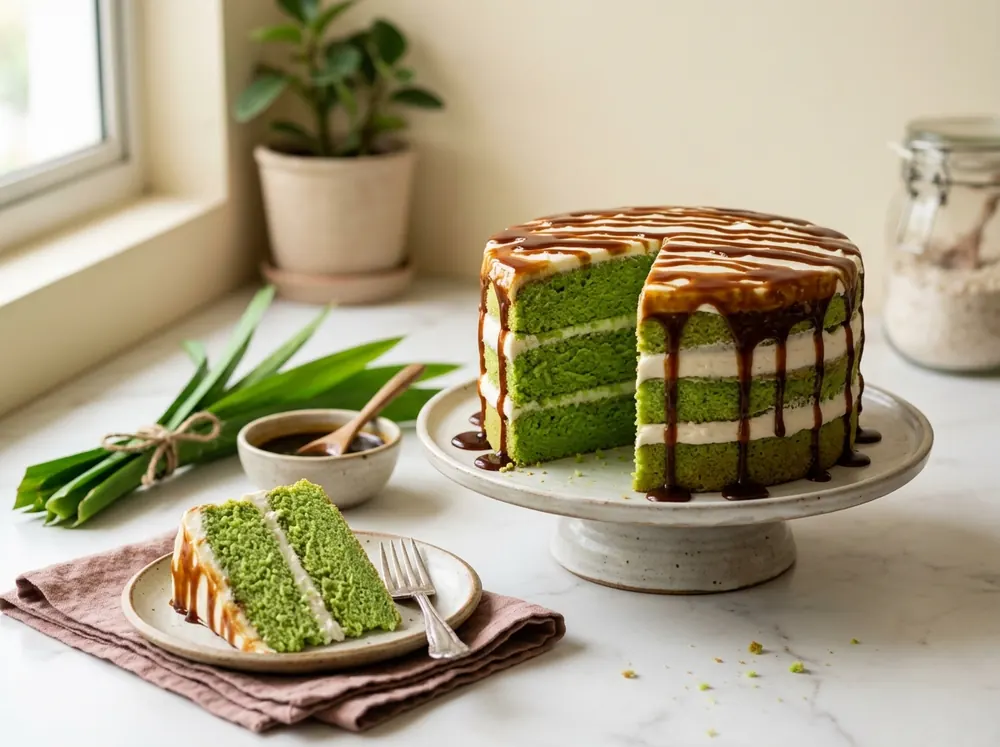
2.4 Pandan Gula Melaka Cake
Kek pandan yang wangi, dibasahkan dengan gula melaka dan dilapis krim santan.
Loyang
3 × 8 inci
Suhu
150°C, api atas bawah
Masa
20 minit
Tahap
Sederhana
Bahan Kek
Siraman Gula Melaka
Krim Topping
Cara Penyediaan
Kek: Pukul Bahan A sehingga kembang. Masukkan telur satu per satu, diikuti vanilla. Masukkan Bahan C dan Bahan D secara selang-seli sehingga sebati.
Bahagikan adunan ke dalam tiga loyang yang telah dialas. Bakar selama 20 minit, kemudian sejukkan.
Siraman gula melaka: Cairkan gula melaka bersama air dengan api perlahan. Masukkan whipping cream, kacau sebati dan sejukkan.
Krim: Pukul semua bahan krim topping sehingga kental.
Menyusun: Basahkan setiap lapisan kek (kecuali lapisan paling atas) dengan siraman gula melaka, kemudian sapu krim secara nipis. Ulang untuk lapisan seterusnya. Hias lapisan atas mengikut citarasa.
Cara simpan: Di dalam peti sejuk sehingga 3 hari.
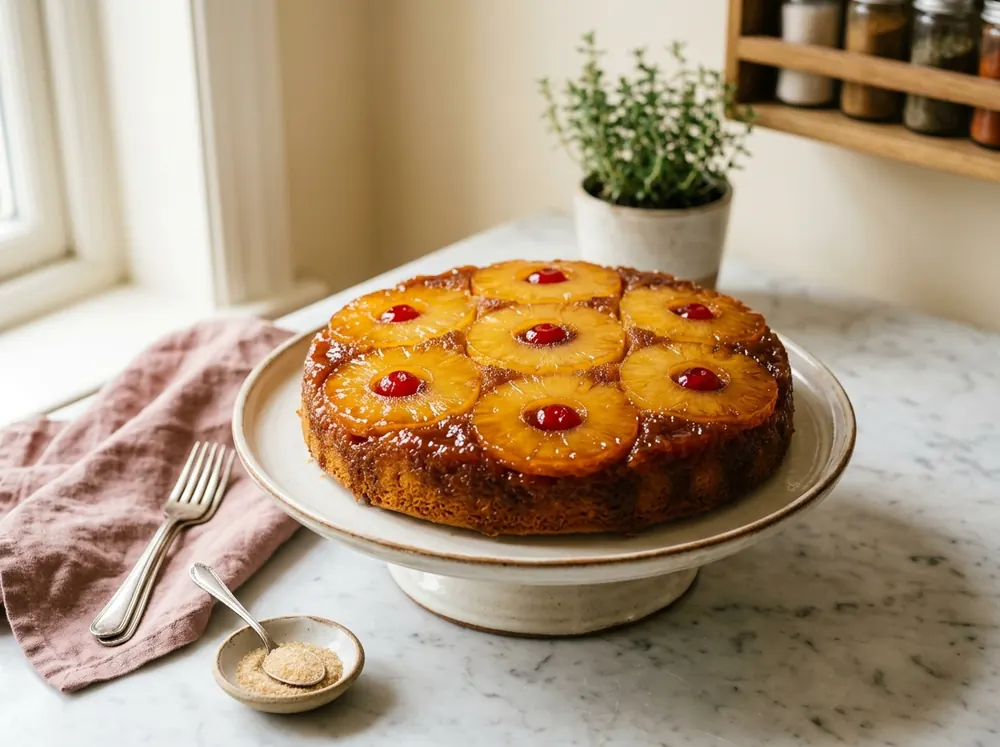
2.5 Pineapple Upside Down Cake
Kek butter dengan lapisan nenas berkaramel. Kek dibakar dalam keadaan terbalik, kemudian diterbalikkan semula selepas dibakar.
Loyang
9 inci (bukan jenis tapak boleh tanggal)
Suhu
160°C, api atas bawah
Masa
45–55 minit
Tahap
Sederhana
Lapisan Karamel Nenas
Adunan Kek
Cara Penyediaan
Panaskan oven pada suhu 160°C.
Karamel: Cairkan butter dan gula perang dengan api perlahan sehingga menjadi karamel. Tuang ke dalam loyang dan ratakan.
Susun nenas di atas karamel. Letakkan ceri di tengah setiap bulatan nenas.
Kek: Pukul butter dan gula sehingga kembang. Masukkan telur satu per satu. Masukkan jus nenas, buttermilk dan tepung secara selang-seli.
Tuang adunan perlahan-lahan di atas nenas dan ratakan.
Bakar selama 45 hingga 55 minit sehingga lidi keluar bersih.
Biarkan 5 hingga 10 minit sahaja, kemudian terbalikkan kek ke atas pinggan.
Cara simpan: Di dalam peti sejuk sehingga 3 hari. Panaskan sedikit sebelum dihidangkan.
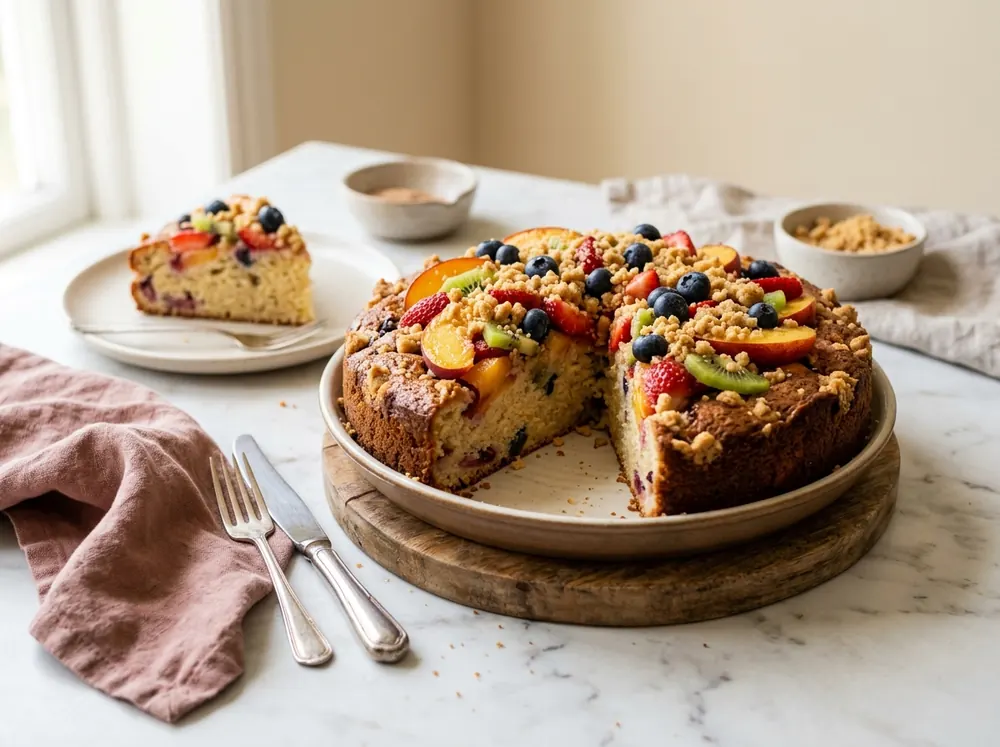
2.6 Fruit Pastry Cake
Kek yogurt yang lembap, dihias buah-buahan segar dan crumble rangup di atasnya.
Loyang
8 inci (tebal) atau 9 inci (nipis)
Suhu
150–160°C, api atas bawah
Masa
40 minit
Tahap
Mudah
Bahan Kek
Crumble
Cara Penyediaan
Panaskan oven pada suhu 150 hingga 160°C. Alas loyang dengan baking paper.
Crumble: Gaul semua bahan crumble dengan hujung jari sehingga berderai seperti pasir kasar. Simpan di dalam peti sejuk semasa menyediakan kek.
Kek: Pukul butter dan gula sehingga berkrim. Masukkan telur, vanilla dan parutan kulit lemon. Adunan mungkin kelihatan sedikit berketul, dan ini perkara biasa.
Ayak tepung bersama baking powder. Masukkan tepung dan yogurt secara selang-seli sehingga sebati.
Tuang adunan ke dalam loyang. Susun buah-buahan di atasnya, kemudian taburkan crumble.
Bakar selama 40 minit sehingga masak.
Cara simpan: Di dalam peti sejuk sehingga 3 hari.
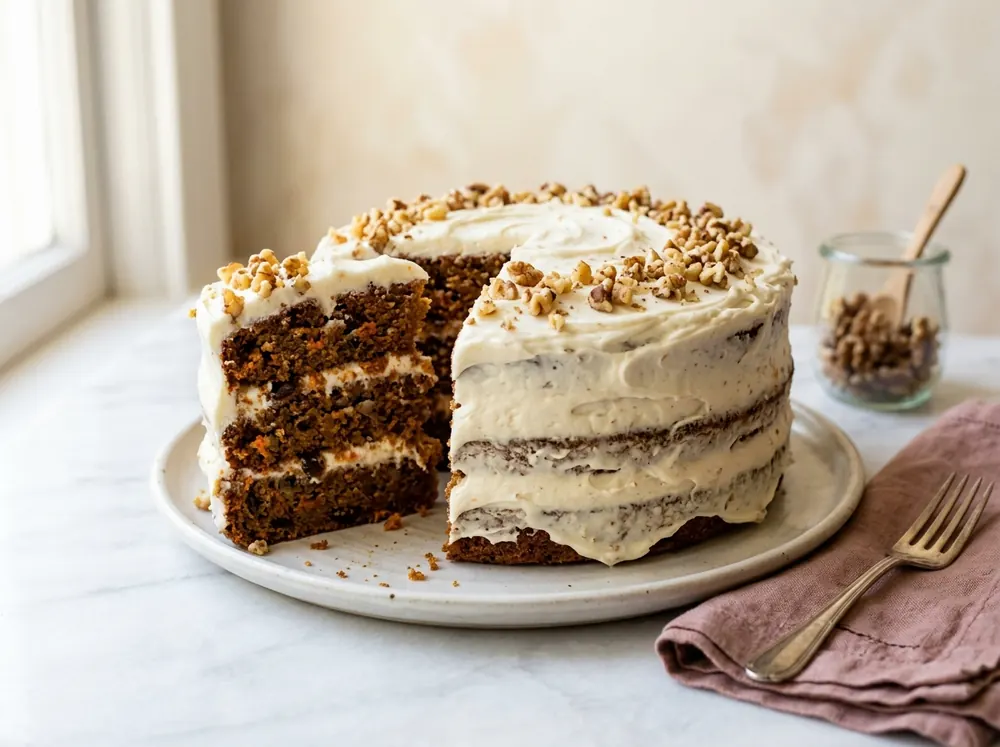
2.7 Carrot Cake
Kek lobak merah yang lembap dengan walnut dan nenas, dilapis cream cheese frosting.
Loyang
3 × 8 inci atau 2 × 9 inci
Suhu
170°C, api atas bawah
Masa
30–35 minit
Tahap
Sederhana
Bahan Kek
Cream Cheese Frosting
Cara Penyediaan
Panaskan oven pada suhu 170°C. Alas loyang dengan baking paper.
Gaul tepung, baking soda, baking powder dan garam di dalam satu mangkuk.
Di dalam mangkuk lain, pukul minyak, telur, gula dan vanilla sehingga sebati dan sedikit pucat.
Masukkan campuran tepung dan kacau sehingga sebati sahaja. Masukkan lobak merah, nenas dan walnut.
Bahagikan adunan ke dalam loyang dan bakar selama 30 hingga 35 minit sehingga lidi keluar bersih.
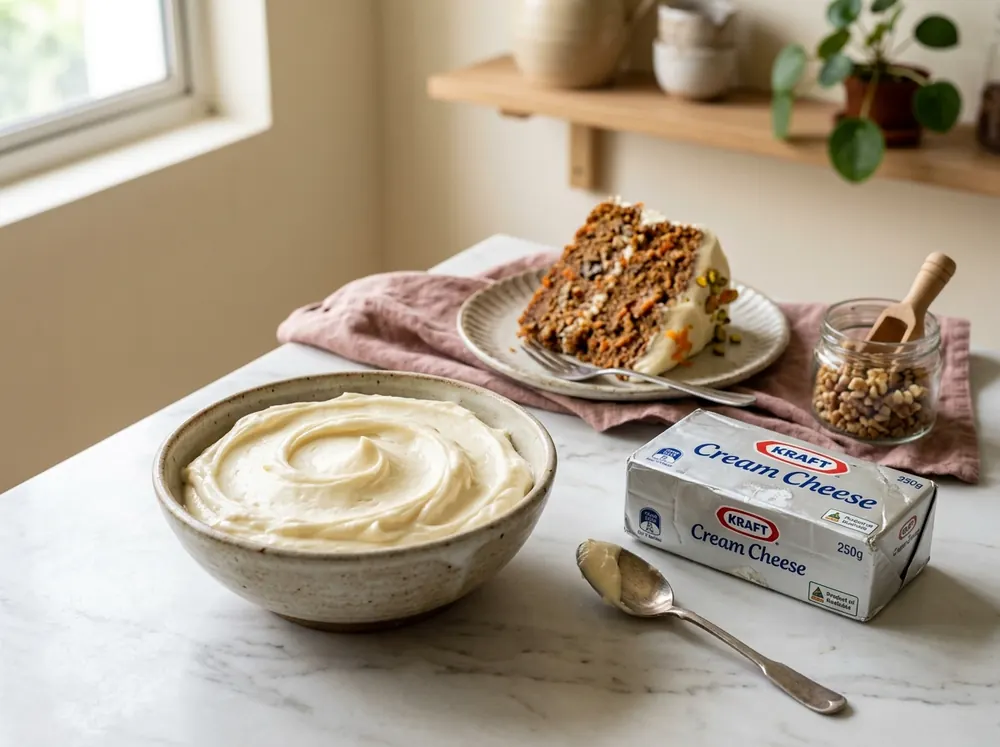
Frosting: Pukul cream cheese dan gula aising sehingga berkrim. Masukkan butter dan pukul lagi. Akhir sekali, masukkan whipping cream.
Pastikan kek benar-benar sejuk, kemudian lapiskan dengan frosting.
Cara simpan: Di dalam peti sejuk sehingga 4 hari.
2.8 Sponge Cake (Premix)
Kek span yang gebu dan ringan menggunakan tepung premix. Sesuai untuk pemula yang mahukan hasil yang konsisten, dan boleh dijadikan asas kek hari jadi.
Loyang
8 inci
Suhu
170°C, api atas bawah
Masa
25–30 minit
Tahap
Mudah
Bahan Kek
Buttercream Hiasan
Cara Penyediaan
Panaskan oven pada suhu 170°C. Alas bahagian bawah loyang sahaja. Jangan lenser dinding loyang.
Masukkan premix, telur dan susu ke dalam mangkuk. Pukul pada kelajuan tinggi sehingga benar-benar kembang, pucat dan pekat, lebih kurang 8 hingga 10 minit.
Masukkan minyak sedikit demi sedikit dan kaup balik perlahan-lahan dengan spatula sehingga sebati. Pastikan tiada minyak bertakung di dasar mangkuk.
Tuang ke dalam loyang dan hentak perlahan untuk membuang gelembung udara yang besar.
Bakar selama 25 hingga 30 minit.
Buttercream: Pukul semua bahan sehingga kembang dan gebu. Sapu pada kek yang telah sejuk.
Cara simpan: Di dalam bekas kedap udara selama 2 hingga 3 hari. Jika sudah dihias dengan krim, simpan di dalam peti sejuk.
Bab 3
Kek Coklat
Dua resepi kek coklat dalam bab ini: satu kek coklat klasik berlapis cream cheese, dan satu lagi kek tiga lapis dengan mousse dan ganache.
3.1 Devil's Food Chocolate Cake
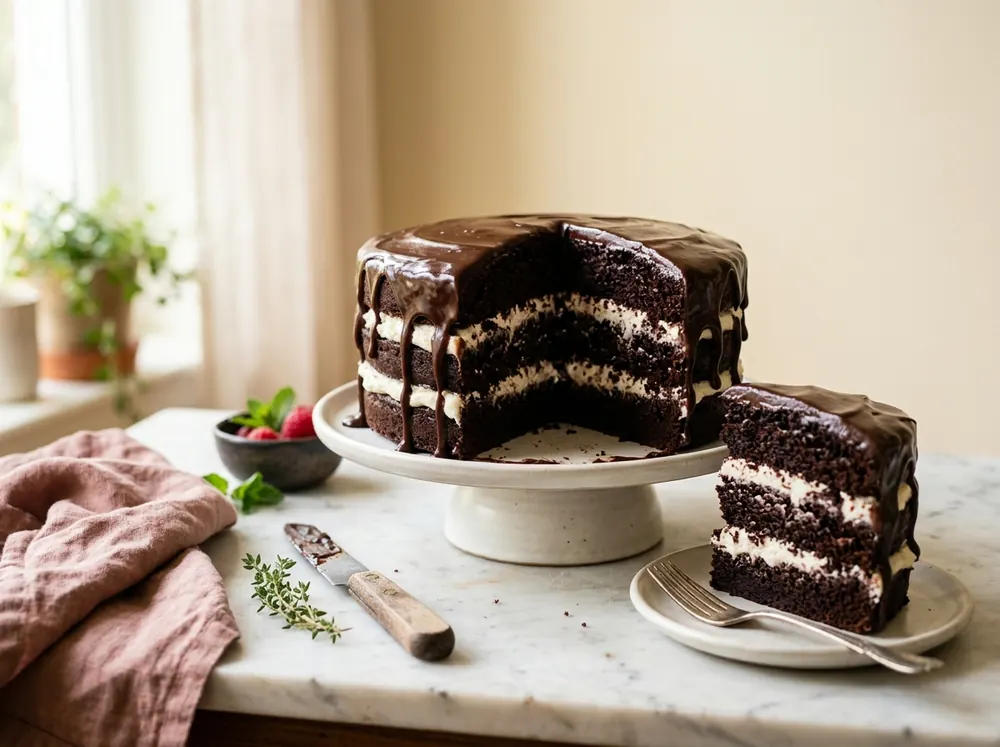
Kek coklat yang gelap, lembap dan kaya rasa, dilapis cream cheese dan disalut coklat berkilat. Antara kek coklat yang paling laris untuk dijual.
Loyang
3 × 8 inci
Suhu
150°C, api atas bawah
Masa
25–30 minit
Tahap
Sederhana
Bahan Kek
Filling Cream Cheese
Topping Coklat (Ganache)
Cara Penyediaan Kek
Panaskan oven pada suhu 150°C. Alas ketiga-tiga loyang dengan baking paper.
Ayak tepung, serbuk koko, baking powder dan baking soda bersama.
Pukul minyak dan gula sehingga sebati. Masukkan telur dan kacau sebati.
Masukkan buttermilk dan vanilla secara selang-seli dengan campuran tepung, dan kacau sebati.
Masukkan air panas dan kacau sebati. Adunan akan menjadi sangat cair, dan ini perkara biasa untuk kek ini.
Bahagikan adunan sama rata ke dalam tiga loyang. Bakar selama 25 hingga 30 minit sehingga lidi keluar bersih. Sejukkan sepenuhnya.
Cara Penyediaan Filling
Pukul gula aising dan cream cheese sehingga berkrim.
Masukkan butter dan pukul sehingga sebati.
Masukkan vanilla dan whipping cream, kemudian pukul sekejap sehingga sebati sahaja.
Cara Penyediaan Ganache
Panaskan whipping cream dengan api perlahan sehingga mula berwap. Jangan biarkan mendidih.
Matikan api, masukkan coklat dan biarkan selama 1 minit. Kacau sehingga licin dan berkilat.
Masukkan ke dalam peti sejuk seketika sehingga ganache mencapai kepekatan yang dikehendaki. Semakin lama disejukkan, semakin pekat ganache.
Cara Menyusun
Susun mengikut turutan ini: kek, cream cheese, kek, cream cheese, kek, ganache. Biarkan ganache mengalir di tepi kek untuk kesan drip.
Cara simpan: Di dalam peti sejuk sehingga 4 hari. Keluarkan 20 hingga 30 minit sebelum dihidangkan supaya tekstur kek lebih lembut.
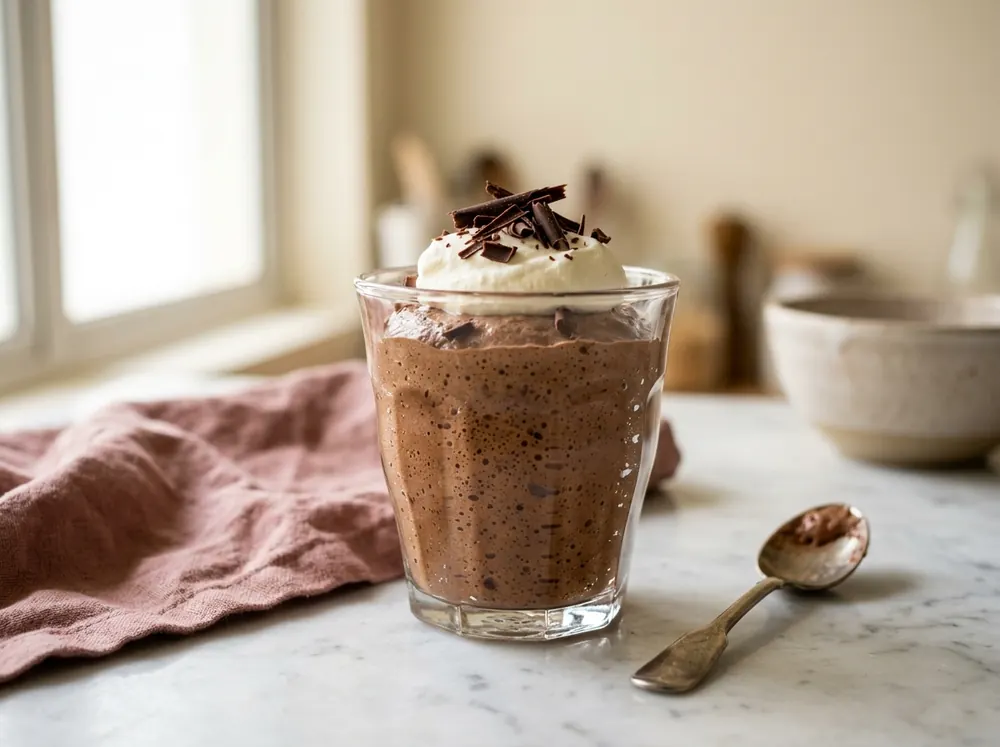
3.2 Absolute Chocolate Cake
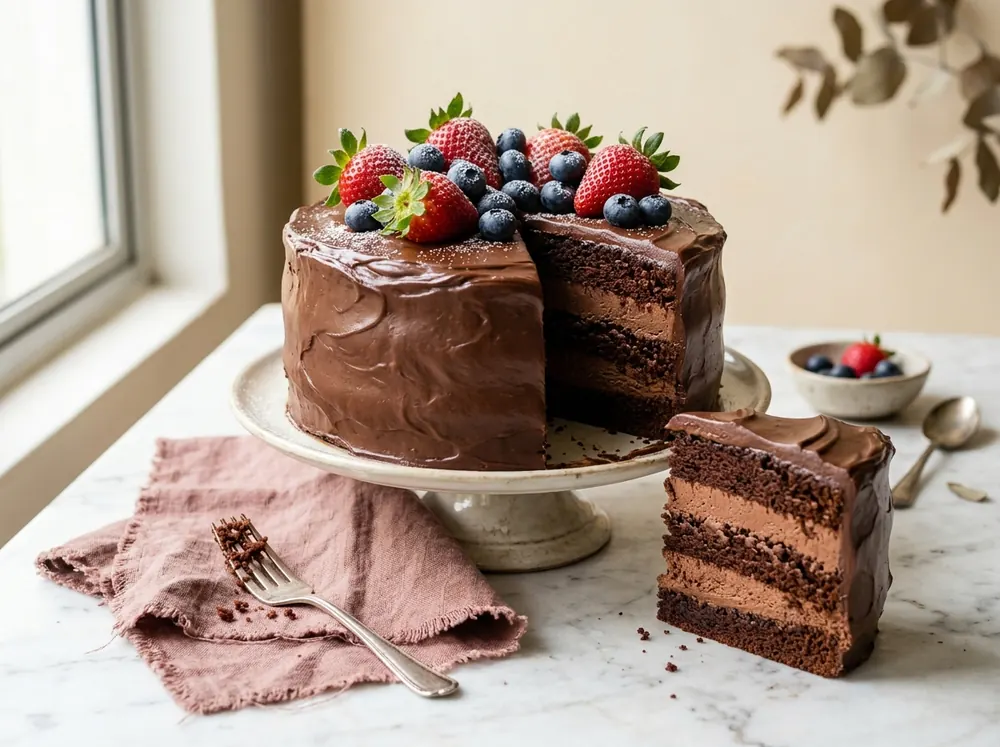
Kek coklat tiga lapis dengan mousse coklat dan salutan ganache. Sesuai untuk majlis istimewa.
Loyang
3 × 8 inci
Suhu
150°C, api atas bawah
Masa
20–25 minit
Tahap
Mencabar
Bahan Kek
Mousse Coklat (Filling)
Ganache Coklat
Tambahan: sedikit air kopi (untuk membasahkan kek), serbuk koko atau gula aising (untuk hiasan)
Cara Penyediaan Kek
Panaskan oven pada suhu 150°C. Lenser ketiga-tiga loyang dan alas dengan baking paper.
Masukkan semua bahan kecuali air mendidih ke dalam mangkuk mixer. Pukul pada kelajuan sederhana selama 1 minit.
Masukkan air mendidih dan pukul sehingga sebati.
Bahagikan adunan ke dalam tiga loyang dan bakar selama 20 hingga 25 minit. Sejukkan sepenuhnya.
Cara Penyediaan Mousse
Tabur gelatin ke atas 45 ml air dan biarkan kembang. Cairkan secara double boil sambil dikacau perlahan sehingga larut sepenuhnya.
Cairkan 100 g coklat secara double boil.
Masak kuning telur secara double boil sambil dikacau tanpa henti sehingga pekat dan berkrim. Jika berhenti mengacau, telur akan termasak dan berketul.
Tuang gelatin ke dalam kuning telur dan gaul rata. Masukkan coklat cair, kacau rata dan ketepikan.
Di dalam mangkuk lain, pukul whipping cream sehingga kental.
Kaup sepertiga krim ke dalam adunan coklat sehingga rata. Kemudian, masukkan baki krim dan vanilla, dan kaup balik sehingga sebati.
Cara Penyediaan Ganache
Panaskan krim dan sirap glukos sehingga keluar buih kecil di tepi periuk.
Tuang ke atas coklat yang telah dicincang dan kacau rata. Masukkan butter dan gaul sehingga sebati.
Sejukkan, kemudian pukul sehingga berkrim.
Cara Menyusun
Letakkan sekeping kek di atas papan kek. Basahkan permukaannya dengan sedikit air kopi, cukup untuk melembapkan sahaja.
Ratakan mousse coklat dan taburkan coklat cincang.
Letakkan kek kedua dan ulang proses yang sama sehingga habis.
Salut seluruh kek dengan baki mousse. Simpan di dalam peti sejuk sekurang-kurangnya 6 jam.
Salut kek dengan ganache dan hias mengikut kreativiti anda. Simpan di dalam peti sejuk sehingga ganache mengeras.
Ayak serbuk koko atau gula aising di atas kek sebelum dihidangkan (pilihan).
Cara simpan: Di dalam peti sejuk sehingga 3 hari.
Bab 4
Cheesecake
Bab ini bermula dengan satu resepi asas Burnt Cheesecake dan tiga variasinya, diikuti Unbaked Cheesecake yang tidak memerlukan oven.
4.1 Burnt Cheesecake: Resepi Asas (Vanilla)
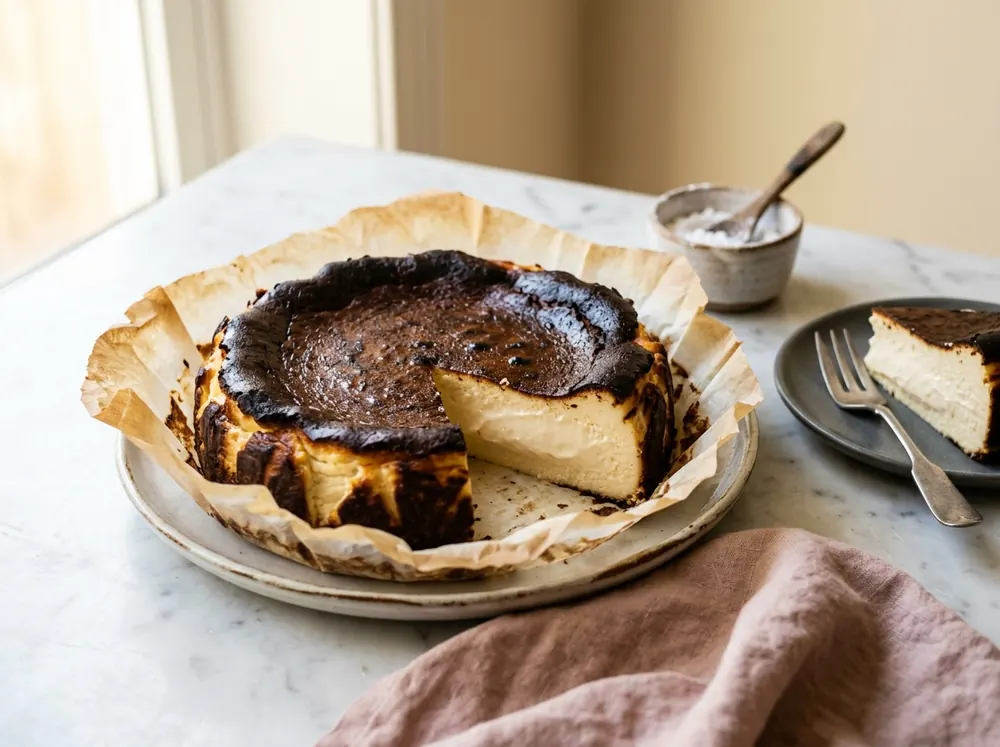
Cheesecake gaya Basque dengan permukaan hangus berkaramel dan bahagian dalam yang lembut berkrim. Warna hangus di atas memang sengaja, dan itulah yang memberikan rasa istimewa.
Loyang
6 inci
Suhu
200°C, api atas bawah
Masa
55–60 minit
Tahap
Mudah
Bahan
Cara Penyediaan
Panaskan oven pada suhu 200°C.
Lenser loyang dan alas dengan baking paper yang lebih tinggi daripada dinding loyang (lebih kurang 5 cm). Renyukkan kertas terlebih dahulu supaya mudah dibentuk mengikut loyang.
Pukul cream cheese dan gula sehingga licin dan berkrim.
Masukkan telur satu per satu dan pukul sehingga sebati. Kikis dinding mangkuk supaya tiada cream cheese yang tertinggal.
Masukkan whipping cream dan vanilla, kemudian pukul sekejap sehingga sebati sahaja.
Masukkan tepung dan kaup balik dengan spatula.
Tuang ke dalam loyang dan hentak perlahan untuk membuang gelembung udara.
Bakar selama 55 hingga 60 minit sehingga permukaan berwarna perang gelap.
Bagaimana mengetahui cheesecake sudah masak? Bahagian tepi sudah set, tetapi bahagian tengah masih bergoyang seperti jeli apabila loyang digoyang perlahan. Ini perkara biasa kerana cheesecake akan set semasa disejukkan.
Menyejukkan: Biarkan pada suhu bilik sehingga sejuk (lebih kurang 1 jam), kemudian simpan di dalam peti sejuk sekurang-kurangnya 4 hingga 6 jam, atau semalaman, sebelum dipotong.
Cara simpan: Di dalam bekas bertutup di dalam peti sejuk, tahan sehingga 5 hari.
4.2 Variasi Burnt Cheesecake
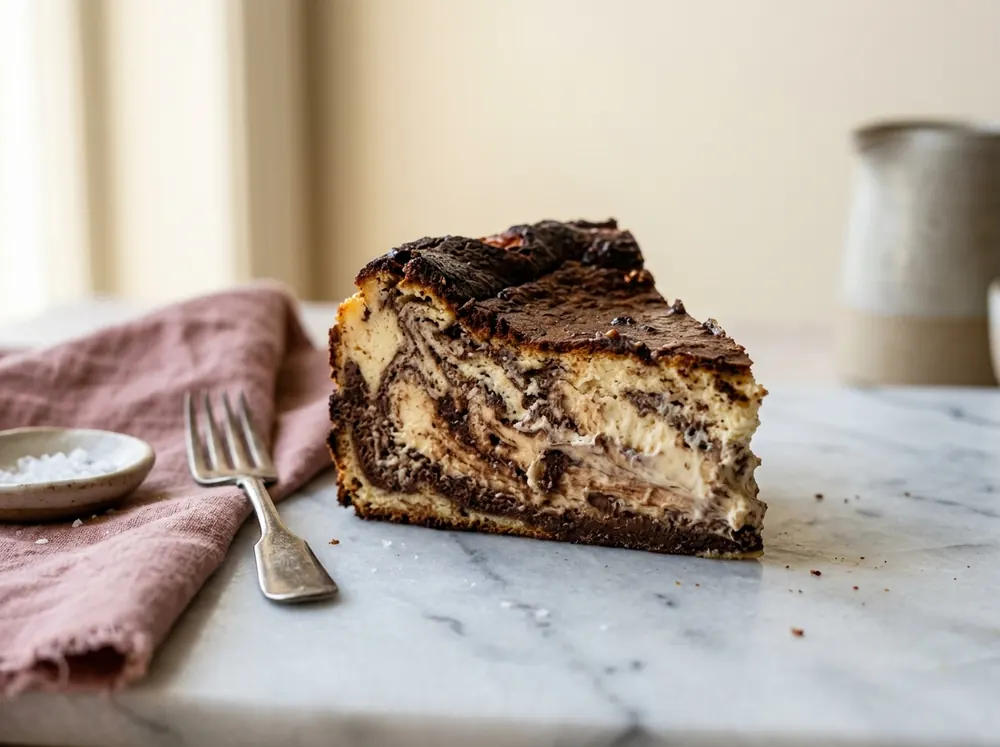
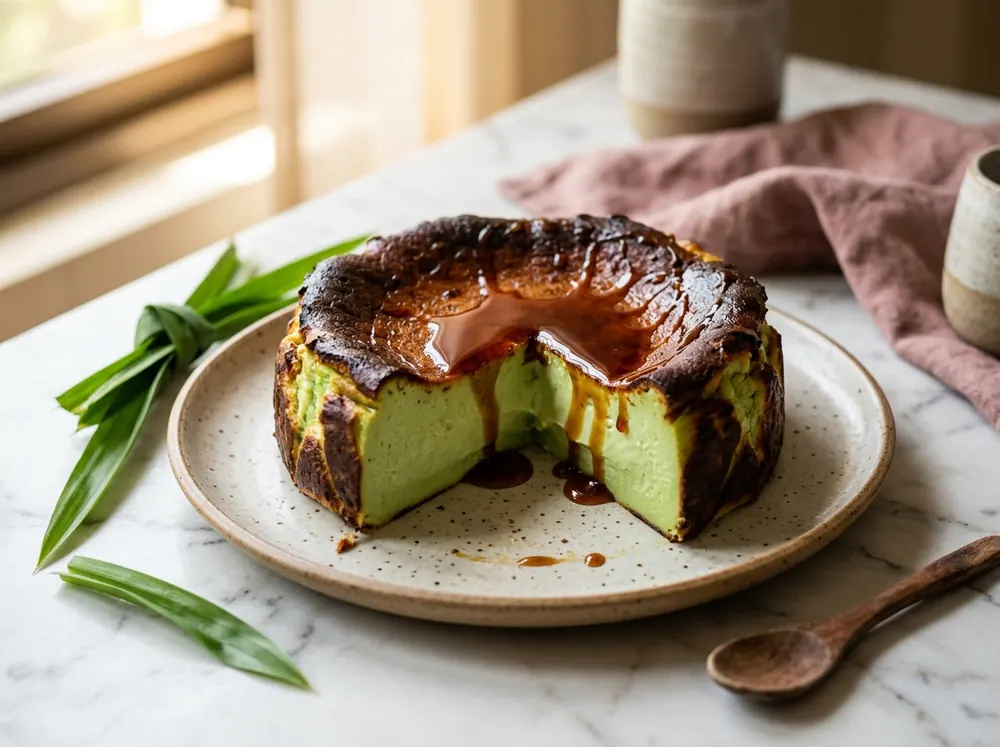
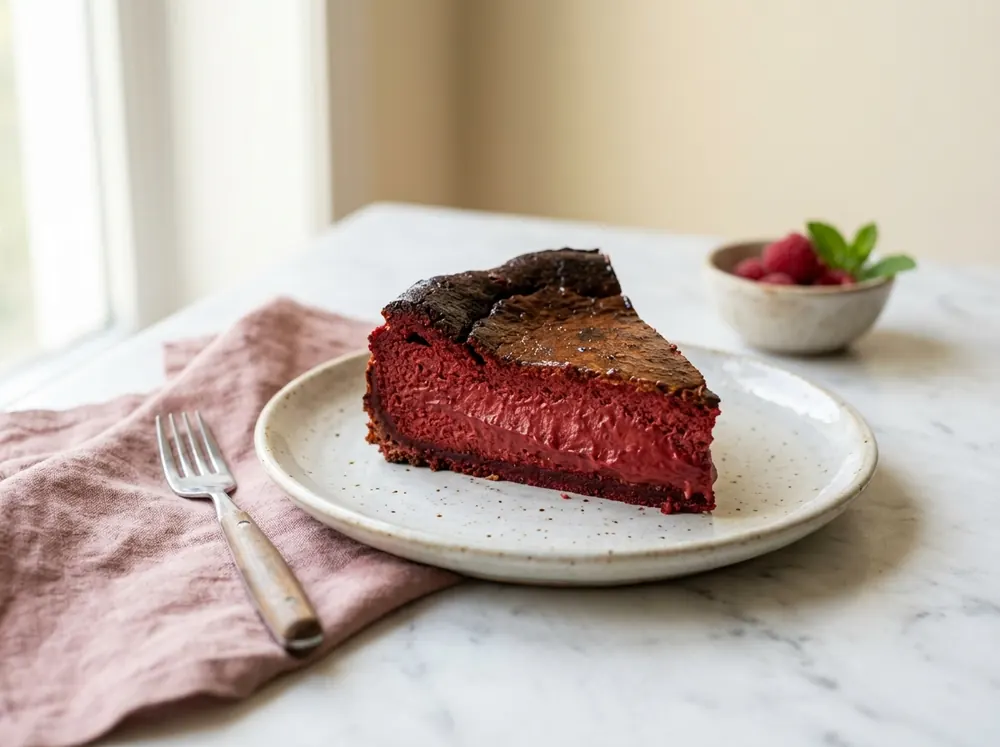
A. Chocolate MarbleB. Pandan Gula MelakaC. Red Velvet
Gunakan resepi asas 4.1 dan buat perubahan seperti di bawah. Saiz loyang, suhu dan masa bakar kekal sama.
A. Chocolate Marble Burnt Cheesecake
Tahap: Sederhana
Tambah: ½ cawan dark chocolate compound (±85 g), dicairkan dan disejukkan sedikit.
Cara: Sediakan adunan asas dan bahagikan kepada dua. Campurkan satu bahagian dengan coklat cair. Tuang kedua-dua adunan secara berselang ke dalam loyang, kemudian lorek sekali atau dua kali dengan lidi untuk corak marble.
B. Pandan Gula Melaka Burnt Cheesecake
Tahap: Sederhana
Tambah:
60 g santan (dimasukkan bersama whipping cream)
1 sdb pandan emulco (dimasukkan bersama whipping cream)
1 sdb sirap gula melaka
Cara: Ikut resepi asas. Selepas adunan dituang ke dalam loyang, titiskan sirap gula melaka di atas permukaan dan lorek perlahan dengan lidi. Hidangkan bersama siraman gula melaka tambahan jika suka.
C. Velvety (Red Velvet) Burnt Cheesecake
Tahap: Sederhana
Ubah:
Kurangkan tepung kepada 5 g, dan tambah 5 g serbuk koko (ayak bersama tepung)
Tambah 2 sdb sour cream (dimasukkan bersama whipping cream)
Tambah 1 sdk pewarna merah terang (bright red) atau 1 sdk red velvet emulco (dimasukkan bersama whipping cream)
Cara: Ikut resepi asas dengan perubahan di atas.
4.3 Unbaked Cheesecake
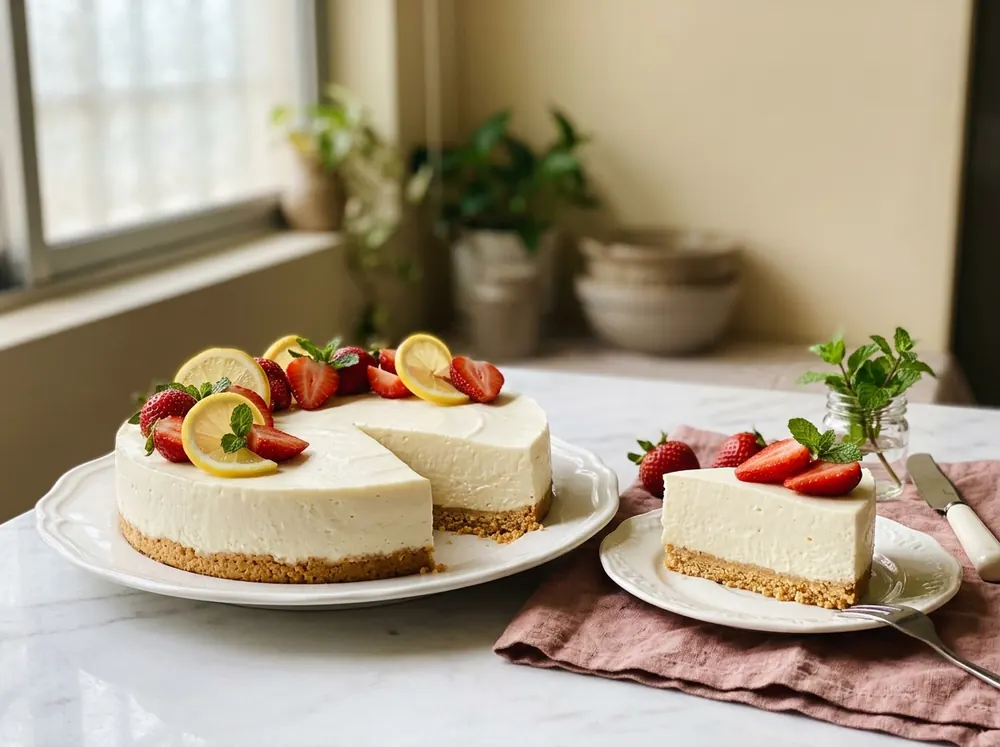
Cheesecake sejuk tanpa oven, dengan tapak biskut yang rangup dan filling lembut berperisa lemon. Sesuai untuk mereka yang tidak mempunyai oven.
Loyang
7 inci (jenis klip atau tapak boleh tanggal)
Masa set
sekurang-kurangnya 4 jam
Tahap
Mudah
Tapak Biskut
Filling
Cara Membuat Tapak
Masukkan biskut ke dalam plastik tebal dan hancurkan menggunakan rolling pin sehingga halus.
Masukkan serbuk biskut ke dalam mangkuk besar. Tambah gula dan butter cair, kemudian gaul sehingga menjadi seperti pasir basah yang boleh dibentuk.
Tekan dan ratakan di dasar loyang. Jika ada lebihan, tekan di bahagian tepi loyang supaya lebih kemas.
Simpan di dalam peti sejuk sekurang-kurangnya 1 jam supaya tapak set.
Cara Membuat Filling
Tabur gelatin ke atas air dan biarkan kembang selama lebih kurang 5 minit. Kemudian, cairkan secara double boil atau di dalam microwave selama 10 hingga 15 saat sehingga jernih. Biarkan suam.
Pukul cream cheese dan susu pekat pada kelajuan sederhana sehingga licin.
Masukkan gelatin cair, jus lemon dan vanilla, kemudian pukul sehingga sebati.
Di dalam mangkuk lain, pukul whipping cream sehingga soft peak.
Kaup whipping cream ke dalam adunan cream cheese menggunakan spatula sehingga sebati dan rata.
Tuang perlahan-lahan ke atas tapak yang telah disejukkan. Hentak loyang perlahan untuk membuang udara yang terperangkap.
Simpan di dalam peti sejuk sekurang-kurangnya 4 jam, atau semalaman.
Hias dengan buah-buahan segar, sos strawberi, coklat atau karamel.
Cara simpan: Di dalam peti sejuk sehingga 4 hari. Hidangkan sejuk.
Bab 5
Brownies & Bars
Brownies sesuai untuk pemula yang mahu mula berniaga kerana bahannya ringkas, tahan lama dan mudah dipotong. Bab ini mengandungi empat jenis brownies dan dua jenis bar.
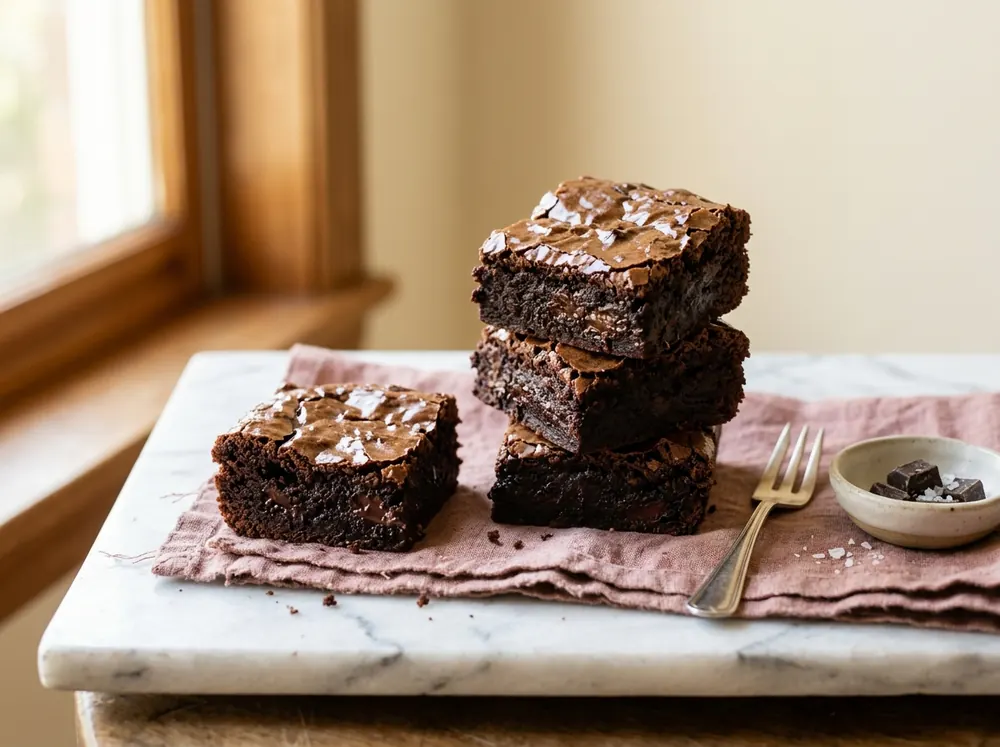
5.1 Basic Brownies
Brownies coklat klasik yang fudgy dengan permukaan berkilat. Resepi asas yang perlu dikuasai sebelum mencuba variasi lain.
Loyang
7 inci segi empat
Suhu
150°C, api atas bawah
Masa
±35 minit
Tahap
Mudah
Bahan
Cara Penyediaan
Panaskan oven pada suhu 150°C selama 5 hingga 10 minit. Lenser loyang dengan butter dan alas dengan baking paper.
Cairkan butter secara double boil atau di dalam microwave pada suhu sederhana.
Masukkan gula ke dalam mangkuk lain. Tuang butter cair ke atas gula dan kacau sebati.
Masukkan telur satu per satu dan kacau dengan spatula sehingga sebati.
Cairkan coklat secara double boil.
Masukkan tepung dan serbuk koko ke atas adunan telur. Jangan kacau dahulu.
Tuang coklat cair ke atasnya, kemudian kaup balik perlahan-lahan sehingga sebati. Adunan yang siap akan kelihatan berkilat.
Tuang ke dalam loyang dan ratakan.
Bakar selama lebih kurang 35 minit atau sehingga masak.
Cara simpan: Di dalam bekas kedap udara pada suhu bilik selama 4 hingga 5 hari, atau di dalam peti sejuk sehingga 1 minggu.
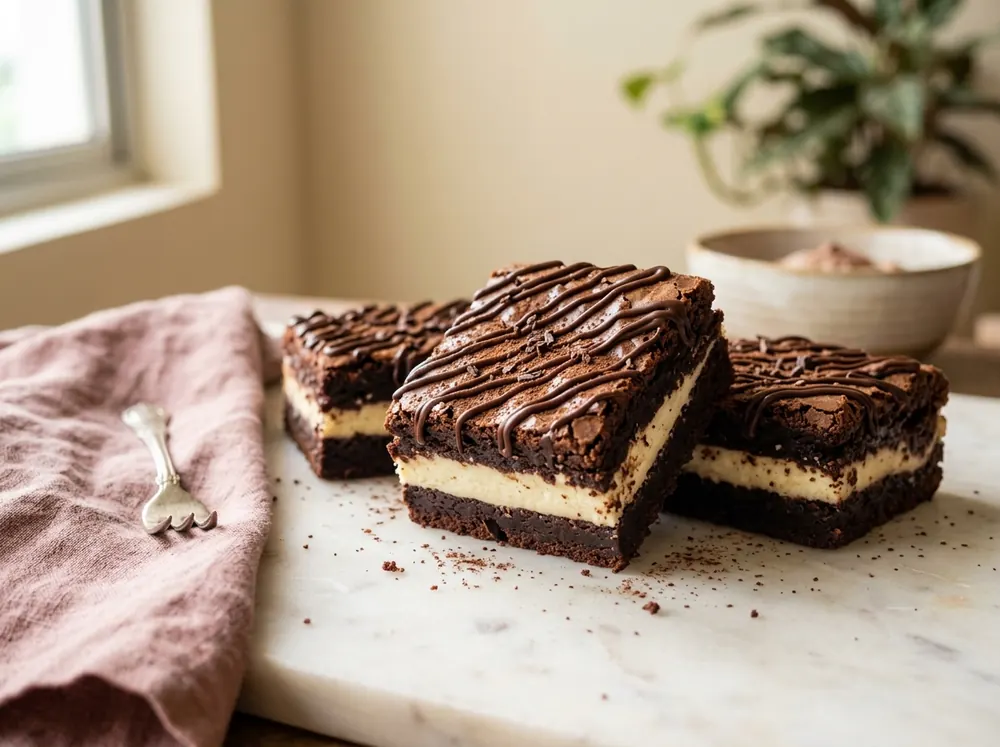
5.2 Double Layer Cheese Brownies
Dua lapis brownies coklat yang diselangi lapisan cream cheese. Kaya rasa dan cantik apabila dipotong.
Loyang
8 inci segi empat
Suhu
150°C, api atas bawah
Masa
±45 minit (2 peringkat)
Tahap
Sederhana
Adunan Brownies
Topping Cheese
Topping Coklat (pilihan)
Cara Penyediaan
Panaskan oven pada suhu 150°C selama 5 hingga 10 minit. Lenser loyang dan alas dengan baking paper.
Topping cheese: Pukul cream cheese dan gula aising sehingga berkrim. Masukkan telur dan vanilla, kemudian pukul sehingga sebati. Ketepikan.
Brownies: Cairkan butter dan coklat secara double boil, kemudian kacau sehingga sebati.
Di dalam mangkuk lain, kacau gula perang, telur dan vanilla sehingga sebati.
Satukan adunan telur dengan coklat cair. Masukkan tepung dan serbuk koko, kemudian kaup balik sehingga sebati sahaja.
Lapisan pertama: Tuang separuh adunan brownies ke dalam loyang, kemudian ratakan separuh topping cheese di atasnya.
Bakar selama 15 minit sehingga separuh masak.
Lapisan kedua: Keluarkan loyang. Tuang baki adunan brownies perlahan-lahan di atas lapisan cheese, kemudian ratakan baki topping cheese.
Bakar lagi selama lebih kurang 30 minit atau sehingga masak.
Topping coklat (pilihan): Cairkan coklat dan whipping cream secara double boil. Titiskan secara zig-zag di atas brownies yang telah masak, kemudian sejukkan.
Cara simpan: Di dalam peti sejuk sehingga 5 hari.
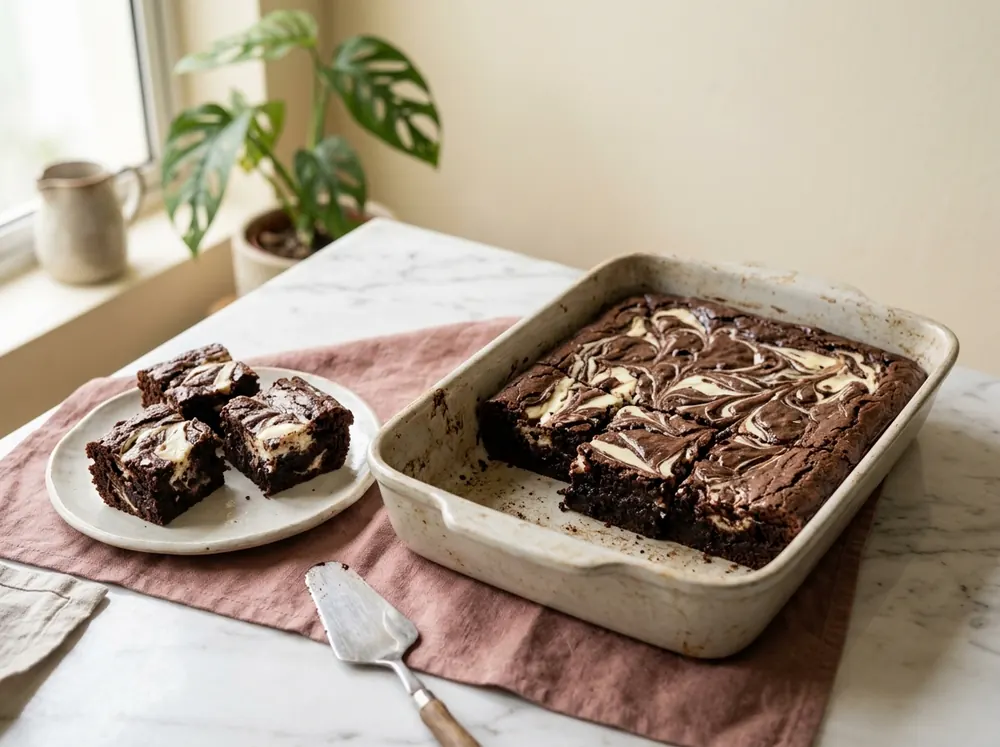
5.3 Marble Cheese Brownies
Brownies dengan corak marble cream cheese di permukaan. Lebih mudah daripada versi dua lapis, tetapi sama menarik.
Loyang
8 inci segi empat
Suhu
150°C, api atas bawah
Masa
±45 minit
Tahap
Mudah
Adunan Brownies
Topping Cheese
Cara Penyediaan
Panaskan oven pada suhu 150°C selama 5 hingga 10 minit. Lenser loyang dan alas dengan baking paper.
Cairkan butter dan coklat secara double boil, kemudian kacau sehingga sebati.
Di dalam mangkuk lain, kacau gula kastor, telur dan vanilla sehingga sebati.
Satukan semua adunan bersama tepung dan serbuk koko, kemudian kaup balik sehingga sebati sahaja. Tuang ke dalam loyang.
Topping cheese: Pukul cream cheese dan gula aising sehingga berkrim. Masukkan telur dan vanilla, kemudian kacau sebati.
Letakkan topping cheese secara bertompok di atas adunan brownies menggunakan sudu. Lorek dengan lidi atau hujung pisau untuk membentuk corak marble.
Bakar selama lebih kurang 45 minit atau sehingga masak.
Cara simpan: Di dalam peti sejuk sehingga 5 hari.
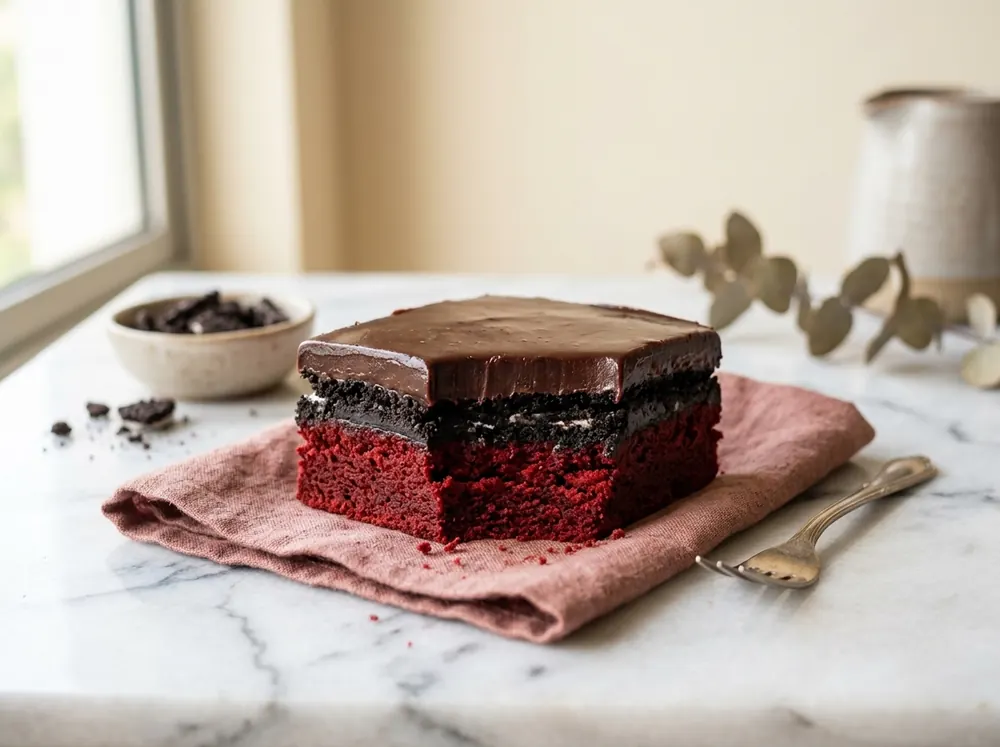
5.4 Red Velvet Truffle Brownies
Brownies red velvet dengan lapisan Oreo dan salutan coklat. Warnanya menarik dan sesuai untuk dijual atau dijadikan hadiah.
Loyang
7 inci segi empat
Suhu
150°C, api atas bawah
Masa
±30 minit
Tahap
Sederhana
Adunan Brownies
Lapisan Oreo
Topping Coklat
Cara Penyediaan
Panaskan oven pada suhu 150°C selama 5 hingga 10 minit. Lenser loyang dan alas dengan baking paper.
Kacau butter cair dan gula sehingga sebati.
Masukkan vanilla dan telur, kemudian kacau sehingga sebati.
Masukkan tepung dan baking powder, kemudian kaup balik sehingga sebati.
Masukkan coklat cair dan red velvet emulco, kemudian kacau sehingga warnanya sekata.
Tuang ke dalam loyang dan bakar selama lebih kurang 30 minit atau sehingga masak.
Lapisan Oreo: Semasa brownies dibakar, gaul serbuk Oreo dengan butter cair sehingga lembap.
Sebaik sahaja brownies dikeluarkan dan masih panas, taburkan campuran Oreo di atasnya tanpa mengeluarkan brownies dari loyang. Tekan perlahan supaya rata.
Topping coklat: Cairkan coklat dan whipping cream secara double boil sehingga licin. Tuang di atas lapisan Oreo dan ratakan.
Sejukkan di dalam peti sejuk sehingga topping set. Hias mengikut kreativiti anda.
Cara simpan: Di dalam peti sejuk sehingga 5 hari.
5.5 Congo Bars
Bar coklat cip yang chewy dengan rasa karamel daripada gula perang.
Loyang
7 inci segi empat
Suhu
150°C, api atas bawah
Masa
±35 minit
Tahap
Mudah
Bahan
Cara Penyediaan
Lenser loyang dan alas dengan baking paper.
Panaskan oven pada suhu 150°C selama 5 hingga 10 minit.
Cairkan butter, kemudian masukkan gula perang dan kacau sehingga sebati.
Masukkan telur dan vanilla, kemudian kacau sehingga sebati.
Masukkan tepung, baking powder dan coklat cip, kemudian kacau sehingga sebati sahaja.
Tuang ke dalam loyang dan ratakan.
Bakar selama lebih kurang 35 minit atau sehingga masak dan permukaannya berwarna perang keemasan.
Cara simpan: Di dalam bekas kedap udara pada suhu bilik sehingga 5 hari.
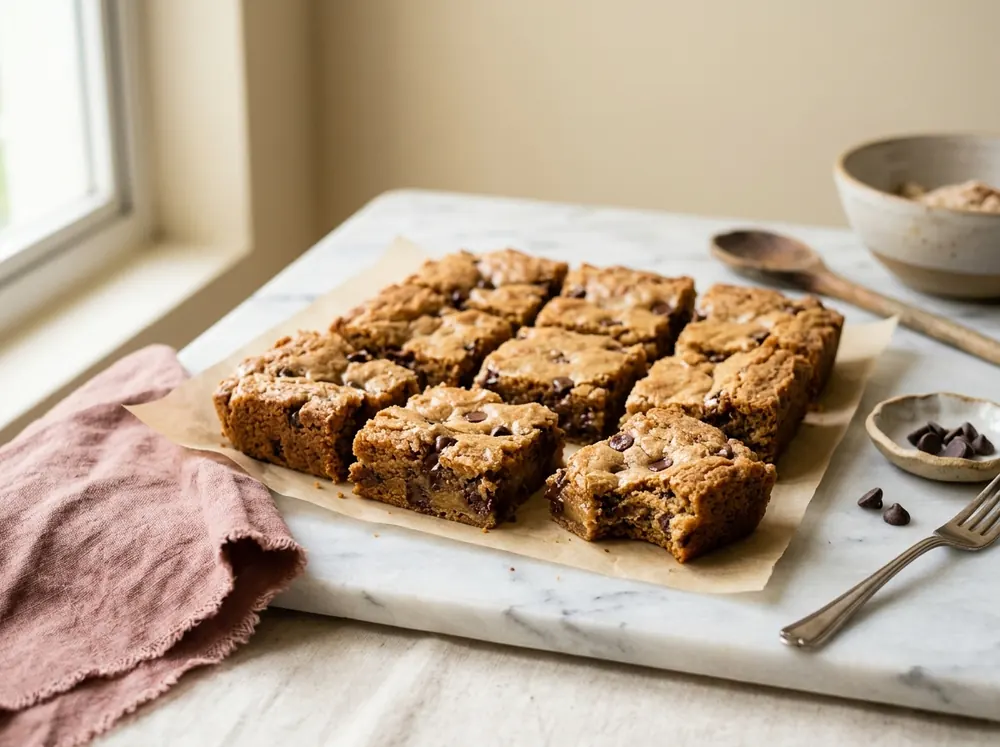
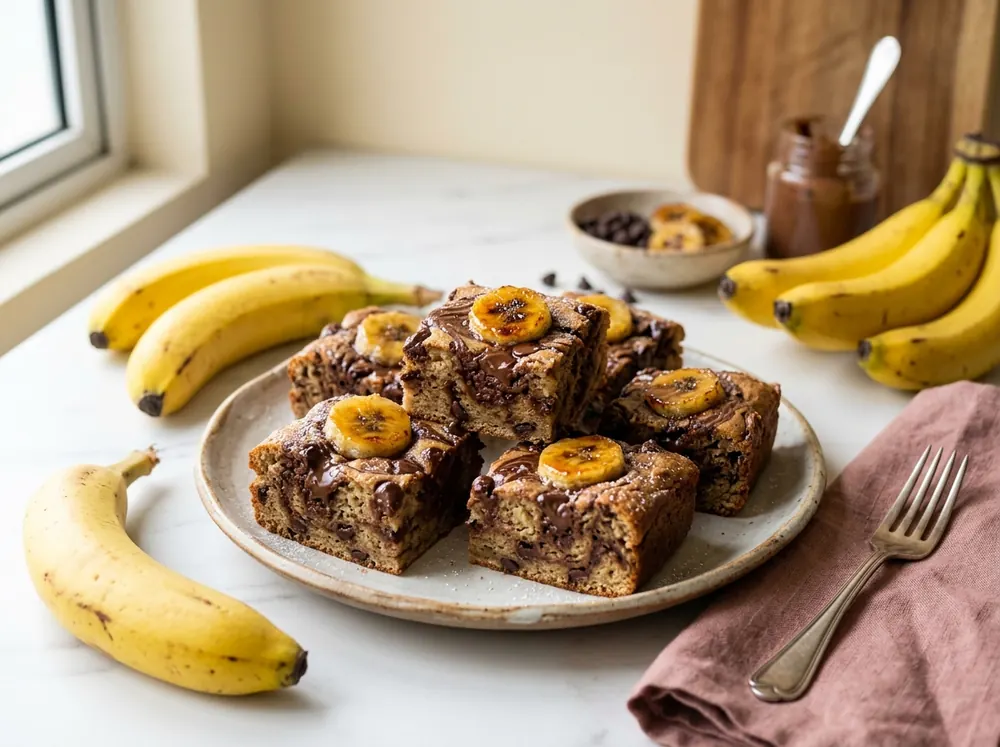
5.6 Banana Blondies
Blondies pisang dengan mentega kacang, coklat cip dan Nutella. Cara terbaik untuk menggunakan pisang yang terlalu masak.
Loyang
8 inci segi empat
Suhu
150°C, api atas bawah
Masa
30–35 minit
Tahap
Mudah
Bahan A
Bahan B
Bahan C
Cara Penyediaan
Panaskan oven pada suhu 150°C. Alas loyang dengan baking paper.
Masukkan semua Bahan A ke dalam mangkuk dan pukul dengan mixer sehingga sebati.
Masukkan Bahan B (kecuali coklat cip) dan pukul sehingga rata.
Masukkan coklat cip dan kacau rata dengan spatula.
Tuang ke dalam loyang dan ratakan.
Picit Nutella secara berjalur di atas adunan dan lorek perlahan-lahan.
Susun hirisan pisang di atasnya.
Bakar selama 30 hingga 35 minit, bergantung pada oven anda.
Biarkan sejuk sedikit sebelum dipotong dan dihidangkan.
Cara simpan: Di dalam bekas kedap udara di dalam peti sejuk sehingga 4 hari.
Bab 6
Cookies & Meringue
Cookies dan meringue sesuai untuk pemula. Tidak memerlukan loyang khas, mudah dibungkus untuk hadiah atau jualan, dan tahan lama jika disimpan dengan betul.
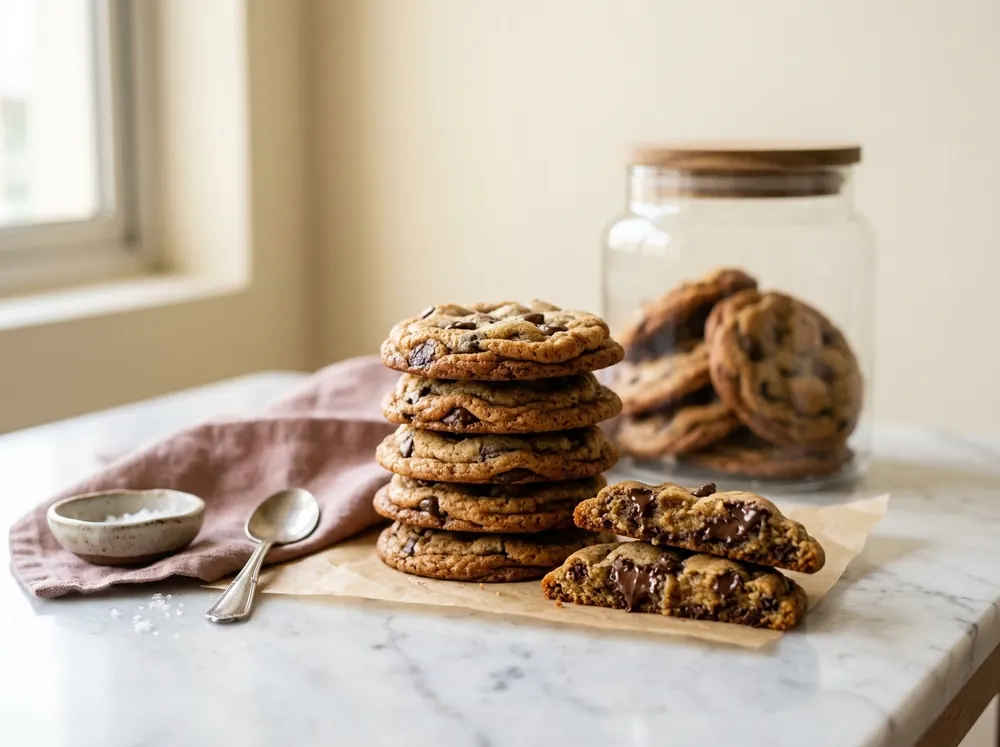
6.1 Chocolate Chip Cookies
Cookies coklat cip yang rangup di tepi dan lembut di tengah. Sedikit tepung jagung ditambah untuk tekstur yang lebih lembut.
Hasil
±40 keping (saiz 1 sdb)
Suhu
150°C, api atas bawah
Masa
±20 minit
Tahap
Mudah
Bahan
Cara Penyediaan
Panaskan oven pada suhu 150°C. Alas dulang dengan baking paper.
Pukul butter, gula kastor dan gula perang sehingga sebati dan berkrim.
Masukkan telur dan vanilla, kemudian gaul sehingga sebati.
Ayak tepung gandum, tepung jagung, baking powder dan baking soda bersama. Masukkan ke dalam adunan dan gaul sehingga sebati sahaja.
Masukkan coklat cip dan gaul rata dengan spatula.
Bentukkan adunan mengikut saiz yang dikehendaki menggunakan sudu atau scoop, dan susun di atas dulang dengan jarak.
Bakar selama lebih kurang 20 minit sehingga bahagian tepi berwarna perang keemasan.
Biarkan sejuk sebelum dihidangkan atau disimpan.
Cara simpan: Di dalam balang kedap udara pada suhu bilik sehingga 2 minggu.
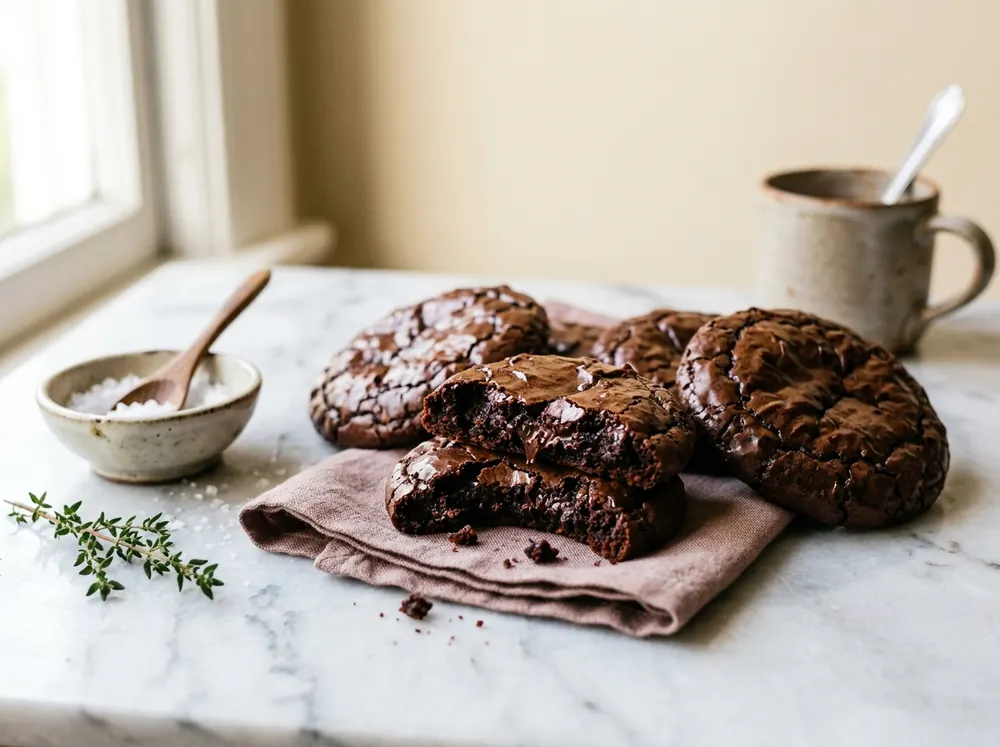
6.2 Brownies Cookies
Cookies coklat yang rasanya seperti brownies, dengan permukaan retak berkilat dan bahagian dalam yang lembut.
Hasil
±20–24 keping
Suhu
170°C
Masa
10–15 minit
Tahap
Sederhana
Bahan
Cara Penyediaan
Panaskan oven pada suhu 170°C. Alas dulang dengan baking paper.
Cairkan coklat dan butter secara double boil. Ketepikan sebentar.
Di dalam mangkuk lain, pukul telur, gula perang, gula pasir, vanilla dan air sehingga sedikit kembang dan warnanya bertukar pucat.
Masukkan adunan telur ke dalam coklat cair dan kaup balik.
Masukkan tepung, baking powder dan garam, kemudian kaup balik sehingga sebati.
Biarkan adunan selama 5 hingga 10 minit supaya pekat dan mudah dibentuk.
Letakkan adunan di atas dulang menggunakan scoop, sudu atau tangan. Jarakkan setiap adunan kerana cookies akan mengembang.
Bakar selama 10 hingga 15 minit. Untuk tekstur yang sedikit garing, bakar sehingga 18 minit.
Biarkan di atas dulang seketika sehingga sedikit keras, kemudian barulah diangkat.
Cara simpan: Di dalam balang kedap udara pada suhu bilik sehingga 1 minggu.
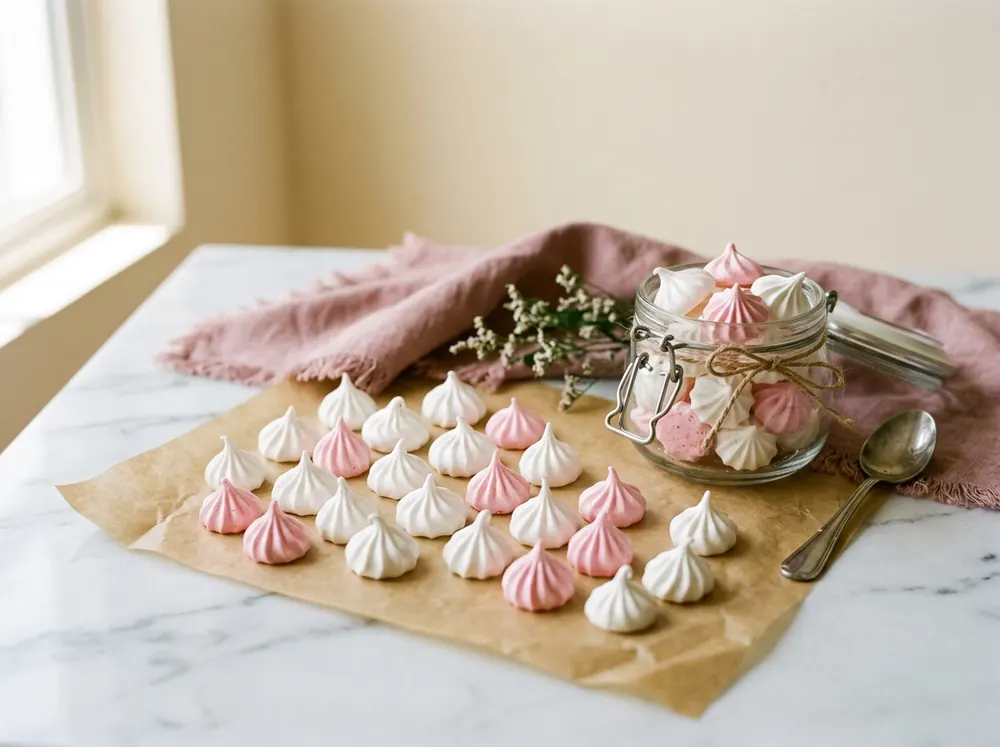
6.3 Meringue Kisses
Meringue kecil yang ringan dan rangup, dan mudah cair di mulut. Hanya memerlukan tiga bahan.
Hasil
±50–60 biji kecil
Suhu
120°C
Masa
±1 jam
Tahap
Sederhana
Bahan
Cara Penyediaan
Panaskan oven pada suhu 120°C. Alas dulang dengan baking paper.
Pukul putih telur sehingga berbuih.
Masukkan gula sedikit demi sedikit sambil terus dipukul sehingga gebu dan mencapai stiff peak. Adunan tidak jatuh walaupun mangkuk diterbalikkan.
Masukkan vanilla dan pukul sekejap sehingga sebati sahaja.
Masukkan adunan ke dalam piping bag dengan nozzle bulat atau bintang. Picit adunan, kemudian tarik ke atas.
Bakar selama lebih kurang 1 jam (bergantung pada oven anda) sehingga kering dan mudah tanggal dari kertas.
Matikan oven dan biarkan meringue sejuk di dalam oven.
Cara simpan: Di dalam balang kedap udara pada suhu bilik sehingga 2 minggu. Jangan simpan di dalam peti sejuk kerana kelembapan akan menyebabkan meringue menjadi lembik.
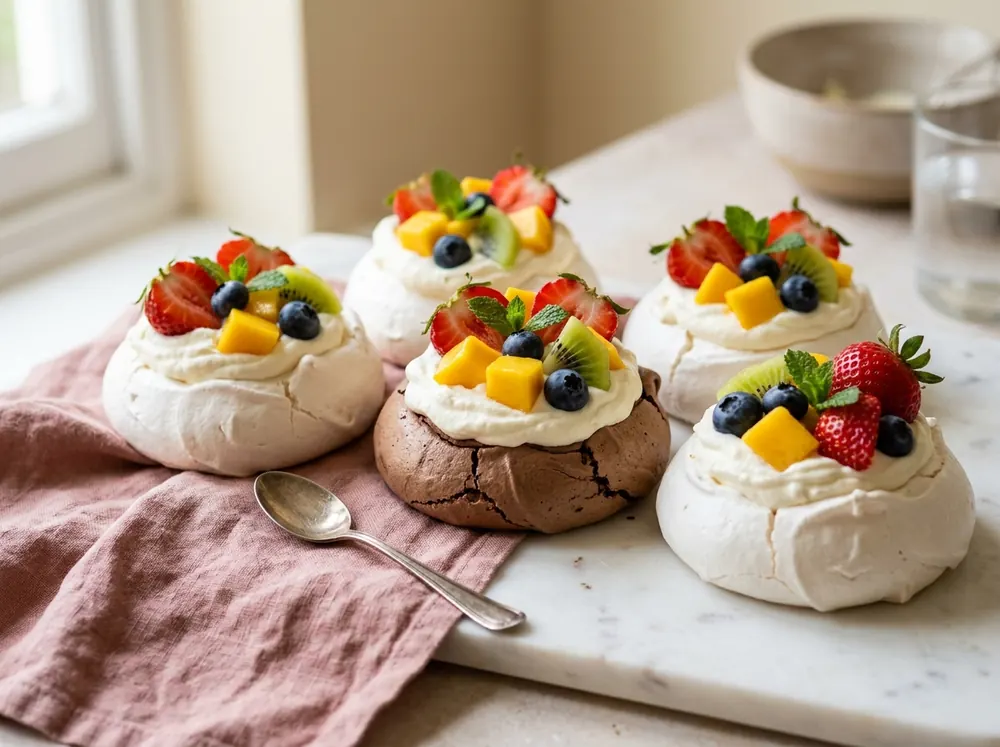
6.4 Pavlova (+ Variasi Chocolate Pavlova)
Meringue yang rangup di luar dan lembut di dalam, dihias whipped cream dan buah-buahan segar. Bahannya ringkas, tetapi hasilnya kelihatan mewah.
Hasil
Pavlova mini (bergantung pada saiz cutter)
Suhu
150°C, kemudian 110°C
Masa
±30 minit + disejukkan di dalam oven
Tahap
Mencabar
Bahan Pavlova
Whipped Cream
Hiasan: buah-buahan segar (strawberi, kiwi, blueberi, mangga) dan daun pudina
Cara Penyediaan
Panaskan oven pada suhu 150°C. Oven berkipas (convection) paling sesuai, tetapi oven gas biasa juga boleh digunakan.
Pastikan semua alatan bersih, kering dan bebas minyak. Pastikan tangan dan telur kering semasa mengasingkan putih telur.
Pukul putih telur pada kelajuan sederhana terlebih dahulu supaya tidak terpercik. Apabila mula berbuih, tingkatkan kelajuan mixer.
Masukkan gula sedikit demi sedikit sambil dipukul sehingga mencapai stiff peak. Adunan tidak jatuh apabila mangkuk diterbalikkan.
Masukkan tepung jagung dan kaup balik dengan spatula. Kemudian, masukkan cuka dan kaup sehingga sebati.
Teknik capan: Alas dulang dengan baking paper. Celup hujung cookie cutter bulat ke dalam adunan dan capkan di atas kertas sebagai panduan saiz. Dengan cara ini, anda tidak perlu melukis bulatan menggunakan pensil. Teknik ini juga boleh digunakan untuk membuat macaron.
Letakkan atau picit adunan mengikut bulatan, kemudian buat sedikit lekuk di tengah untuk tempat krim.
Masukkan ke dalam oven. Selepas 10 minit, turunkan suhu kepada 110°C dan bakar lagi selama 20 minit sehingga pavlova kembang, kering dan rangup di luar.
Matikan oven dan biarkan pavlova sejuk sepenuhnya di dalam oven. Jangan buka pintu oven selagi pavlova belum sejuk.
Whipped cream: Pukul semua bahan sehingga kental. Berhenti sebaik sahaja krim kental kerana krim yang terlebih pukul akan pecah.
Hias pavlova dengan whipped cream dan buah-buahan segar sejurus sebelum dihidangkan.
Variasi Chocolate Pavlova: Tambah 30 g dark chocolate (dicincang) dan 2 sdb serbuk koko. Masukkan kedua-duanya bersama cuka pada langkah 5 dan kaup sehingga sebati. Langkah lain kekal sama.
Cara simpan: Pavlova tanpa hiasan boleh disimpan di dalam bekas kedap udara pada suhu bilik selama 2 hingga 3 hari. Selepas dihias, hidangkan segera.
Bab 7
Siri Crepe
Tiga resepi pertama dalam bab ini menggunakan adunan asas yang sama. Setelah anda menguasai satu adunan, anda boleh menghasilkan tiga jenis dessert yang berbeza.
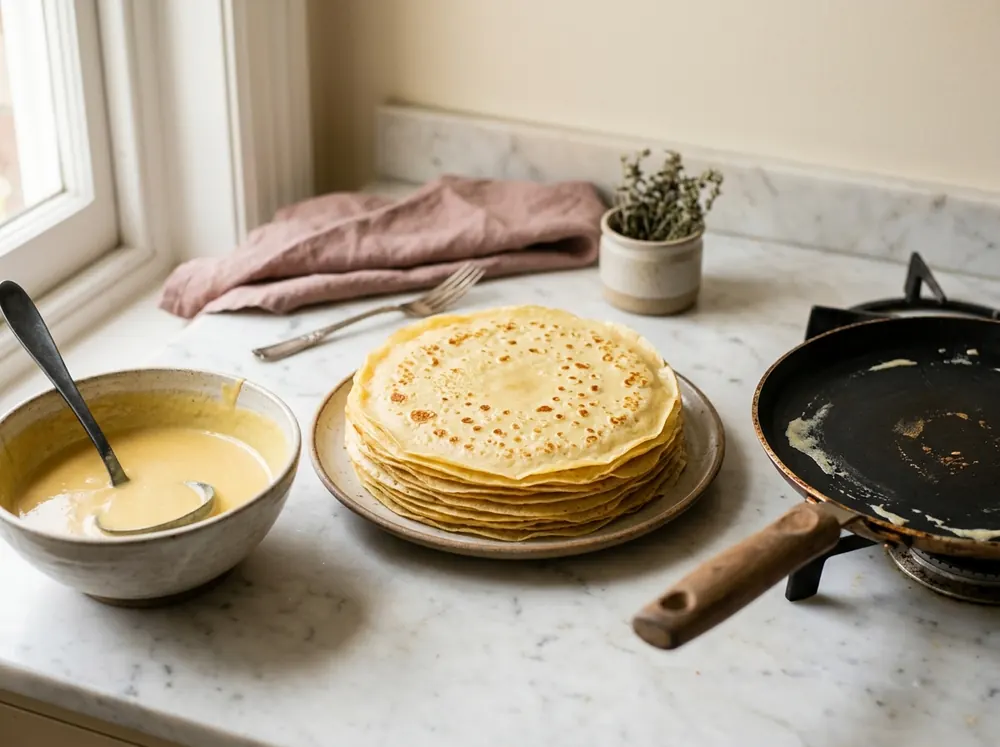
Adunan Crepe Asas
Adunan ini digunakan untuk resepi 7.1 Mille Crepe Cake, 7.2 Mini Crepe Cake dan 7.3 Crepe Ais Krim.
Bahan
Cara Penyediaan (Kaedah Semua Dalam Satu)
Timbang semua bahan dengan tepat.
Campurkan semua bahan di dalam satu mangkuk dan gaul sehingga sebati.
Tapis adunan untuk mengasingkan ketulan tepung yang tidak larut. Langkah ini penting supaya crepe licin tanpa bintik.
(Pilihan) Rehatkan adunan di dalam peti sejuk selama 30 minit. Crepe akan menjadi lebih lembut dan kurang berlubang.
Cara Memasak Crepe
Gunakan kuali non-stick dan api perlahan.
Gunakan senduk atau cawan yang sama saiz untuk setiap keping supaya ketebalan crepe sekata.
Tuang adunan ke tengah kuali, kemudian pusingkan kuali dengan cepat supaya adunan merata.
Masak sebelah sahaja. Crepe tidak perlu diterbalikkan. Crepe siap apabila kelihatan gelembung kecil di permukaan dan permukaannya hampir kering.
Pindahkan ke dulang rata yang besar dan tutup dengan cling wrap supaya tidak kering.
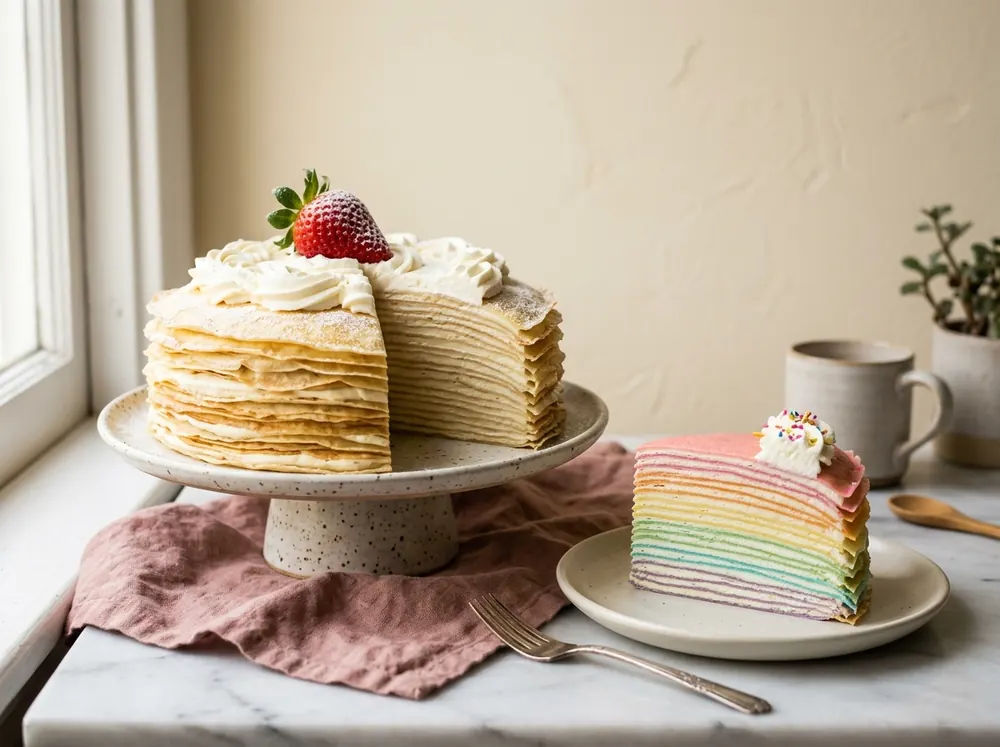
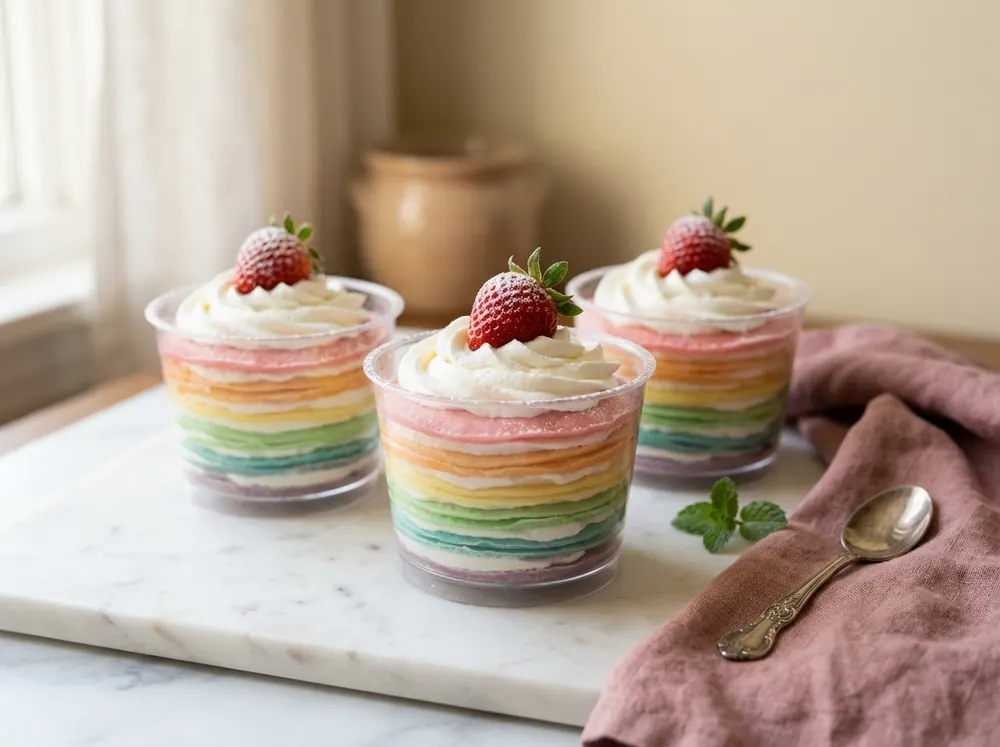
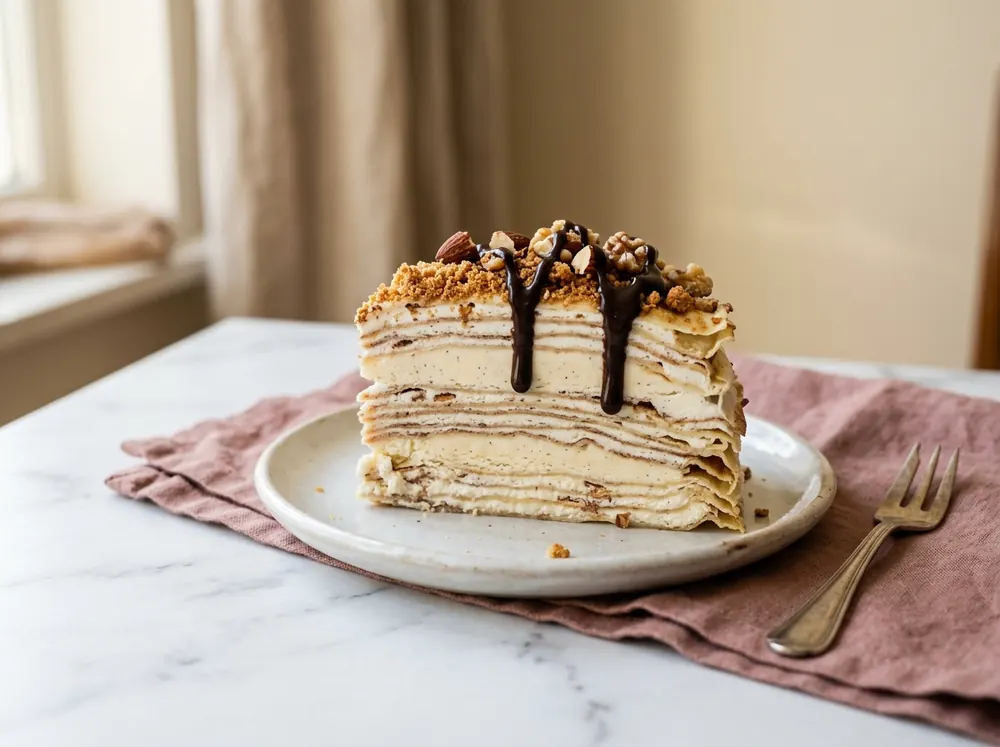
7.1 Mille Crepe Cake (+ Variasi Kek Crepe Pelangi)
Kek berlapis-lapis crepe nipis dengan krim di setiap lapisan. Cantik apabila dipotong dan boleh dipelbagaikan perisanya.
Hasil
±25 keping crepe (1 kek, 20 lapis)
Kuali
7–8 inci
Tahap
Sederhana
Bahan
Cara Penyediaan
Sediakan Adunan Crepe Asas dan masak lebih kurang 25 keping crepe. Sejukkan sepenuhnya.
Pukul whipping cream sehingga soft peak.
Letakkan crepe pertama di atas pinggan. Sapu krim secara nipis dan rata dengan spatula, kemudian letakkan crepe kedua.
Perisa boleh diletakkan terus di atas krim, atau dicampur dan dipukul bersama krim.
Ulang sehingga lapisan ke-20. Baki crepe boleh digunakan sebagai ganti jika ada yang koyak.
Ratakan krim di bahagian atas kek, dan hias dengan perisa pilihan.
Sejukkan di dalam peti sejuk sekurang-kurangnya 2 jam sebelum dipotong supaya lapisannya lebih kemas.
Variasi Kek Crepe Pelangi: Bahagikan adunan kepada beberapa mangkuk mengikut bilangan warna yang dikehendaki, dan titiskan pewarna ke dalam setiap mangkuk. Cadangannya, 3 keping crepe bagi setiap warna. Susun mengikut turutan warna pelangi.
Cara simpan: Di dalam bekas bertutup di dalam peti sejuk sehingga 3 hari.
7.2 Mini Crepe Cake
Kek crepe bersaiz kecil yang sesuai dijual secara individu atau dijadikan door gift.
Hasil
±35 keping crepe kecil
Kuali
5–6 inci
Tahap
Sederhana
Bahan
Cara Penyediaan
Sediakan Adunan Crepe Asas. Masak lebih kurang 35 keping crepe menggunakan kuali kecil dan senduk yang lebih kecil. Sejukkan.
Pukul whipping cream sehingga soft peak.
Susun crepe dan krim seperti Mille Crepe Cake (7.1) sehingga lapisan ke-20 atau mengikut ketinggian yang dikehendaki.
Ratakan krim di bahagian atas dan hias dengan perisa pilihan.
Sejukkan sebelum dihidangkan.
Variasi Mini Crepe Pelangi: Sama seperti 7.1. Bahagikan adunan mengikut warna, dengan cadangan 3 keping bagi setiap warna.
Cara simpan: Di dalam peti sejuk sehingga 3 hari.
7.3 Crepe Ais Krim
Lapisan crepe nipis yang diselangi ais krim dan krim, kemudian dibekukan. Sesuai untuk cuaca panas.
Hasil
±35 keping crepe nipis
Masa beku
sekurang-kurangnya 4 jam
Tahap
Mudah
Bahan
Cara Penyediaan
Sediakan Adunan Crepe Asas. Untuk resepi ini, setiap lapisan crepe perlu senipis yang mungkin.
Pukul whipping cream pada kelajuan sederhana sehingga soft peak. Perisa boleh dicampur terus ke dalam krim.
Pilih bekas yang sesuai untuk penyimpanan dan hidangan.
Letakkan crepe pertama dan ratakan ais krim di atasnya. Letakkan crepe kedua dan sapu krim ke seluruh permukaan.
Jika perisa belum dicampur ke dalam krim, letakkan perisa di atas lapisan crepe kedua sebelum menyapu krim.
Ulang langkah 4 sehingga mencapai ketinggian yang dikehendaki.
Hias bahagian atas dengan serbuk biskut, sos atau kacang.
Bekukan sekurang-kurangnya 4 jam sebelum dihidangkan.
Cara simpan: Di dalam bekas bertutup rapat di dalam peti beku sehingga 2 minggu.
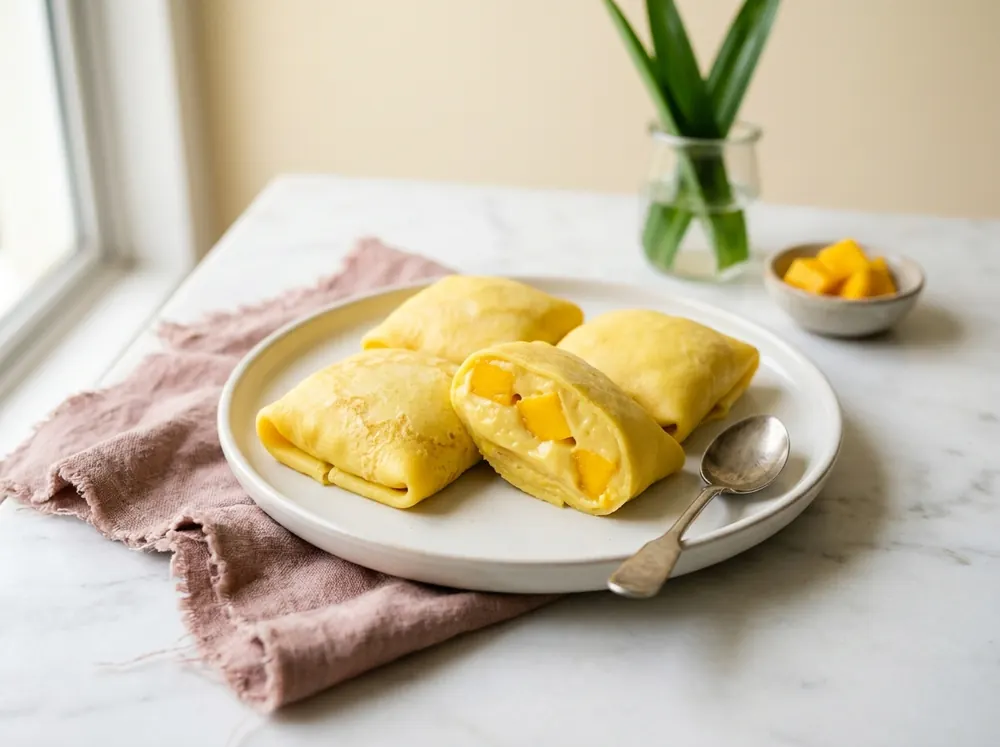
7.4 Crepe Bantal (+ Inti Krim Kastard)
Crepe kuning lembut yang dilipat seperti bantal kecil, berisi krim kastard dan perisa pilihan. Popular sebagai snek dan produk jualan.
Hasil
±20 keping
Kuali
7–8 inci
Tahap
Sederhana
Adunan Kulit Crepe Bantal
Inti Krim Kastard
Perisa (pilihan): mangga, durian, blueberi, strawberi, coklat dan sebagainya
Cara Menyediakan Kulit
Timbang semua bahan dengan tepat.
Campurkan semua bahan di dalam satu mangkuk dan gaul sehingga sebati.
Tapis adunan untuk mengasingkan ketulan tepung.
Masak dengan api perlahan menggunakan sukatan yang sama bagi setiap keping.
Elakkan crepe terlalu tebal kerana crepe yang tebal sukar dilipat.
Angkat apabila kelihatan gelembung kecil dan permukaannya hampir kering. Susun di atas dulang rata dan sejukkan.
Cara Menyediakan Inti Krim
Bancuh serbuk kastard dengan air di dalam mangkuk yang berasingan.
Pukul whipping cream pada kelajuan sederhana tinggi sehingga soft peak.
Masukkan bancuhan kastard ke dalam krim.
Pukul pada kelajuan perlahan selama 1 hingga 2 minit sahaja supaya krim tidak overbeat.
Cara Melipat
Letakkan crepe di atas permukaan yang rata. Letakkan 1 sdk inti di tengah. Untuk crepe yang lebih besar, gunakan 2 sdk.
Letakkan perisa pilihan di atas inti dengan berhati-hati supaya tidak terkena kulit crepe.
Lipat bahagian bawah ke atas inti, diikuti bahagian kiri dan kanan. Akhir sekali, gulung dari bawah sekali lagi sehingga membentuk bantal.
Letakkan lapik kertas di antara setiap crepe bantal supaya tidak melekat antara satu sama lain.
Cara simpan: Di dalam peti sejuk jika mahu dihidangkan dalam tempoh 1 hingga 2 hari. Untuk simpanan lebih lama, bekukan sehingga 1 bulan dan pindahkan ke peti sejuk untuk dicairkan sebelum dihidangkan.
Bab 8
Frosting & Filling
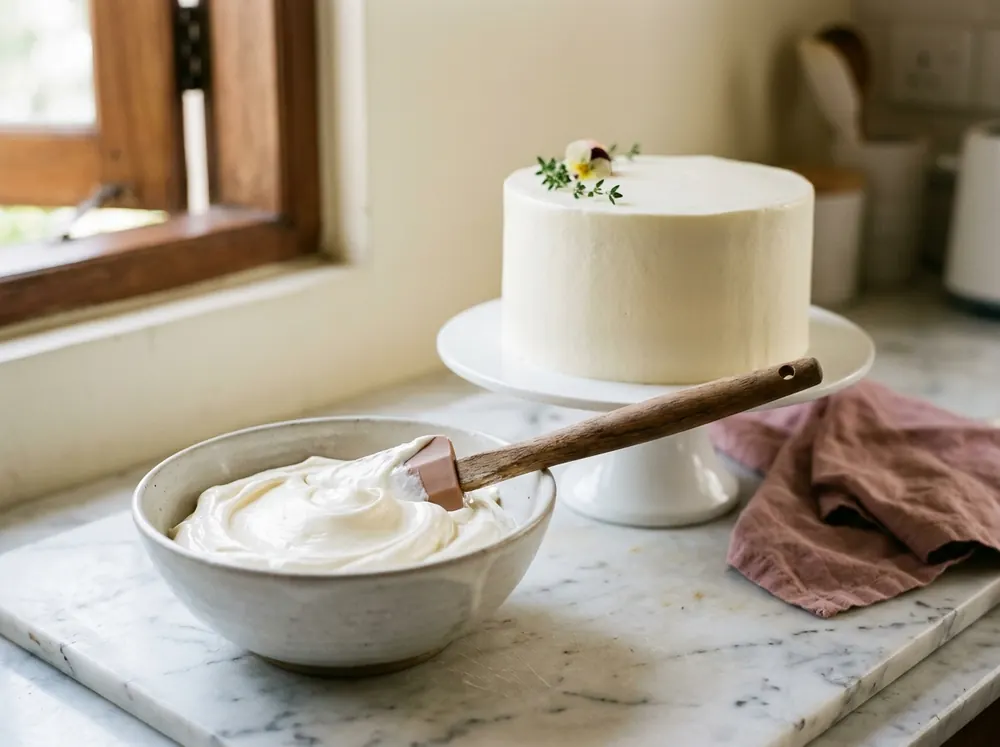
Bab ini mengumpulkan semua krim, frosting dan filling dalam ebook ini di satu tempat. Anda boleh memadankannya dengan mana-mana kek, contohnya Butter Cake dengan Cream Cheese Frosting, atau Sponge Cake dengan Swiss Meringue Buttercream.
Panduan Padanan
Frosting / Filling
Tekstur
Tahan cuaca panas
Sesuai untuk
Swiss Meringue Buttercream
Licin, ringan, tidak terlalu manis
Sederhana
Kek lapis, kek hari jadi, cupcake
Cream Cheese Frosting
Berkrim, sedikit masam
Rendah (simpan sejuk)
Carrot cake, red velvet, kek coklat
Buttercream Ringkas
Padat dan stabil
Tinggi
Hiasan kek, piping bunga
Whipped Cream Asas
Sangat ringan dan gebu
Rendah (hidang segera)
Pavlova, crepe, dessert sejuk
Ganache Coklat
Berkilat atau gebu
Sederhana
Kesan drip, salutan, filling
Mousse Coklat
Lembut
Rendah (simpan sejuk)
Filling kek lapis
Strawberry Compote
Seperti jem buah segar
Tinggi
Victoria sandwich, cheesecake, pavlova
Siraman Gula Melaka
Sirap pekat
Tinggi
Kek pandan, burnt cheesecake
8.1 Swiss Meringue Buttercream
Buttercream yang licin, ringan dan tidak terlalu manis. Sesuai untuk menyalut kek dengan kemas.
Hasil
cukup untuk 1 kek 8 inci (3 lapis)
Tahap
Mencabar
Bahan
Cara Penyediaan
Didihkan sedikit air di dalam periuk. Letakkan mangkuk berisi putih telur dan gula di atasnya (double boil). Pastikan dasar mangkuk tidak menyentuh air.
Kacau tanpa henti sehingga gula larut sepenuhnya dan adunan terasa panas. Gosok sedikit adunan di antara jari. Adunan tidak sepatutnya terasa berpasir lagi. Teruskan mengacau supaya putih telur tidak termasak.
Pindahkan ke mixer dan pukul pada kelajuan tinggi sehingga kental, berkilat dan mangkuk terasa sejuk apabila disentuh (stiff peak).
Masukkan butter sedikit demi sedikit sambil terus dipukul sehingga berkrim dan licin.
Di dalam mangkuk lain, pukul non-dairy whipping cream, UHT whipping cream dan vanilla sehingga kembang.
Kaup kedua-dua adunan bersama sehingga sebati.
Cara simpan: Di dalam peti sejuk sehingga 1 minggu. Biarkan pada suhu bilik dan pukul semula sebelum digunakan.
8.2 Cream Cheese Frosting
Frosting berkrim dengan rasa masam manis yang seimbang. Pasangan klasik untuk carrot cake dan kek coklat.
Digunakan dalam: 2.7 Carrot Cake, 3.1 Devil's Food Chocolate Cake
Bahan
Cara Penyediaan
Pukul cream cheese dan gula aising sehingga berkrim.
Masukkan butter dan pukul sehingga sebati.
Masukkan whipping cream dan vanilla, kemudian pukul sekejap sehingga sebati sahaja.
Cara simpan: Di dalam peti sejuk sehingga 5 hari.
8.3 Buttercream Ringkas
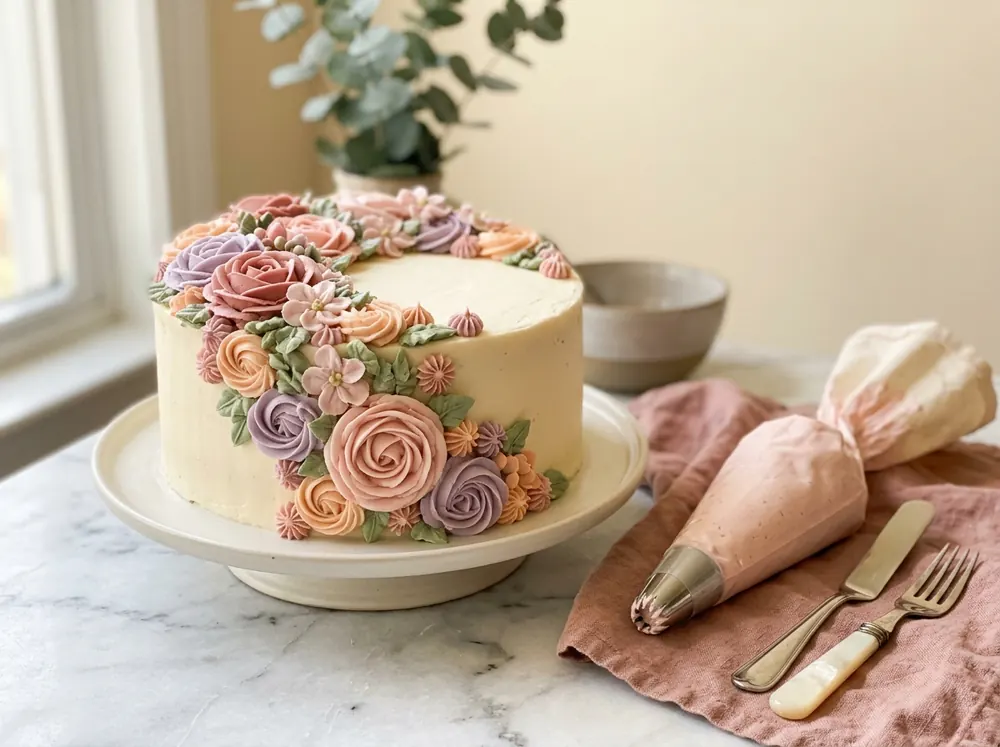
Buttercream yang padat, stabil dan tahan cuaca panas. Sesuai untuk piping bunga dan hiasan.
Digunakan dalam: 2.8 Sponge Cake
Bahan
Cara Penyediaan
Pukul semua bahan sehingga kembang dan gebu.
Cara simpan: Di dalam bekas kedap udara di dalam peti sejuk sehingga 2 minggu.
8.4 Whipped Cream Asas
Krim yang ringan dan gebu untuk pavlova, crepe dan dessert sejuk.
Digunakan dalam: 6.4 Pavlova
Bahan
Cara Penyediaan
Campurkan semua bahan dan pukul sehingga kental.
Berhenti sebaik sahaja krim kental. Jika terus dipukul, krim akan pecah dan berketul.
Cara simpan: Gunakan segera, atau simpan di dalam peti sejuk sehingga 1 hari.
8.5 Ganache Coklat (3 Kepekatan)
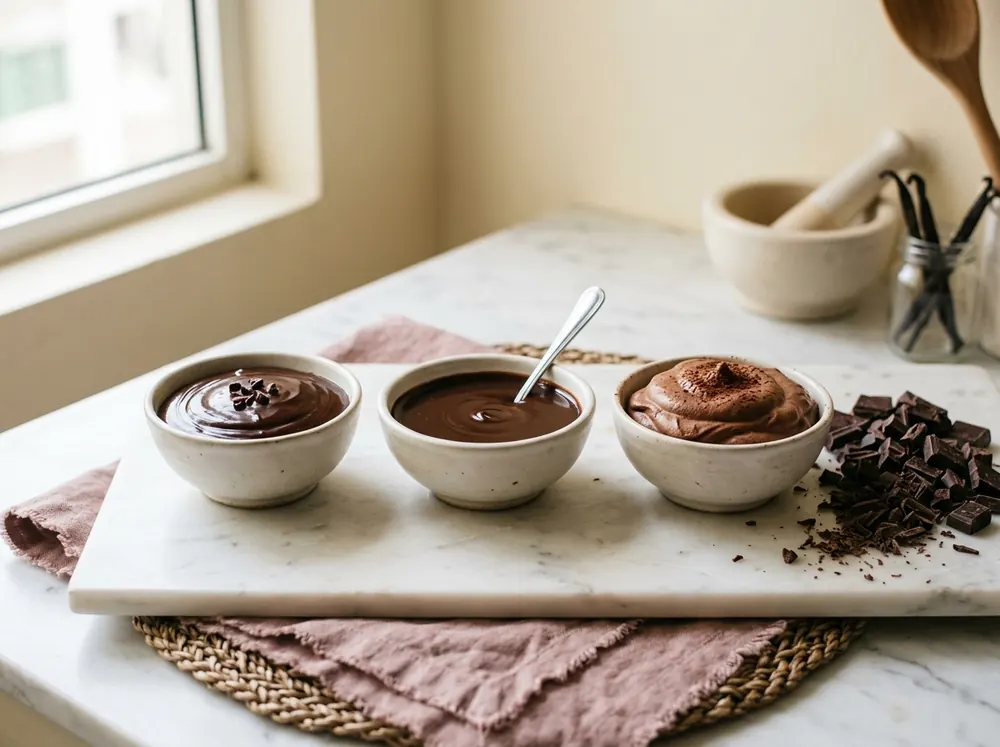
Ganache hanya memerlukan dua bahan utama, iaitu coklat dan krim. Nisbah kedua-dua bahan inilah yang menentukan kepekatannya.
Jenis
Nisbah coklat : krim
Contoh sukatan
Kegunaan
Ganache Salutan
2 : 1
400 g coklat + 200 g krim
Salutan kek, kesan drip
Ganache Siraman
1 : 1
100 g coklat + 100 g krim
Siraman atas brownies, sos
Ganache Pukul (Whipped)
±1.6 : 1
200 g coklat + 125 ml krim + 20 g sirap glukos + 15 g butter
Salutan gebu, filling
Digunakan dalam: 3.1 Devil's Food (salutan), 3.2 Absolute Chocolate (pukul), 5.2 dan 5.4 Brownies (siraman)
Cara Penyediaan Ganache Salutan dan Siraman
Panaskan whipping cream dengan api perlahan sehingga mula berwap. Jangan biarkan mendidih.
Matikan api dan masukkan coklat yang telah dicincang. Biarkan selama 1 minit.
Kacau perlahan-lahan dari tengah sehingga licin dan berkilat.
Sejukkan sehingga mencapai kepekatan yang dikehendaki.
Cara Penyediaan Ganache Pukul
Panaskan krim dan sirap glukos sehingga keluar buih kecil di tepi periuk.
Tuang ke atas coklat yang telah dicincang dan kacau rata. Masukkan butter dan gaul sehingga sebati.
Sejukkan sepenuhnya, kemudian pukul dengan mixer sehingga berkrim dan gebu.
Cara simpan: Di dalam peti sejuk sehingga 1 minggu. Panaskan sedikit secara double boil untuk mencairkannya semula.
8.6 Mousse Coklat
Mousse lembut yang set dengan bantuan gelatin. Sesuai sebagai filling kek lapis.
Digunakan dalam: 3.2 Absolute Chocolate Cake
Bahan
Cara Penyediaan
Tabur gelatin ke atas air dan biarkan kembang. Cairkan secara double boil sehingga larut sepenuhnya.
Cairkan coklat secara double boil.
Masak kuning telur secara double boil sambil dikacau tanpa henti sehingga pekat dan berkrim.
Masukkan gelatin ke dalam kuning telur dan gaul rata. Masukkan coklat cair dan kacau rata.
Pukul whipping cream sehingga kental. Kaup sepertiga krim ke dalam adunan coklat, kemudian masukkan baki krim dan vanilla, dan kaup sehingga sebati.
Gunakan segera sebelum mousse mula set.
Cara simpan: Kek yang berisi mousse perlu disimpan di dalam peti sejuk dan tahan sehingga 3 hari.
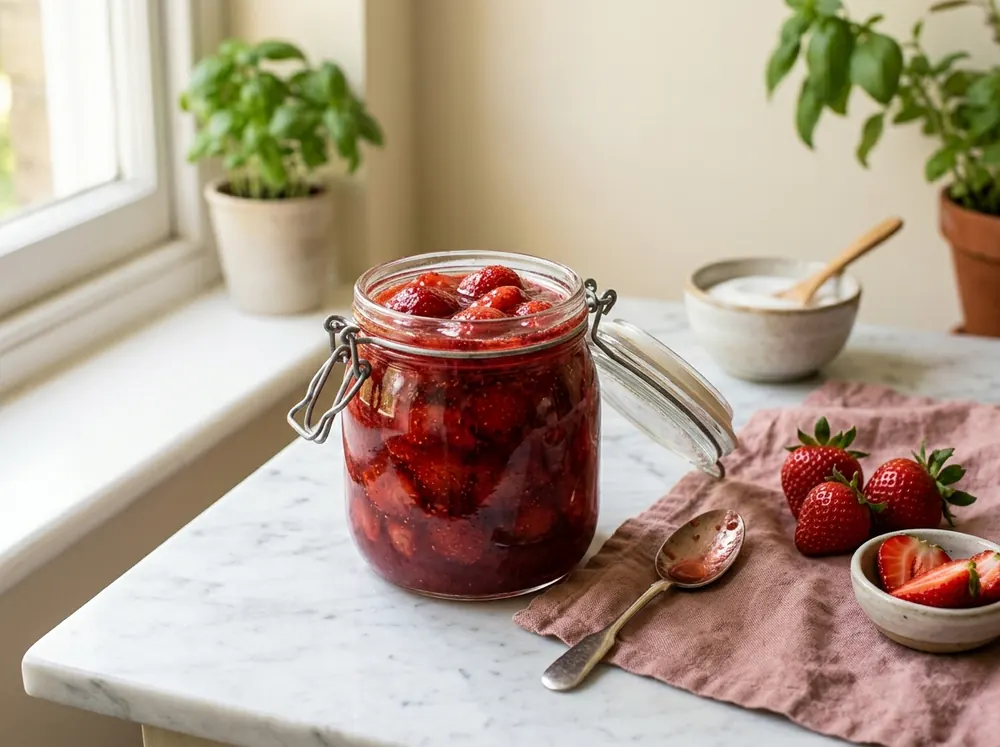
8.7 Strawberry Compote
Sos strawberi segar yang pekat dan berkilat, sesuai sebagai filling kek atau topping cheesecake.
Digunakan dalam: 2.2 Victoria Sandwich Cake
Bahan
Cara Penyediaan
Masak strawberi dan gula kastor dengan api kecil sehingga strawberi lembut dan mula menjadi seperti jem.
Masukkan jem strawberi dan baki gula, kemudian kacau rata.
Masukkan bancuhan tepung jagung sedikit demi sedikit sambil dikacau sehingga compote pekat.
Sejukkan sepenuhnya sebelum digunakan. Compote akan menjadi lebih pekat apabila sejuk.
Cara simpan: Di dalam balang bersih di dalam peti sejuk sehingga 1 minggu.
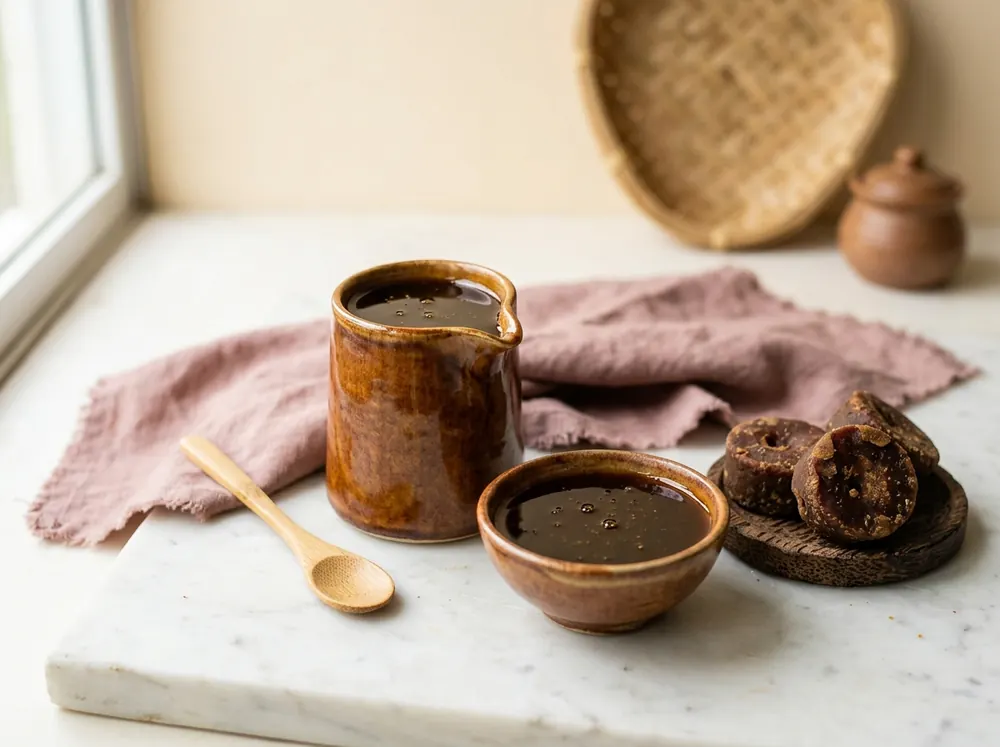
8.8 Siraman Gula Melaka
Sirap gula melaka berkrim untuk membasahkan kek dan menyiram dessert.
Digunakan dalam: 2.4 Pandan Gula Melaka Cake, 4.2B Pandan Gula Melaka Burnt Cheesecake
Bahan
Cara Penyediaan
Cairkan gula melaka bersama air dengan api perlahan sehingga larut. Tapis jika ada kotoran.
Masukkan whipping cream dan kacau sebati.
Sejukkan sebelum digunakan.
Cara simpan: Di dalam balang bersih di dalam peti sejuk sehingga 2 minggu.
Bonus
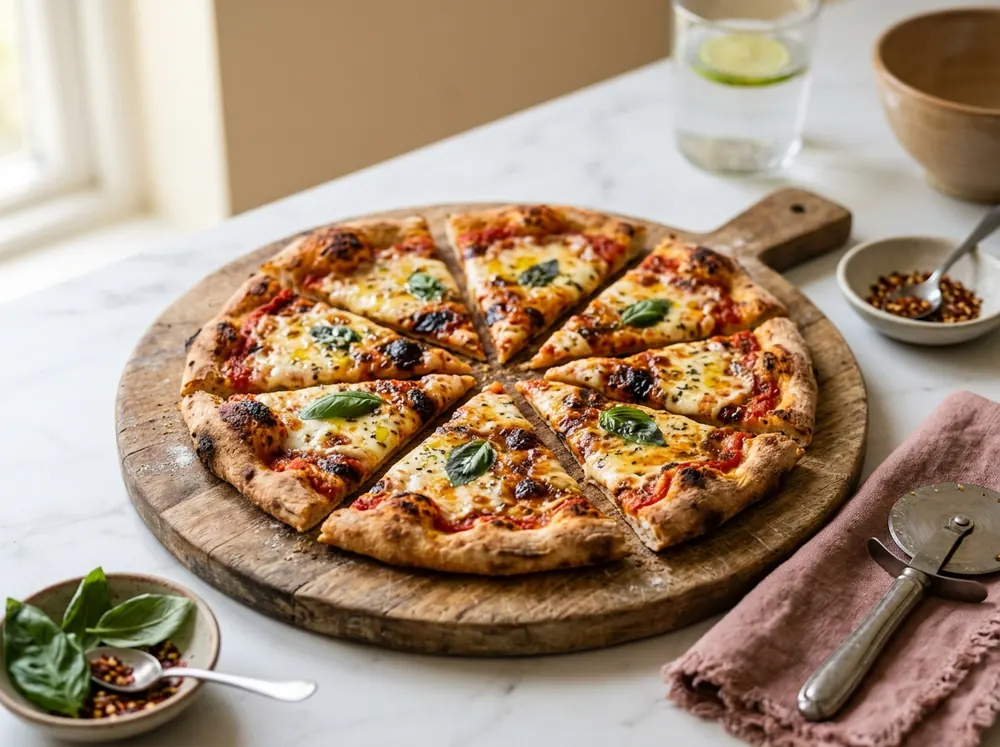
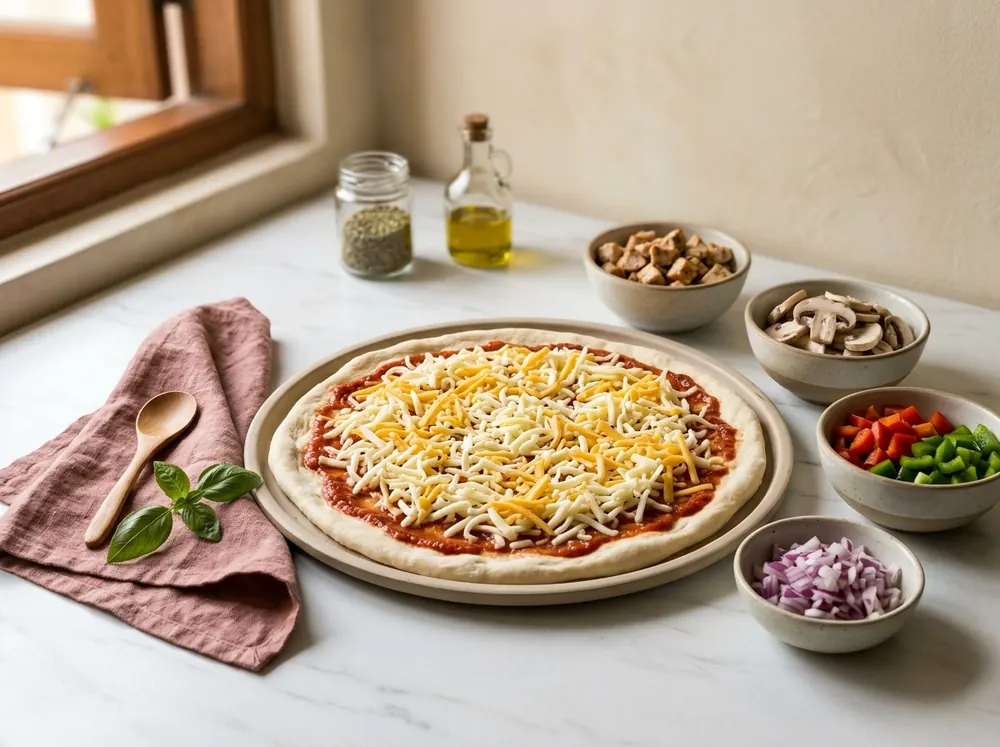
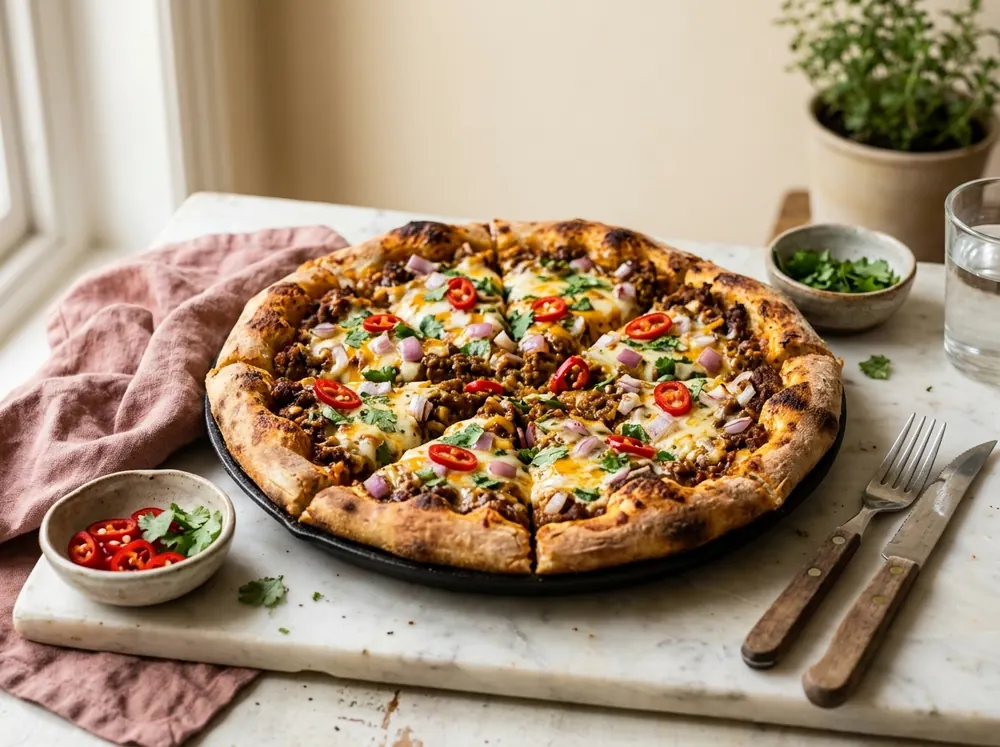
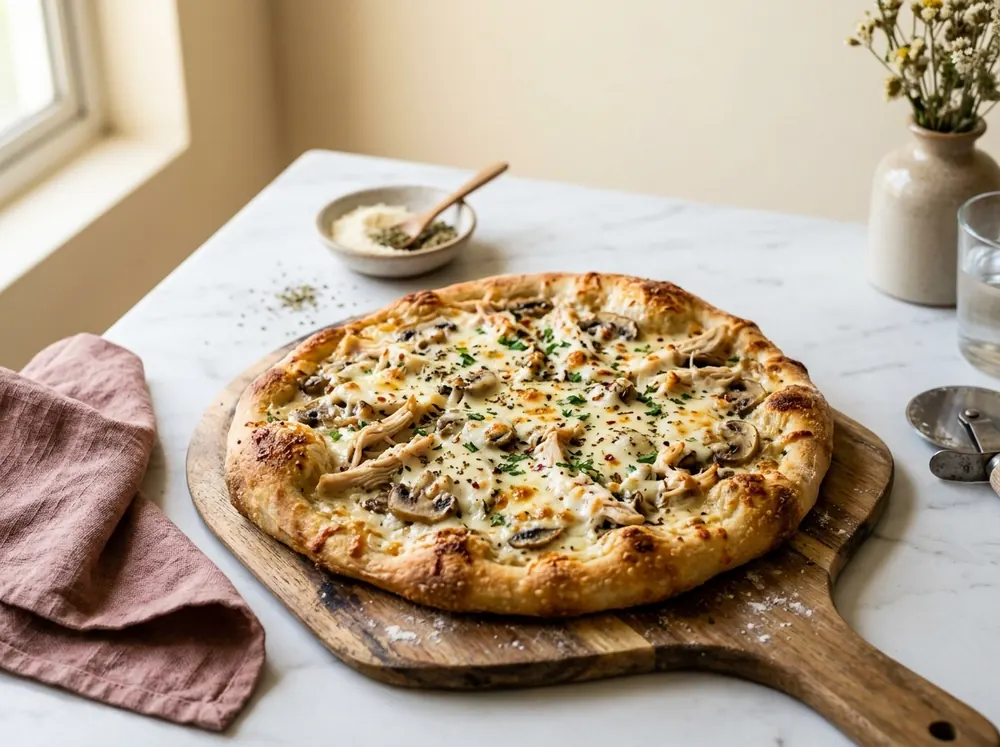
Pizza Homemade
Bab bonus ini mengandungi dua jenis doh pizza (tebal dan nipis) dan lima jenis sos yang boleh dipadankan mengikut citarasa, daripada sos Bolognese hingga sos kari pedas.
B.1 Pizza Base Tebal
Base pizza yang tebal dan lembut, seperti pizza pan di restoran.
Hasil
±4 base 9 inci
Suhu
180–200°C
Masa bakar
±15 minit
Tahap
Sederhana
Bahan
Cara Penyediaan (Menggunakan Mixer)
Masukkan semua bahan kecuali air dan minyak ke dalam mangkuk mixer.
Mulakan pada kelajuan 1, dan masukkan air sedikit demi sedikit.
Apabila doh hampir sebati, masukkan minyak.
Uli sehingga mangkuk licin dan doh tidak melekit di tangan. Doh tidak perlu terlalu elastik seperti doh roti.
Bahagikan doh mengikut saiz loyang: 200 g untuk loyang 9 inci, 150 g untuk loyang 8 inci dan 100 g untuk loyang 7 inci.
Bulatkan setiap doh, sapu sedikit minyak di permukaannya, masukkan ke dalam mangkuk dan tutup.
Biarkan doh mengembang dua kali ganda daripada saiz asal, lebih kurang 30 hingga 60 minit bergantung pada cuaca. Cuaca yang lembap atau sejuk memerlukan masa yang lebih lama.
Canai doh menggunakan rolling pin dan letakkan di dalam loyang. Cucuk permukaan doh dengan garpu supaya tidak mengembung semasa dibakar.
Biarkan selama 10 minit atau sehingga bahagian tepi doh sedikit mengembang.
Letakkan sos dan topping (rujuk B.3), kemudian bakar pada suhu 180 hingga 200°C selama lebih kurang 15 minit.
B.2 Pizza Base Nipis
Base pizza yang nipis dan sedikit rangup. Boleh dibuat menggunakan mixer atau breadmaker.
Hasil
±6 base 9 inci
Suhu
180–200°C
Masa bakar
12–15 minit
Tahap
Mudah
Bahan
Cara Penyediaan
Menggunakan breadmaker: Masukkan bahan mengikut turutan dalam manual breadmaker anda. Biasanya bahan cecair dimasukkan dahulu, diikuti bahan kering. Tekan butang Dough.
Menggunakan mixer:
Masukkan tepung, gula, garam dan yis. Letakkan yis dan garam berasingan kerana garam boleh melemahkan yis jika bersentuhan terus. Gaul sekejap.
Masukkan telur dan gaul sekejap. Masukkan air dan uli sehingga sebati.
Akhir sekali, masukkan shortening. Uli sehingga permukaan doh licin dan mangkuk mixer bersih. Doh tidak perlu elastik.
Langkah seterusnya:
Bahagikan doh kepada 130 g untuk setiap loyang 9 inci.
Susun di atas dulang dan biarkan selama 20 hingga 30 minit sehingga doh naik dua kali ganda.
Canai nipis, letakkan sos dan topping, kemudian bakar pada suhu 180 hingga 200°C selama 12 hingga 15 minit.
B.3 Cara Memasang dan Membakar Pizza
Sos: Sapu sos secara nipis dan rata. Tinggalkan lebih kurang 1 cm di bahagian tepi.
Topping: Susun daging, sayur-sayuran dan topping lain. Jangan letak terlalu banyak kerana base akan menjadi lembik dan tidak masak.
Bakar: Pada suhu 180 hingga 200°C selama 12 hingga 15 minit sehingga keju cair dan bahagian tepi base berwarna perang keemasan.
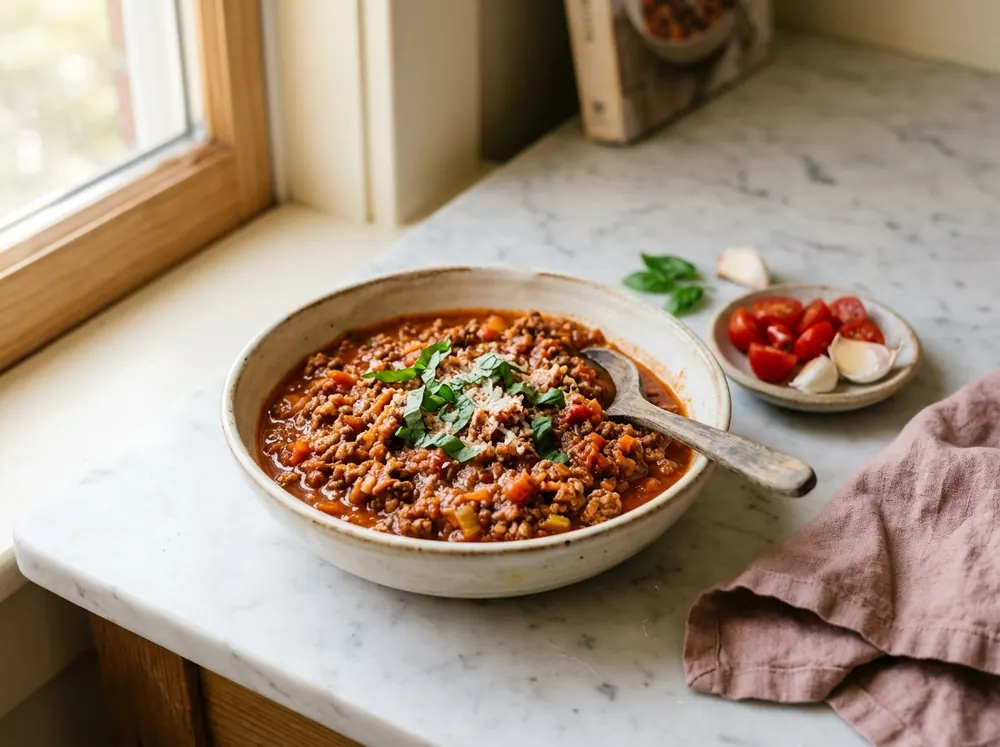
B.4 Sos Bolognese
Sos tomato asas yang wangi. Sayur-sayuran di dalamnya memberikan rasa manis semula jadi tanpa perlu menggunakan MSG.
Bahan
Cara Penyediaan
Panaskan minyak dan tumis bawang holland sehingga sedikit layu.
Masukkan semua bahan lain dan perasakan.
Masak dengan api perlahan selama 15 hingga 20 minit sambil dikacau sekali-sekala sehingga sos pekat.
Sejukkan dan simpan di dalam bekas kedap udara.
Variasi: Tumis daging atau ayam kisar bersama bawang untuk sos Bolognese berdaging.
Cara simpan: Di dalam peti sejuk sehingga 5 hari, atau bekukan sehingga 1 bulan.
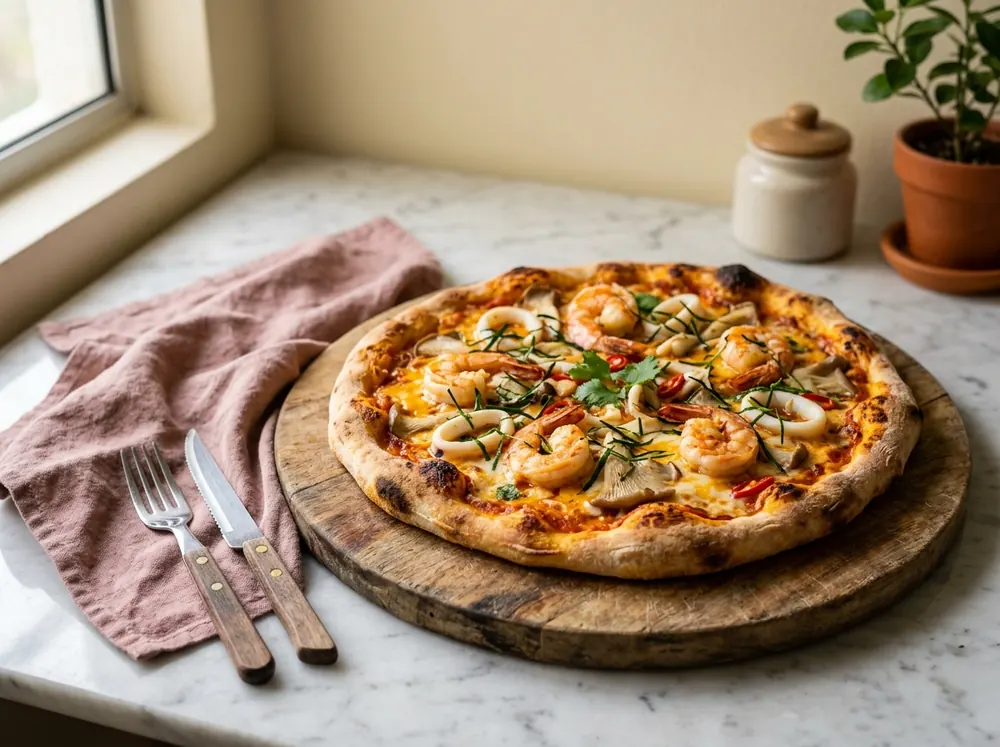
B.5 Sos Tomyam
Sos pizza pedas dan masam gaya Thai yang dibuat daripada Sos Bolognese dan pes tomyam.
Bahan
Cara Penyediaan
Campurkan Sos Bolognese dengan pes tomyam. Mulakan dengan 1 hingga 2 sdb pes tomyam bagi setiap 100 ml sos, rasa, kemudian tambah mengikut tahap pedas yang dikehendaki.
Cadangan topping: udang, sotong, ayam, cendawan dan daun limau purut yang dihiris halus.
Cara simpan: Sama seperti Sos Bolognese.
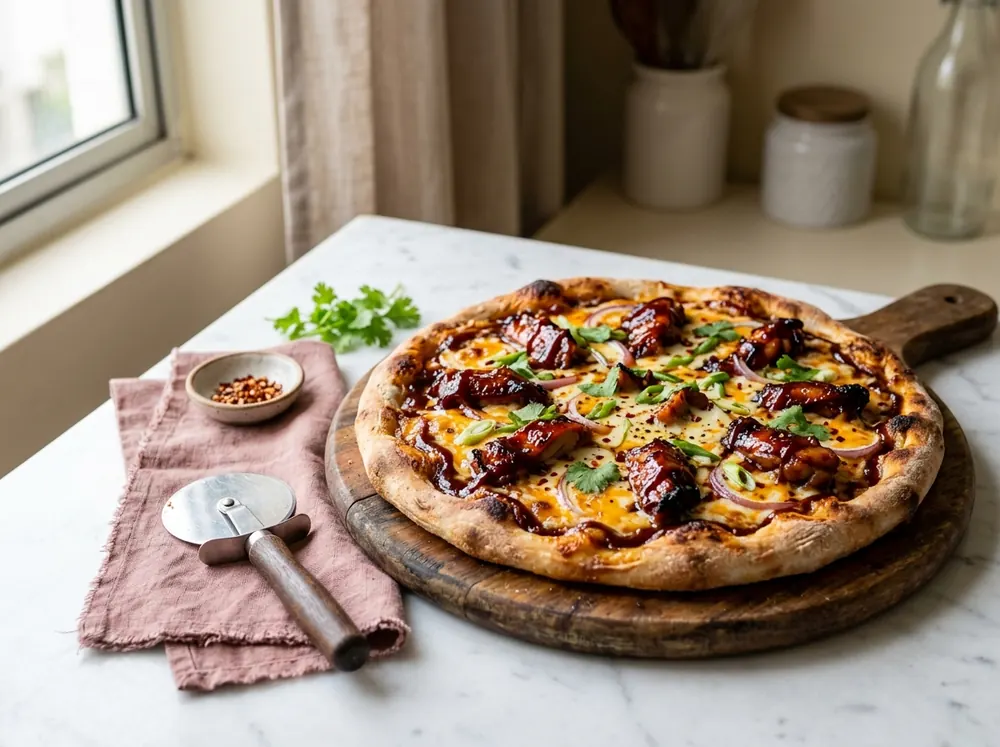
B.6 Sos BBQ
Sos BBQ yang manis dan ringkas, sesuai untuk pizza ayam atau daging.
Bahan
Cara Penyediaan
Campurkan semua bahan sehingga sebati.
Salut hirisan ayam, kambing atau daging dengan sebahagian sos BBQ dan masak seketika.
Sapu baki sos BBQ di atas base pizza, susun daging, kemudian tabur keju cheddar dan mozzarella.
Bakar pada suhu 180 hingga 200°C selama lebih kurang 15 minit.
Cara simpan: Di dalam peti sejuk sehingga 1 minggu.
B.7 Sos Kari Pedas
Sos kari daging untuk pizza berperisa tempatan. Resepi ini menghasilkan kuantiti yang banyak, jadi sesuai untuk dibekukan atau untuk jualan.
Bahan
Cara Penyediaan
Panaskan minyak dan tumis semua bahan kisar sehingga garing dan naik bau.
Masukkan tomato puree dan serbuk kari. Masak sehingga pecah minyak.
Masukkan daging kisar dan masak sehingga daging kecut.
Masukkan air dan semua perasa. Masak sehingga sos agak kering.
Masukkan bawang holland dan kacau seketika. Matikan api dan sejukkan.
Cara simpan: Di dalam peti sejuk sehingga 4 hari, atau bekukan sehingga 1 bulan.
B.8 Sos Putih (White Sauce)
Sos putih berkrim dengan keju cheddar. Sesuai untuk pizza ayam, cendawan atau makanan laut.
Bahan
Cara Penyediaan
Cairkan butter di dalam periuk. Masukkan susu dan masak sehingga keluar sedikit buih di sekeliling periuk.
Masukkan keju cheddar, oregano dan lada hitam, kemudian kacau sehingga keju cair.
Masukkan bancuhan tepung sedikit demi sedikit sambil dikacau supaya tidak berketul.
Kacau sehingga sos sedikit pekat. Sos akan menjadi lebih pekat apabila sejuk.
Cara simpan: Di dalam peti sejuk sehingga 3 hari.
Penutup
Terima kasih kerana membaca ebook ini hingga ke halaman terakhir.
Jangan berputus asa jika percubaan pertama tidak menjadi seperti yang diharapkan. Kek yang mendap, cookies yang hangus dan krim yang pecah adalah perkara biasa bagi setiap baker. Semakin kerap anda mencuba, semakin mudah anda mengenal pasti tekstur adunan yang betul.
Mulakan dengan resepi bertahap Mudah, kemudian cuba resepi yang lebih mencabar apabila anda sudah yakin.
Kongsi hasil anda. Kami ingin melihat hasil air tangan anda. Tag kami di media sosial: [masukkan handle media sosial anda]
Ada soalan? Hubungi kami di: [masukkan e-mel atau nombor WhatsApp anda]
Terima kasih kerana menyokong Arkib Digital. Selamat mencuba.
More than 35 cake, cheesecake, brownie, cookie and crepe recipes for beginners, with measurements in grams and cups, oven temperatures and fixes for when things go wrong. Bonus: homemade pizza.
This ebook was written especially for people who are new to baking. If you have ever baked a cake that turned out hard, sank in the middle or did not rise, you are not alone. Most of these problems can be avoided with correct measurements and the right technique.
Inside you will find more than 35 dessert and bakery recipes, covering cakes, cheesecakes, brownies, cookies and crepes, plus a bonus chapter on homemade pizza. Every recipe includes measurements in grams and cups, baking temperature and time, and guidance on avoiding common mistakes.
How to Use This Ebook
Read Chapter 1 first. Most cakes fail because of wrong measurements, not because of the recipe.
Read each recipe to the end before you start, and set out all the ingredients on the table.
Start with recipes marked Easy before trying Medium and Challenging ones.
See Chapter 8 for frostings and fillings that can be paired with many different cakes.
Happy baking.
Arkib Digital
Chapter 1
Baking Basics for Beginners
Before you start baking, take a little time to read this chapter. The information here is used in every recipe that follows.
1.1 Why Accurate Measuring Matters
When cooking a savoury dish, we can add salt or sugar as we taste. Baking does not work that way. Every ingredient has its own job: flour gives the cake its structure, eggs bind the ingredients, sugar keeps it moist and baking powder makes it rise. If one ingredient is too much or too little, you only see the result once the cake comes out of the oven. By then, it is too late to fix.
The main reason cakes fail is usually not a bad recipe, but inaccurate measuring.
1.2 Basic Tools
Essential tools:
Tool
Use
Digital scale
The most important tool. More accurate than cups.
Dry measuring cups (set of ¼, ⅓, ½, 1)
Flour, sugar, cocoa powder
Liquid measuring jug (clear)
Milk, water, oil
Measuring spoons
Baking powder, salt, essence
Mixer (hand or stand)
Beating butter, eggs and cream
Rubber spatula
Folding batter and scraping the bowl
6, 7 and 8 inch baking pans
The sizes used most often in this ebook
Baking paper
Lining pans so cakes do not stick
Useful extras: oven thermometer, flour sifter, piping bag and nozzles, turntable and cooling rack.
1.3 How to Measure Correctly
Dry ingredients (flour, sugar, cocoa powder)
Use a spoon to fill the measuring cup. Do not scoop directly with the cup.
Level off the top with the back of a knife.
Do not tap, shake or press the cup.
Brown sugar should be packed into the cup. To check, turn the cup over onto a plate. If the sugar keeps the shape of the cup, your measurement is correct.
Liquid ingredients (milk, water, oil)
Place the jug on a flat surface. Do not hold the jug while measuring.
Pour the liquid slowly.
Bend down until your eyes are level with the liquid. Make sure the bottom of the liquid surface sits exactly on the measuring line.
Sticky ingredients (honey, syrup): lightly oil the cup first so everything slides out easily.
The four most common measuring mistakes:
Packing flour into the cup. You can end up with up to 25% more than needed.
Letting the ingredient heap above the rim of the cup.
Shaking the cup to make the flour settle.
Measuring 1 cup by filling a ½ cup twice. Use the correct cup size.
1.4 Cup to Gram Conversion Chart
Ingredient
¼ cup
⅓ cup
½ cup
⅔ cup
¾ cup
1 cup
Butter
57 g
76 g
113 g
151 g
170 g
227 g
All-purpose flour
31 g
42 g
63 g
83 g
94 g
125 g
Bread flour (high protein)
34 g
45 g
68 g
91 g
102 g
136 g
Cocoa powder
21 g
28 g
43 g
57 g
64 g
85 g
Icing sugar
30 g
40 g
60 g
80 g
90 g
120 g
Granulated / caster sugar
50 g
67 g
100 g
134 g
150 g
200 g
Brown sugar (packed)
55 g
73 g
110 g
147 g
165 g
220 g
Abbreviations and spoon measures: tbsp = tablespoon, tsp = teaspoon. 1 tbsp = 3 tsp = 15 ml. 1 cup of liquid = about 240 ml.
1.5 Egg Sizes by Grade
Most baking recipes use grade A eggs. If you use another grade, weigh the eggs without their shells so the total amount is the same.
Grade
Weight per egg (with shell)
AA
70 g and above
A
65 to 69.9 g
B
60 to 64.9 g
C
55 to 59.9 g
1.6 Know Your Ingredients
Ingredient
Role
All-purpose flour
Gives the cake its structure
Self-raising flour
Flour already mixed with a raising agent
Baking powder and baking soda
Make the cake rise. Do not mix them up, as baking soda is stronger.
Eggs
Bind the ingredients, help the cake rise and add colour
Butter
Adds flavour, softness and aroma
Oil
Keeps the cake moist for longer
Sugar
Adds sweetness, moisture and a golden colour
Cream cheese
The main ingredient in cheesecakes and frostings
Dairy whipping cream
Real dairy cream. Tastes better but is less stable.
Non-dairy whipping cream
More stable and heat-resistant, but sweeter
Important: take butter, eggs and cream cheese out of the fridge 30 to 60 minutes early so they reach room temperature. Cold ingredients are hard to combine and can make the batter lumpy.
1.7 Ingredient Substitutes
If you do not have
Replace with
Buttermilk (½ cup)
½ cup fresh milk + 1 tbsp vinegar or lemon juice. Leave for 10 minutes before using.
Self-raising flour (125 g)
125 g all-purpose flour + 1½ tsp baking powder + ¼ tsp salt
Caster sugar
Blend regular granulated sugar until fine
Icing sugar
Blend granulated sugar with 1 tsp cornflour until powdery
1.8 Know Your Oven
Every oven is different, even ovens of the same brand. Here are the basics:
Preheat the oven for 10 to 15 minutes before putting the batter in.
Top and bottom heat is the setting used for most recipes in this ebook.
Place the pan on the middle rack so the heat is even.
Do not open the oven door during the first two thirds of the baking time. The cake may sink.
Skewer test: insert a skewer into the centre of the cake. If it comes out clean, the cake is done.
An oven thermometer costs around RM15 to RM30 and is very helpful if your oven's real temperature does not match its setting.
1.9 Baking Terms
Term
Meaning
Well combined
All ingredients evenly mixed with no lumps
Light and fluffy / creamy
Butter and sugar beaten until pale and fluffy
Fold
Gently mix with a spatula from the bottom up so the air in the batter is not lost
Soft peak
Cream or egg whites form peaks that curl over at the tip
Stiff peak
Peaks stand straight up. The mixture does not fall even when the bowl is turned over.
Double boil
Melting ingredients in a bowl set over a pot of simmering water
Grease
Brushing the pan with butter or oil
Overbeat
Beating too much. Cream can split and cakes can turn tough.
Alternately
Adding dry and wet ingredients in turns
Chapter 2
Classic Cakes
This chapter contains basic cakes that are often made at home and are easy to sell. Most use the method of beating butter and sugar, so master the first recipe before trying the others.
2.1 Butter Cake (+ Cupcake Variation)
A basic cake every baker should master. The same batter can also be used to make cupcakes.
Pan
8 inch round
Temperature
160°C, top and bottom heat
Time
50–60 minutes
Level
Easy
Ingredients
Method
Preheat the oven to 160°C. Grease the pan and line it with baking paper.
Beat the butter and sugar until light, fluffy and pale, about 5 to 7 minutes.
Add the eggs one at a time. Make sure each egg is well combined before adding the next. Then add the vanilla essence.
Add the flour and milk alternately, starting and ending with flour. Use a low speed and mix only until combined.
Pour the batter into the pan and level it.
Bake for 50 to 60 minutes. Insert a skewer into the centre of the cake. If it comes out clean, the cake is done.
Leave the cake in the pan for 10 minutes, then remove it and cool on a cooling rack.
Cupcake variation: Fill paper cases only halfway with batter. Bake at 170°C for 18 to 22 minutes. This recipe makes about 24 cupcakes. Decorate with buttercream from Chapter 8.
Storage: In an airtight container at room temperature for 3 to 4 days.
2.2 Victoria Sandwich Cake
An English-style layer cake filled with buttercream and strawberry compote. It looks impressive, but it is not difficult to make.
Pan
3 × 8 inch
Temperature
150°C, top and bottom heat
Time
30 minutes
Level
Medium
Ingredients
Method
Preheat the oven to 150°C. Line all three pans with baking paper.
Beat Ingredients A until combined and the sugar has dissolved.
Add Ingredients B a little at a time while beating so the batter does not split.
Add Ingredients C and mix gently. Do not overbeat.
Add Ingredients D and mix only until combined.
Divide the batter equally between the three pans. Weigh the batter so each layer is the same thickness.
Bake for 30 minutes. Cool completely.
Assemble in this order: cake, buttercream, compote, cake, buttercream, compote, cake. Dust the top with icing sugar.
Storage: In the fridge for up to 3 days. Take it out 20 minutes before serving.
2.3 Marble Seksay Cake
A colourful marble cake that looks lovely when sliced. Great for birthdays and for selling.
Pan
8 inch
Temperature
150°C, top and bottom heat
Time
40–45 minutes
Level
Medium
Ingredients
Method
Preheat the oven to 150°C. Line the pan with baking paper.
Beat the margarine and caster sugar until light and fluffy.
Add the eggs one at a time until combined.
Slowly add the milk powder, evaporated milk and condensed milk.
Sift the flour with the baking powder. Add to the batter and mix only until combined.
Divide the batter into three or four bowls. Leave one bowl plain and colour the others.
Spoon the batters alternately into the pan. Swirl once or twice with a skewer for a marble pattern. Do not over-swirl, as the colours will blend and look muddy.
Bake for 40 to 45 minutes.
Storage: In an airtight container in a cool place for up to 5 days.
2.4 Pandan Gula Melaka Cake
A fragrant pandan cake, soaked with gula melaka and layered with coconut cream.
Pan
3 × 8 inch
Temperature
150°C, top and bottom heat
Time
20 minutes
Level
Medium
Cake Ingredients
Gula Melaka Syrup
Cream Topping
Method
Cake: Beat Ingredients A until light and fluffy. Add the eggs one at a time, followed by the vanilla. Add Ingredients C and D alternately until combined.
Divide the batter between the three lined pans. Bake for 20 minutes, then cool.
Gula melaka syrup: Melt the gula melaka with the water over low heat. Add the whipping cream, stir well and let it cool.
Cream: Whip all the topping ingredients until thick.
Assembly: Soak each cake layer (except the top one) with gula melaka syrup, then spread a thin layer of cream. Repeat for the next layer. Decorate the top as you like.
Storage: In the fridge for up to 3 days.
2.5 Pineapple Upside Down Cake
A butter cake with a layer of caramelised pineapple. The cake is baked upside down, then turned over after baking.
Pan
9 inch (not a loose-bottom pan)
Temperature
160°C, top and bottom heat
Time
45–55 minutes
Level
Medium
Caramel Pineapple Layer
50 g butter
150 g brown sugar (±⅔ cup)
Canned pineapple rings, drained (keep the juice)
Red cherries (optional)
Cake Batter
Method
Preheat the oven to 160°C.
Caramel: Melt the butter and brown sugar over low heat until it turns into caramel. Pour into the pan and spread evenly.
Arrange the pineapple rings on the caramel. Place a cherry in the centre of each ring.
Cake: Beat the butter and sugar until light and fluffy. Add the eggs one at a time. Add the pineapple juice, buttermilk and flour alternately.
Pour the batter slowly over the pineapple and level it.
Bake for 45 to 55 minutes until a skewer comes out clean.
Leave for only 5 to 10 minutes, then turn the cake out onto a plate.
Storage: In the fridge for up to 3 days. Warm slightly before serving.
2.6 Fruit Pastry Cake
A moist yogurt cake topped with fresh fruit and a crunchy crumble.
Pan
8 inch (thick) or 9 inch (thin)
Temperature
150–160°C, top and bottom heat
Time
40 minutes
Level
Easy
Cake Ingredients
Crumble
Method
Preheat the oven to 150 to 160°C. Line the pan with baking paper.
Crumble: Rub all the crumble ingredients together with your fingertips until they look like coarse sand. Keep in the fridge while you make the cake.
Cake: Beat the butter and sugar until creamy. Add the eggs, vanilla and lemon zest. The batter may look slightly curdled, and this is normal.
Sift the flour with the baking powder. Add the flour and yogurt alternately until combined.
Pour the batter into the pan. Arrange the fruit on top, then sprinkle over the crumble.
Bake for 40 minutes until cooked.
Storage: In the fridge for up to 3 days.
2.7 Carrot Cake
A moist carrot cake with walnuts and pineapple, layered with cream cheese frosting.
Pan
3 × 8 inch or 2 × 9 inch
Temperature
170°C, top and bottom heat
Time
30–35 minutes
Level
Medium
Cake Ingredients
Cream Cheese Frosting
Method
Preheat the oven to 170°C. Line the pans with baking paper.
Mix the flour, baking soda, baking powder and salt in a bowl.
In another bowl, beat the oil, eggs, sugar and vanilla until combined and slightly pale.
Add the flour mixture and stir only until combined. Add the carrots, pineapple and walnuts.
Divide the batter between the pans and bake for 30 to 35 minutes until a skewer comes out clean.
Frosting: Beat the cream cheese and icing sugar until creamy. Add the butter and beat again. Finally, add the whipping cream.
Make sure the cake is completely cool, then layer it with the frosting.
Storage: In the fridge for up to 4 days.
2.8 Sponge Cake (Premix)
A light and fluffy sponge cake made with premix flour. Ideal for beginners who want consistent results, and a good base for birthday cakes.
Pan
8 inch
Temperature
170°C, top and bottom heat
Time
25–30 minutes
Level
Easy
Cake Ingredients
Decorating Buttercream
Method
Preheat the oven to 170°C. Line only the base of the pan. Do not grease the sides.
Put the premix, eggs and milk in a bowl. Beat on high speed until very light, pale and thick, about 8 to 10 minutes.
Add the oil a little at a time and fold gently with a spatula until combined. Make sure no oil pools at the bottom of the bowl.
Pour into the pan and tap gently to release large air bubbles.
Bake for 25 to 30 minutes.
Buttercream: Beat all the ingredients until light and fluffy. Spread over the cooled cake.
Storage: In an airtight container for 2 to 3 days. Once decorated with cream, keep in the fridge.
Chapter 3
Chocolate Cakes
Two chocolate cake recipes in this chapter: a classic chocolate cake layered with cream cheese, and a three-layer cake with mousse and ganache.
3.1 Devil's Food Chocolate Cake
A dark, moist and rich chocolate cake, layered with cream cheese and coated in glossy chocolate. One of the best-selling chocolate cakes.
Pan
3 × 8 inch
Temperature
150°C, top and bottom heat
Time
25–30 minutes
Level
Medium
Cake Ingredients
Cream Cheese Filling
Chocolate Topping (Ganache)
Cake Method
Preheat the oven to 150°C. Line all three pans with baking paper.
Sift the flour, cocoa powder, baking powder and baking soda together.
Beat the oil and sugar until combined. Add the eggs and stir well.
Add the buttermilk and vanilla alternately with the flour mixture, and stir well.
Add the hot water and stir until combined. The batter will be very runny, and this is normal for this cake.
Divide the batter equally between the three pans. Bake for 25 to 30 minutes until a skewer comes out clean. Cool completely.
Filling Method
Beat the icing sugar and cream cheese until creamy.
Add the butter and beat until combined.
Add the vanilla and whipping cream, then beat briefly until just combined.
Ganache Method
Heat the whipping cream over low heat until it starts to steam. Do not let it boil.
Turn off the heat, add the chocolate and leave for 1 minute. Stir until smooth and glossy.
Put it in the fridge for a while until the ganache reaches the thickness you want. The longer it chills, the thicker it gets.
Assembly
Assemble in this order: cake, cream cheese, cake, cream cheese, cake, ganache. Let the ganache run down the sides of the cake for a drip effect.
Storage: In the fridge for up to 4 days. Take it out 20 to 30 minutes before serving so the cake is softer.
3.2 Absolute Chocolate Cake
A three-layer chocolate cake with chocolate mousse and a ganache coating. Perfect for special occasions.
Pan
3 × 8 inch
Temperature
150°C, top and bottom heat
Time
20–25 minutes
Level
Challenging
Cake Ingredients
Chocolate Mousse (Filling)
Chocolate Ganache
Extras: a little coffee (for moistening the cake), cocoa powder or icing sugar (for decorating)
Cake Method
Preheat the oven to 150°C. Grease all three pans and line them with baking paper.
Put all the ingredients except the boiling water into the mixer bowl. Beat on medium speed for 1 minute.
Add the boiling water and beat until combined.
Divide the batter between the three pans and bake for 20 to 25 minutes. Cool completely.
Mousse Method
Sprinkle the gelatine over the 45 ml water and let it bloom. Melt it over a double boiler, stirring gently until fully dissolved.
Melt the 100 g chocolate over a double boiler.
Cook the egg yolks over a double boiler, stirring constantly until thick and creamy. If you stop stirring, the eggs will cook and turn lumpy.
Pour the gelatine into the egg yolks and mix well. Add the melted chocolate, stir well and set aside.
In another bowl, whip the whipping cream until thick.
Fold a third of the cream into the chocolate mixture until even. Then add the remaining cream and vanilla, and fold until combined.
Ganache Method
Heat the cream and glucose syrup until small bubbles appear at the edge of the pot.
Pour over the chopped chocolate and stir well. Add the butter and mix until combined.
Let it cool, then beat until creamy.
Assembly
Place one cake layer on a cake board. Moisten the surface with a little coffee, just enough to dampen it.
Spread with chocolate mousse and sprinkle with chopped chocolate.
Place the second cake layer on top and repeat until all layers are used.
Cover the whole cake with the remaining mousse. Chill in the fridge for at least 6 hours.
Coat the cake with ganache and decorate as you like. Keep in the fridge until the ganache sets.
Dust with cocoa powder or icing sugar before serving (optional).
Storage: In the fridge for up to 3 days.
Chapter 4
Cheesecakes
This chapter starts with one basic Burnt Cheesecake recipe and three variations, followed by an Unbaked Cheesecake that needs no oven.
4.1 Burnt Cheesecake: Basic Recipe (Vanilla)
A Basque-style cheesecake with a burnt, caramelised top and a soft, creamy centre. The burnt colour on top is intentional, and it is what gives this cheesecake its special flavour.
Pan
6 inch
Temperature
200°C, top and bottom heat
Time
55–60 minutes
Level
Easy
Ingredients
Method
Preheat the oven to 200°C.
Grease the pan and line it with baking paper that rises above the sides of the pan (about 5 cm). Crumple the paper first so it is easier to shape into the pan.
Beat the cream cheese and sugar until smooth and creamy.
Add the eggs one at a time and beat until combined. Scrape down the sides of the bowl so no cream cheese is left behind.
Add the whipping cream and vanilla, then beat briefly until just combined.
Add the flour and fold in with a spatula.
Pour into the pan and tap gently to release air bubbles.
Bake for 55 to 60 minutes until the top is dark brown.
How do you know it is done? The edges have set, but the centre still wobbles like jelly when you gently shake the pan. This is normal, because the cheesecake will set as it cools.
Cooling: Leave at room temperature until cool (about 1 hour), then chill in the fridge for at least 4 to 6 hours, or overnight, before slicing.
Storage: In a covered container in the fridge for up to 5 days.
4.2 Burnt Cheesecake Variations
A. Chocolate MarbleB. Pandan Gula MelakaC. Red Velvet
Use basic recipe 4.1 and make the changes below. The pan size, temperature and baking time stay the same.
A. Chocolate Marble Burnt Cheesecake
Level: Medium
Add: ½ cup dark chocolate compound (±85 g), melted and slightly cooled.
Method: Make the basic batter and divide it in two. Mix one half with the melted chocolate. Pour both batters alternately into the pan, then swirl once or twice with a skewer for a marble pattern.
B. Pandan Gula Melaka Burnt Cheesecake
Level: Medium
Add:
60 g coconut milk (added with the whipping cream)
1 tbsp pandan emulco (added with the whipping cream)
1 tbsp gula melaka syrup
Method: Follow the basic recipe. After pouring the batter into the pan, drizzle the gula melaka syrup over the surface and swirl gently with a skewer. Serve with extra gula melaka syrup if you like.
C. Velvety (Red Velvet) Burnt Cheesecake
Level: Medium
Changes:
Reduce the flour to 5 g, and add 5 g cocoa powder (sift with the flour)
Add 2 tbsp sour cream (added with the whipping cream)
Add 1 tsp bright red colouring or 1 tsp red velvet emulco (added with the whipping cream)
Method: Follow the basic recipe with the changes above.
4.3 Unbaked Cheesecake
A chilled no-bake cheesecake with a crunchy biscuit base and a soft lemony filling. Ideal if you do not have an oven.
Pan
7 inch (springform or loose-bottom)
Setting time
at least 4 hours
Level
Easy
Biscuit Base
Filling
Making the Base
Put the biscuits in a thick plastic bag and crush them finely with a rolling pin.
Put the crumbs in a large bowl. Add the sugar and melted butter, then mix until it looks like wet sand that holds its shape.
Press and level it over the base of the pan. If there is extra, press it up the sides of the pan for a neater finish.
Chill in the fridge for at least 1 hour so the base sets.
Making the Filling
Sprinkle the gelatine over the water and let it bloom for about 5 minutes. Then melt it over a double boiler or in the microwave for 10 to 15 seconds until clear. Let it cool until warm.
Beat the cream cheese and condensed milk on medium speed until smooth.
Add the melted gelatine, lemon juice and vanilla, then beat until combined.
In another bowl, whip the whipping cream to soft peaks.
Fold the whipped cream into the cream cheese mixture with a spatula until smooth and even.
Pour slowly over the chilled base. Tap the pan gently to release trapped air.
Chill in the fridge for at least 4 hours, or overnight.
Decorate with fresh fruit, strawberry sauce, chocolate or caramel.
Storage: In the fridge for up to 4 days. Serve chilled.
Chapter 5
Brownies & Bars
Brownies are ideal for beginners who want to start selling because the ingredients are simple, they keep well and they are easy to cut. This chapter has four kinds of brownies and two kinds of bars.
5.1 Basic Brownies
Classic fudgy chocolate brownies with a shiny top. A basic recipe to master before trying the other variations.
Pan
7 inch square
Temperature
150°C, top and bottom heat
Time
±35 minutes
Level
Easy
Ingredients
Method
Preheat the oven to 150°C for 5 to 10 minutes. Grease the pan with butter and line it with baking paper.
Melt the butter over a double boiler or in the microwave on medium heat.
Put the sugar in another bowl. Pour the melted butter over the sugar and stir well.
Add the eggs one at a time and stir with a spatula until combined.
Melt the chocolate over a double boiler.
Add the flour and cocoa powder on top of the egg mixture. Do not stir yet.
Pour the melted chocolate over, then fold gently until combined. The finished batter will look glossy.
Pour into the pan and level it.
Bake for about 35 minutes or until cooked.
Storage: In an airtight container at room temperature for 4 to 5 days, or in the fridge for up to 1 week.
5.2 Double Layer Cheese Brownies
Two layers of chocolate brownie with a layer of cream cheese in between. Rich and beautiful when sliced.
Pan
8 inch square
Temperature
150°C, top and bottom heat
Time
±45 minutes (2 stages)
Level
Medium
Brownie Batter
Cheese Topping
Chocolate Topping (optional)
Method
Preheat the oven to 150°C for 5 to 10 minutes. Grease the pan and line it with baking paper.
Cheese topping: Beat the cream cheese and icing sugar until creamy. Add the egg and vanilla, then beat until combined. Set aside.
Brownies: Melt the butter and chocolate over a double boiler, then stir until combined.
In another bowl, stir the brown sugar, eggs and vanilla until combined.
Combine the egg mixture with the melted chocolate. Add the flour and cocoa powder, then fold until just combined.
First layer: Pour half the brownie batter into the pan, then spread half the cheese topping over it.
Bake for 15 minutes until half cooked.
Second layer: Take the pan out. Pour the remaining brownie batter slowly over the cheese layer, then spread the remaining cheese topping.
Bake for about 30 minutes more or until cooked.
Chocolate topping (optional): Melt the chocolate and whipping cream over a double boiler. Drizzle in a zigzag over the baked brownies, then let it cool.
Storage: In the fridge for up to 5 days.
5.3 Marble Cheese Brownies
Brownies with a marbled cream cheese pattern on top. Easier than the double-layer version, but just as attractive.
Pan
8 inch square
Temperature
150°C, top and bottom heat
Time
±45 minutes
Level
Easy
Brownie Batter
Cheese Topping
Method
Preheat the oven to 150°C for 5 to 10 minutes. Grease the pan and line it with baking paper.
Melt the butter and chocolate over a double boiler, then stir until combined.
In another bowl, stir the caster sugar, eggs and vanilla until combined.
Combine everything with the flour and cocoa powder, then fold until just combined. Pour into the pan.
Cheese topping: Beat the cream cheese and icing sugar until creamy. Add the egg and vanilla, then stir well.
Drop spoonfuls of the cheese topping over the brownie batter. Swirl with a skewer or the tip of a knife to form a marble pattern.
Bake for about 45 minutes or until cooked.
Storage: In the fridge for up to 5 days.
5.4 Red Velvet Truffle Brownies
Red velvet brownies with an Oreo layer and a chocolate coating. The colour is eye-catching and they are great for selling or gifting.
Pan
7 inch square
Temperature
150°C, top and bottom heat
Time
±30 minutes
Level
Medium
Brownie Batter
Oreo Layer
Chocolate Topping
Method
Preheat the oven to 150°C for 5 to 10 minutes. Grease the pan and line it with baking paper.
Stir the melted butter and sugar until combined.
Add the vanilla and eggs, then stir until combined.
Add the flour and baking powder, then fold until combined.
Add the melted chocolate and red velvet emulco, then stir until the colour is even.
Pour into the pan and bake for about 30 minutes or until cooked.
Oreo layer: While the brownies bake, mix the Oreo crumbs with the melted butter until moist.
As soon as the brownies come out and while still hot, sprinkle the Oreo mixture over them without removing them from the pan. Press gently to level.
Chocolate topping: Melt the chocolate and whipping cream over a double boiler until smooth. Pour over the Oreo layer and spread evenly.
Chill in the fridge until the topping sets. Decorate as you like.
Storage: In the fridge for up to 5 days.
5.5 Congo Bars
Chewy chocolate chip bars with a caramel flavour from brown sugar.
Pan
7 inch square
Temperature
150°C, top and bottom heat
Time
±35 minutes
Level
Easy
Ingredients
Method
Grease the pan and line it with baking paper.
Preheat the oven to 150°C for 5 to 10 minutes.
Melt the butter, then add the brown sugar and stir until combined.
Add the eggs and vanilla, then stir until combined.
Add the flour, baking powder and chocolate chips, then stir until just combined.
Pour into the pan and level it.
Bake for about 35 minutes or until cooked and golden brown on top.
Storage: In an airtight container at room temperature for up to 5 days.
5.6 Banana Blondies
Banana blondies with peanut butter, chocolate chips and Nutella. The best way to use up overripe bananas.
Pan
8 inch square
Temperature
150°C, top and bottom heat
Time
30–35 minutes
Level
Easy
Ingredients A
Ingredients B
Ingredients C
Method
Preheat the oven to 150°C. Line the pan with baking paper.
Put all of Ingredients A into a bowl and beat with a mixer until combined.
Add Ingredients B (except the chocolate chips) and beat until even.
Add the chocolate chips and stir in with a spatula.
Pour into the pan and level it.
Pipe stripes of Nutella over the batter and swirl gently.
Arrange banana slices on top.
Bake for 30 to 35 minutes, depending on your oven.
Let it cool slightly before cutting and serving.
Storage: In an airtight container in the fridge for up to 4 days.
Chapter 6
Cookies & Meringue
Cookies and meringues are great for beginners. They need no special pans, are easy to pack as gifts or for selling, and keep well when stored properly.
6.1 Chocolate Chip Cookies
Chocolate chip cookies that are crisp at the edges and soft in the middle. A little cornflour is added for a softer texture.
Yield
±40 pieces (1 tbsp size)
Temperature
150°C, top and bottom heat
Time
±20 minutes
Level
Easy
Ingredients
Method
Preheat the oven to 150°C. Line a tray with baking paper.
Beat the butter, caster sugar and brown sugar until combined and creamy.
Add the egg and vanilla, then mix until combined.
Sift the flour, cornflour, baking powder and baking soda together. Add to the dough and mix until just combined.
Add the chocolate chips and mix in with a spatula.
Shape the dough to the size you want using a spoon or scoop, and place on the tray with space between them.
Bake for about 20 minutes until the edges are golden brown.
Let them cool before serving or storing.
Storage: In an airtight jar at room temperature for up to 2 weeks.
6.2 Brownie Cookies
Chocolate cookies that taste like brownies, with a shiny crackled top and a soft centre.
Yield
±20–24 pieces
Temperature
170°C
Time
10–15 minutes
Level
Medium
Ingredients
Method
Preheat the oven to 170°C. Line a tray with baking paper.
Melt the chocolate and butter over a double boiler. Set aside.
In another bowl, beat the eggs, brown sugar, granulated sugar, vanilla and water until slightly fluffy and pale.
Add the egg mixture to the melted chocolate and fold in.
Add the flour, baking powder and salt, then fold until combined.
Let the dough rest for 5 to 10 minutes so it thickens and is easier to shape.
Place portions of dough on the tray using a scoop, spoon or your hands. Leave space between them because the cookies will spread.
Bake for 10 to 15 minutes. For a slightly crisper texture, bake for up to 18 minutes.
Leave on the tray for a moment until slightly firm, then lift them off.
Storage: In an airtight jar at room temperature for up to 1 week.
6.3 Meringue Kisses
Small, light and crisp meringues that melt in your mouth. They need only three ingredients.
Yield
±50–60 small pieces
Temperature
120°C
Time
±1 hour
Level
Medium
Ingredients
Method
Preheat the oven to 120°C. Line a tray with baking paper.
Whisk the egg whites until foamy.
Add the sugar a little at a time while whisking until fluffy and at stiff peaks. The mixture does not fall even when the bowl is turned over.
Add the vanilla and whisk briefly until just combined.
Put the mixture into a piping bag with a round or star nozzle. Squeeze out the mixture, then pull upwards.
Bake for about 1 hour (depending on your oven) until dry and easy to lift off the paper.
Turn off the oven and let the meringues cool inside the oven.
Storage: In an airtight jar at room temperature for up to 2 weeks. Do not keep them in the fridge, because the moisture will make them soft.
6.4 Pavlova (+ Chocolate Pavlova Variation)
Meringue that is crisp outside and soft inside, topped with whipped cream and fresh fruit. The ingredients are simple, but the result looks luxurious.
Yield
Mini pavlovas (depends on cutter size)
Temperature
150°C, then 110°C
Time
±30 minutes + cooling in the oven
Level
Challenging
Pavlova Ingredients
Whipped Cream
Decoration: fresh fruit (strawberries, kiwi, blueberries, mango) and mint leaves
Method
Preheat the oven to 150°C. A fan (convection) oven works best, but a regular gas oven also works.
Make sure all your tools are clean, dry and free of oil. Make sure your hands and the eggs are dry when separating the whites.
Whisk the egg whites on medium speed first so they do not splash. Once foamy, increase the mixer speed.
Add the sugar a little at a time while whisking until stiff peaks form. The mixture does not fall when the bowl is turned over.
Add the cornflour and fold in with a spatula. Then add the vinegar and fold until combined.
Stamping technique: Line a tray with baking paper. Dip the edge of a round cookie cutter into the mixture and stamp it onto the paper as a size guide. This way, you do not need to draw circles with a pencil. This technique can also be used for macarons.
Spoon or pipe the mixture into the circles, then make a small hollow in the centre for the cream.
Put it in the oven. After 10 minutes, lower the temperature to 110°C and bake for another 20 minutes until the pavlovas are risen, dry and crisp outside.
Turn off the oven and let the pavlovas cool completely inside. Do not open the oven door until they have cooled.
Whipped cream: Whip all the ingredients until thick. Stop as soon as the cream thickens, because overwhipped cream will split.
Top the pavlovas with whipped cream and fresh fruit just before serving.
Chocolate Pavlova variation: Add 30 g dark chocolate (chopped) and 2 tbsp cocoa powder. Add both with the vinegar in step 5 and fold until combined. The other steps stay the same.
Storage: Undecorated pavlovas can be kept in an airtight container at room temperature for 2 to 3 days. Once decorated, serve immediately.
Chapter 7
Crepe Series
The first three recipes in this chapter use the same basic batter. Once you have mastered one batter, you can make three different desserts.
Basic Crepe Batter
This batter is used for recipes 7.1 Mille Crepe Cake, 7.2 Mini Crepe Cake and 7.3 Ice Cream Crepe.
Ingredients
Method (All-in-One)
Weigh all the ingredients accurately.
Combine all the ingredients in one bowl and mix until smooth.
Strain the batter to remove any undissolved lumps of flour. This step matters so the crepes are smooth without specks.
(Optional) Rest the batter in the fridge for 30 minutes. The crepes will be softer with fewer holes.
How to Cook the Crepes
Use a non-stick pan and low heat.
Use the same ladle or cup for every crepe so they are all the same thickness.
Pour the batter into the centre of the pan, then quickly swirl the pan so the batter spreads evenly.
Cook on one side only. The crepes do not need to be flipped. A crepe is done when small bubbles appear on the surface and the top looks almost dry.
Move to a large flat tray and cover with cling wrap so they do not dry out.
7.1 Mille Crepe Cake (+ Rainbow Crepe Cake Variation)
A cake of many thin crepe layers with cream between each one. Beautiful when sliced and easy to vary with different flavours.
Yield
±25 crepes (1 cake, 20 layers)
Pan
7–8 inch
Level
Medium
Ingredients
Method
Make the Basic Crepe Batter and cook about 25 crepes. Cool completely.
Whip the whipping cream to soft peaks.
Place the first crepe on a plate. Spread a thin, even layer of cream with a spatula, then place the second crepe on top.
Flavours can be placed directly on the cream, or mixed and whipped into the cream.
Repeat until the 20th layer. The extra crepes can be used as spares if any tear.
Spread cream over the top of the cake and decorate with your chosen flavour.
Chill in the fridge for at least 2 hours before slicing so the layers are neater.
Rainbow Crepe Cake variation: Divide the batter into several bowls according to the number of colours you want, and add colouring to each bowl. As a guide, make 3 crepes of each colour. Stack them in rainbow order.
Storage: In a covered container in the fridge for up to 3 days.
7.2 Mini Crepe Cake
Small crepe cakes that are great for selling individually or giving as door gifts.
Yield
±35 small crepes
Pan
5–6 inch
Level
Medium
Ingredients
Method
Make the Basic Crepe Batter. Cook about 35 crepes using a small pan and a smaller ladle. Let them cool.
Whip the whipping cream to soft peaks.
Stack the crepes and cream as for the Mille Crepe Cake (7.1), up to the 20th layer or to the height you want.
Spread cream on top and decorate with your chosen flavour.
Chill before serving.
Rainbow Mini Crepe variation: Same as 7.1. Divide the batter by colour, making about 3 crepes of each colour.
Storage: In the fridge for up to 3 days.
7.3 Ice Cream Crepe
Thin crepe layers alternated with ice cream and cream, then frozen. Perfect for hot weather.
Yield
±35 thin crepes
Freezing time
at least 4 hours
Level
Easy
Ingredients
Method
Make the Basic Crepe Batter. For this recipe, every crepe should be as thin as possible.
Whip the whipping cream on medium speed to soft peaks. Flavours can be mixed straight into the cream.
Choose a container suitable for storing and serving.
Place the first crepe and spread ice cream over it. Place the second crepe and spread cream over the whole surface.
If the flavour is not mixed into the cream, place it on the second crepe before spreading the cream.
Repeat step 4 until you reach the height you want.
Decorate the top with biscuit crumbs, sauce or nuts.
Freeze for at least 4 hours before serving.
Storage: In a tightly covered container in the freezer for up to 2 weeks.
7.4 Crepe Bantal (+ Custard Cream Filling)
Soft yellow crepes folded into little pillows, filled with custard cream and a flavour of your choice. Popular as a snack and as a product to sell.
Yield
±20 pieces
Pan
7–8 inch
Level
Medium
Crepe Bantal Skin Batter
Custard Cream Filling
Flavours (optional): mango, durian, blueberry, strawberry, chocolate and so on
Making the Skins
Weigh all the ingredients accurately.
Combine all the ingredients in one bowl and mix until smooth.
Strain the batter to remove any lumps of flour.
Cook over low heat using the same amount of batter for each crepe.
Avoid making the crepes too thick, because thick crepes are hard to fold.
Lift off when small bubbles appear and the surface looks almost dry. Arrange on a flat tray and let them cool.
Making the Cream Filling
Mix the custard powder with the water in a separate bowl.
Whip the whipping cream on medium-high speed to soft peaks.
Add the custard mixture to the cream.
Beat on low speed for only 1 to 2 minutes so the cream does not overbeat.
How to Fold
Lay a crepe on a flat surface. Put 1 tsp of filling in the centre. For larger crepes, use 2 tsp.
Place your chosen flavour on top of the filling carefully so it does not touch the crepe edges.
Fold the bottom over the filling, followed by the left and right sides. Finally, roll from the bottom once more to form a pillow.
Place a piece of paper between each crepe bantal so they do not stick together.
Storage: In the fridge if serving within 1 to 2 days. For longer storage, freeze for up to 1 month and move to the fridge to thaw before serving.
Chapter 8
Frostings & Fillings
This chapter gathers all the creams, frostings and fillings in this ebook in one place. You can pair them with any cake, for example Butter Cake with Cream Cheese Frosting, or Sponge Cake with Swiss Meringue Buttercream.
Pairing Guide
Frosting / Filling
Texture
Heat tolerance
Best for
Swiss Meringue Buttercream
Smooth, light, not too sweet
Medium
Layer cakes, birthday cakes, cupcakes
Cream Cheese Frosting
Creamy, slightly tangy
Low (keep chilled)
Carrot cake, red velvet, chocolate cake
Simple Buttercream
Firm and stable
High
Cake decorating, piping flowers
Basic Whipped Cream
Very light and fluffy
Low (serve right away)
Pavlova, crepes, chilled desserts
Chocolate Ganache
Glossy or fluffy
Medium
Drip effect, coating, filling
Chocolate Mousse
Soft
Low (keep chilled)
Layer cake filling
Strawberry Compote
Like fresh fruit jam
High
Victoria sandwich, cheesecake, pavlova
Gula Melaka Syrup
Thick syrup
High
Pandan cake, burnt cheesecake
8.1 Swiss Meringue Buttercream
A smooth, light buttercream that is not too sweet. Ideal for coating cakes neatly.
Yield
enough for 1 × 8 inch cake (3 layers)
Level
Challenging
Ingredients
Method
Bring a little water to a simmer in a pot. Set a bowl with the egg whites and sugar over it (double boil). Make sure the bottom of the bowl does not touch the water.
Stir constantly until the sugar has fully dissolved and the mixture feels hot. Rub a little between your fingers. It should no longer feel gritty. Keep stirring so the egg whites do not cook.
Transfer to the mixer and whisk on high speed until thick, glossy and the bowl feels cool to the touch (stiff peaks).
Add the butter a little at a time while continuing to beat until creamy and smooth.
In another bowl, whip the non-dairy whipping cream, UHT whipping cream and vanilla until fluffy.
Fold both mixtures together until combined.
Storage: In the fridge for up to 1 week. Bring to room temperature and beat again before using.
8.2 Cream Cheese Frosting
A creamy frosting with a balanced sweet and tangy flavour. The classic partner for carrot cake and chocolate cake.
Used in: 2.7 Carrot Cake, 3.1 Devil's Food Chocolate Cake
Ingredients
Method
Beat the cream cheese and icing sugar until creamy.
Add the butter and beat until combined.
Add the whipping cream and vanilla, then beat briefly until just combined.
Storage: In the fridge for up to 5 days.
8.3 Simple Buttercream
A firm, stable buttercream that holds up in hot weather. Ideal for piping flowers and decorating.
Used in: 2.8 Sponge Cake
Ingredients
Method
Beat all the ingredients until light and fluffy.
Storage: In an airtight container in the fridge for up to 2 weeks.
8.4 Basic Whipped Cream
A light, fluffy cream for pavlovas, crepes and chilled desserts.
Used in: 6.4 Pavlova
Ingredients
Method
Combine all the ingredients and whip until thick.
Stop as soon as the cream thickens. If you keep whipping, the cream will split and turn grainy.
Storage: Use right away, or keep in the fridge for up to 1 day.
8.5 Chocolate Ganache (3 Consistencies)
Ganache needs only two main ingredients: chocolate and cream. The ratio between them decides how thick it is.
Type
Chocolate : cream ratio
Example amounts
Use
Coating Ganache
2 : 1
400 g chocolate + 200 g cream
Coating cakes, drip effect
Drizzle Ganache
1 : 1
100 g chocolate + 100 g cream
Drizzling over brownies, sauce
Whipped Ganache
±1.6 : 1
200 g chocolate + 125 ml cream + 20 g glucose syrup + 15 g butter
Fluffy coating, filling
Used in: 3.1 Devil's Food (coating), 3.2 Absolute Chocolate (whipped), 5.2 and 5.4 Brownies (drizzle)
Coating and Drizzle Ganache Method
Heat the whipping cream over low heat until it starts to steam. Do not let it boil.
Turn off the heat and add the chopped chocolate. Leave for 1 minute.
Stir gently from the centre until smooth and glossy.
Let it cool until it reaches the thickness you want.
Whipped Ganache Method
Heat the cream and glucose syrup until small bubbles appear at the edge of the pot.
Pour over the chopped chocolate and stir well. Add the butter and mix until combined.
Cool completely, then beat with a mixer until creamy and fluffy.
Storage: In the fridge for up to 1 week. Warm gently over a double boiler to melt it again.
8.6 Chocolate Mousse
A soft mousse set with gelatine. Ideal as a layer cake filling.
Used in: 3.2 Absolute Chocolate Cake
Ingredients
Method
Sprinkle the gelatine over the water and let it bloom. Melt over a double boiler until fully dissolved.
Melt the chocolate over a double boiler.
Cook the egg yolks over a double boiler, stirring constantly until thick and creamy.
Add the gelatine to the egg yolks and mix well. Add the melted chocolate and stir well.
Whip the whipping cream until thick. Fold a third of the cream into the chocolate mixture, then add the remaining cream and vanilla, and fold until combined.
Use right away before the mousse starts to set.
Storage: Cakes filled with mousse must be kept in the fridge and last up to 3 days.
8.7 Strawberry Compote
A thick, glossy fresh strawberry sauce, ideal as a cake filling or cheesecake topping.
Used in: 2.2 Victoria Sandwich Cake
Ingredients
Method
Cook the strawberries and caster sugar over low heat until the strawberries are soft and start to turn jammy.
Add the strawberry jam and the remaining sugar, then stir well.
Add the cornflour mixture a little at a time while stirring until the compote thickens.
Cool completely before using. The compote thickens further as it cools.
Storage: In a clean jar in the fridge for up to 1 week.
8.8 Gula Melaka Syrup
A creamy gula melaka syrup for soaking cakes and pouring over desserts.
Used in: 2.4 Pandan Gula Melaka Cake, 4.2B Pandan Gula Melaka Burnt Cheesecake
Ingredients
Method
Melt the gula melaka with the water over low heat until dissolved. Strain if there are any impurities.
Add the whipping cream and stir well.
Let it cool before using.
Storage: In a clean jar in the fridge for up to 2 weeks.
Bonus
Homemade Pizza
This bonus chapter contains two kinds of pizza dough (thick and thin) and five sauces that you can mix and match to your taste, from Bolognese to spicy curry.
B.1 Thick Pizza Base
A thick, soft pizza base, like the pan pizzas at restaurants.
Yield
±4 × 9 inch bases
Temperature
180–200°C
Baking time
±15 minutes
Level
Medium
Ingredients
Method (Using a Mixer)
Put all the ingredients except the water and oil into the mixer bowl.
Start on speed 1, and add the water a little at a time.
When the dough is almost combined, add the oil.
Knead until the bowl is clean and the dough no longer sticks to your hands. The dough does not need to be as elastic as bread dough.
Divide the dough according to pan size: 200 g for a 9 inch pan, 150 g for an 8 inch pan and 100 g for a 7 inch pan.
Round each piece of dough, brush a little oil over the surface, put it in a bowl and cover.
Let the dough rise to double its original size, about 30 to 60 minutes depending on the weather. Humid or cool weather needs more time.
Roll out the dough with a rolling pin and place it in the pan. Prick the surface with a fork so it does not puff up while baking.
Leave for 10 minutes or until the edges of the dough rise slightly.
Add the sauce and toppings (see B.3), then bake at 180 to 200°C for about 15 minutes.
B.2 Thin Pizza Base
A thin and slightly crispy pizza base. Can be made with a mixer or a breadmaker.
Yield
±6 × 9 inch bases
Temperature
180–200°C
Baking time
12–15 minutes
Level
Easy
Ingredients
Method
Using a breadmaker: Add the ingredients in the order given in your breadmaker's manual. Usually wet ingredients go in first, followed by dry ingredients. Press the Dough button.
Using a mixer:
Add the flour, sugar, salt and yeast. Keep the yeast and salt apart, because salt can weaken yeast if they touch directly. Mix briefly.
Add the egg and mix briefly. Add the water and knead until combined.
Finally, add the shortening. Knead until the dough surface is smooth and the mixer bowl is clean. The dough does not need to be elastic.
Next steps:
Divide the dough into 130 g pieces for each 9 inch pan.
Arrange on a tray and leave for 20 to 30 minutes until the dough doubles in size.
Roll out thinly, add the sauce and toppings, then bake at 180 to 200°C for 12 to 15 minutes.
B.3 How to Assemble and Bake Pizza
Sauce: Spread the sauce thinly and evenly. Leave about 1 cm clear around the edge.
Cheese: Sprinkle a mix of mozzarella (for melting) and cheddar (for flavour).
Toppings: Arrange meat, vegetables and other toppings. Do not add too much, or the base will turn soggy and not cook through.
Bake: At 180 to 200°C for 12 to 15 minutes until the cheese melts and the edges of the base are golden brown.
B.4 Bolognese Sauce
A fragrant basic tomato sauce. The vegetables give it a natural sweetness without needing MSG.
Ingredients
Method
Heat the oil and sauté the onions until slightly soft.
Add all the other ingredients and season.
Simmer over low heat for 15 to 20 minutes, stirring occasionally, until the sauce thickens.
Let it cool and store in an airtight container.
Variation: Sauté minced beef or chicken with the onions for a meat Bolognese sauce.
Storage: In the fridge for up to 5 days, or freeze for up to 1 month.
B.5 Tomyam Sauce
A spicy and sour Thai-style pizza sauce made from Bolognese Sauce and tomyam paste.
Ingredients
Method
Mix the Bolognese Sauce with the tomyam paste. Start with 1 to 2 tbsp tomyam paste for every 100 ml of sauce, taste, then add more to reach the spiciness you want.
A simple, sweet BBQ sauce, ideal for chicken or beef pizza.
Ingredients
Method
Mix all the ingredients until combined.
Coat sliced chicken, lamb or beef with some of the BBQ sauce and cook briefly.
Spread the remaining BBQ sauce over the pizza base, arrange the meat, then sprinkle with cheddar and mozzarella.
Bake at 180 to 200°C for about 15 minutes.
Storage: In the fridge for up to 1 week.
B.7 Spicy Curry Sauce
A beef curry sauce for a pizza with local flavour. This recipe makes a large amount, so it is ideal for freezing or for selling.
Ingredients
Method
Heat the oil and sauté all the blended ingredients until fragrant and slightly crisp.
Add the tomato puree and curry powder. Cook until the oil separates.
Add the minced beef and cook until it shrinks.
Add the water and all the seasonings. Cook until the sauce is fairly dry.
Add the diced onions and stir briefly. Turn off the heat and let it cool.
Storage: In the fridge for up to 4 days, or freeze for up to 1 month.
B.8 White Sauce
A creamy white sauce with cheddar cheese. Ideal for chicken, mushroom or seafood pizza.
Ingredients
Method
Melt the butter in a pot. Add the milk and heat until small bubbles appear around the edge of the pot.
Add the cheddar cheese, oregano and black pepper, then stir until the cheese melts.
Add the flour mixture a little at a time while stirring so it does not turn lumpy.
Stir until the sauce thickens slightly. The sauce thickens further as it cools.
Storage: In the fridge for up to 3 days.
Closing
Thank you for reading this ebook all the way to the last page.
Do not give up if your first attempt does not turn out as you hoped. Sunken cakes, burnt cookies and split cream happen to every baker. The more often you practise, the easier it becomes to recognise the right texture of a batter.
Start with recipes marked Easy, then move on to more challenging ones once you feel confident.
Share your bakes. We would love to see what you make. Tag us on social media: [add your social media handle]
Questions? Contact us at: [add your email or WhatsApp number]
Thank you for supporting Arkib Digital. Happy baking.